Showing posts with label decor. Show all posts

Top Trends in Home Remodeling: Enhancing Functionality and Style


Free Aerial Photography of Three People Sitting on Sofa Stock Photo

Image Courtesy

Chicago is a wonderful city rich in architectural heritage, drawing on multiple influences, including American Renaissance, Gothic Revival, and Tudor-style structures. Chi-Town effortlessly blends Renaissance-style heritage interiors with its quintessential commercial and industrial interior palettes. The city’s interiors are dominated by rustic brick walls, exposed industrial elements, and floor-to-ceiling windows adorned with Mid-century furnishings. 

But this year, there’s a change in the wind, pushing Chicago’s interior trendsetters to shift away from industrial-style minimalism. Like the nationwide interior trends, Chicago’s design radar is abuzz with richly textured, maximalist interiors focusing on openness and spaciousness. 

Are you planning to breathe new life into your Chicago home without breaking away from the city’s traditional design aesthetics? Get ready to hit the local thrift markets to shop for chic leather accents, antiques, and hardware with raw finishes. We’ve compiled a roundup of trendy home remodeling strategies to elevate functionality and style. 


A Luxuriously Appointed Open Floor Kitchen 

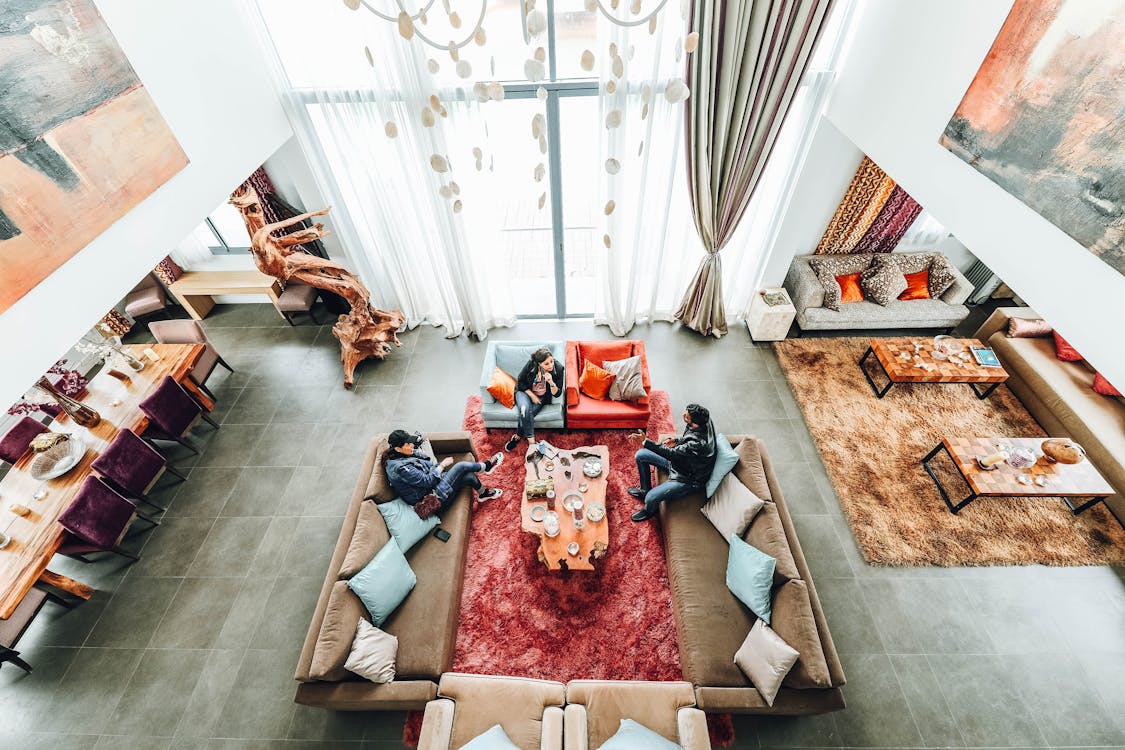
Expansive open-floor kitchens are all the rage in Chicago, a trend that perfectly embodies the Windy City's laid-back energy. This trend is right for your home if you're constantly bumping into fixtures and struggling with tripping hazards. The idea is to create an open-plan kitchen combining multiple spaces, primarily the kitchen, living room, and dining room. 

Homeowners can approach this project with multiple variations, depending on their lifestyle and functional needs. Suppose you want to maintain a formal dining area to entertain guests and throw extravagant dinner parties. In that case, we suggest an open floor plan combining the kitchen and living room in an expansive space. 

It’s important to work closely with a reputable home remodeling company in Chicago to explore design variations suited to your floor plan. Altering the floor plan is a major renovation, and finding the right team is paramount. Specialists with extensive experience in floor plan alterations can help you refine your design vision with practical solutions. Most homeowners neglect architectural designs to save money, but this project demands technical know-how and savviness. 

For instance, experts will help you evaluate the impact of the open-floor plan on multiple aspects, such as HVAC functioning and traffic flow. Once you've altered the floor plan, you can group furniture to create different zones with ample free-flowing samples. If you're combing the dining room, it's wise to anchor the dining table with ambient and well-illuminating lighting fixtures. Rugs are a great way to separate each zone, with the double island as the space's focal point. 

Open floor plans create the illusion of spaciousness, allowing homeowners to utilize every inch of square footage available. If you love entertaining guests, this arrangement is ideal for hosting large crowds and creating lavish buffet-style spreads. 


An Ambient Outdoor Space 

The pandemic has taught us the importance of our connection with Mother Nature and the outdoor world, propelling a mindset shift. This newfound discovery has profoundly impacted interior trends nationwide, encouraging homeowners to maximize their outdoor space. Chicago's continental climate is ideal for garden parties in the summer and bonfires to enjoy the chilly winters in one's backyard. 

We suggest expanding your outdoor space and repurposing your backyard into a whimsical getaway where you can escape and unwind. Anchor the space with a seating arrangement, such as a deck, patio, pergola, or porch. It's wise to connect with one's design inspirations and preferences and the overall architectural integrity of your home. 

A pergola would prove an excellent addition to a traditional home with period-style construction and mid-century furniture. However, a deck or patio will prove more appealing in a contemporary home with modern furniture. Suppose your home has a bold countryside flair with farmhouse-style construction and wooden accents. In that case, we suggest a rustic wooden deck with an earthy finish. 

You can elevate the seating arrangement with functional additions, such as an outdoor kitchen, grilling station, or fire pit. Homeowners across Chicago can maximize outdoor luxury with extravagant additions like hot tubs and plunge pools. Adding a multipurpose shed is another brilliant way to utilize space, turning it into a home office or a children's play area. 


A Decadent Bathroom 

Bathroom renovations are a great strategy to boost a Chicago home's market value and ROI potential, making your property more attractive. Imagine creating a serene spa-like environment where you can luxuriate in a jetted tub and get ready in a walk-in wardrobe. When designing a decadent bathroom, we suggest visualization to devise and refine your artistic vision. 

When you picture a spot brimming with peace and serenity, which destination comes to mind? If the answer is Tuscany, you can create a sun-baked look with a fresh coat of paint. Replace your bathtub with a free-standing stone tub, and adorn the wall with rustic fixtures. Elevate your Tuscan-style bathroom with vibrant terracotta tiles, iron racks and shelves, and a vibrant mural. 

Suppose you wish to create a Balinese-style bathroom with a spa-like ambiance and many scented candles. We suggest focusing on the flow of the bathroom to avoid crowding up the space. Start with a neutral color palette, such as earthy brown, chalky white, or subtle greys. Elevate this muted palette with greenery and natural elements like bamboo and rattan. Accentuate the wooden accents by adding floating shelves to hold your toiletries, scented candles, and planters. 

Customizing and planning is easy once you have a design vision that inspires you to get creative. 


Repurposing the Attic or Garage 

As residential square footage continues to get pricier nationwide, homeowners are embracing the significance of repurposing underutilized living spaces. Instead of turning the attic or garage into a storage dump, transform it into a space that elevates your life quality. 

For instance, you can repurpose the attic into a home office with a library, reading nook, and seating arrangement. If your home lacks a guest bedroom, consider repurposing the attic into a bedroom with comfortable furniture. The garage would make an excellent children's play area – a fabulous trick to maintain a clutter-free home! 


Final Thoughts 

This year's home remodeling trends are about using underutilized spaces and infusing functionality with cosmetic beauty. Remodeling projects focusing solely on aesthetic charm are a frivolous waste of money. After all, your home is a living space, not a gallery with loads of décor items. 

You must prioritize interior trends that infuse your home with practicality and purpose while elevating the aesthetic profile. We strongly advise a balanced approach to make your home attractive, homely, and livable.


14 Easy Ways To Spruce Up Your Backyard!

 Your backyard is your own personal oasis - a place to relax, entertain, and enjoy the great outdoors. But if it's been a while since you've given your backyard a makeover, it might be time for an update.


Photo by Randy Fath on Unsplash

Here Are 14 Easy Ways To Spruce Up Your Backyard And Make It Look Its Best:


  1. Add Some Color


One easy way to update your backyard is to add some color. This can be done by planting flowers or adding colorful outdoor furniture or decor. Adding color will instantly make your backyard more inviting and enjoyable.


  1. Create A Cozy Seating Area


Another way to update your backyard is to create a cozy seating area. This can be done by buying an outdoor dining table, adding a patio or deck, setting up a fire pit, or adding some comfortable outdoor couches or chairs. A cozy seating area is the perfect place to relax and enjoy your backyard.


  1. Add Some Privacy


Consider adding a fence or hedge if you're looking for ways to update your backyard and make it more private. This will give you some much-needed privacy and make your backyard feel like its own oasis. In addition, privacy will also increase the value of your home.


  1. Get Rid Of Weeds And Debris


Weeds and debris can ruin the look of your backyard and make it feel unkempt. To update your backyard, be sure to remove any weeds or debris that might be present. This will give your backyard a neater appearance and make it more inviting.


  1. Add Some Lighting


Adding some soft lighting to your backyard is a great way to make it more inviting and enjoyable. You can add solar lights along your walkways, string lights around your seating area, or even install landscape lighting. Adding lighting will make your backyard feel more like an extension of your home.


It creates a more inviting atmosphere, but it can also be used for safety purposes. When adding lighting to your backyard, be sure to choose weather-resistant and durable fixtures.


  1. Get Rid Of The Clutter


One easy way to instantly update your backyard is to get rid of any clutter that might be taking up space. This could mean donating old furniture or toys, storing away seasonal items, or simply getting rid of anything that you no longer use or need. Getting rid of the clutter will make your backyard feel more spacious and inviting.


  1. Bring In Some New Plants


Another easy way to update your backyard is to bring in some new plants. This could include adding flowers, shrubs, or even trees. Adding new plants will help give your backyard a fresh and vibrant look. In addition, plants can also help to provide privacy and increase the value of your home.


  1. Add A Water Feature


Adding a water feature to your masterpiece is a great way to make your backyard more enjoyable and relaxing. Water features can include anything from a small fountain to a large pond. Adding a water feature will help to create a tranquil and serene atmosphere in your backyard.


  1. Paint Or Stain Your Fencing


If you have a fence around your backyard, consider painting or staining it. This will help to give your backyard a fresh and new look. In addition, painting or staining your fence will also help to protect it from the elements and increase its lifespan.


  1. Add A Fire Pit


A fire pit is an awesome way to make your backyard more enjoyable. Fire pits can be used for cooking, entertaining, or just relaxing. Adding a fire pit will definitely make your backyard stand out.


  1. Plant A Veggie Garden


If you love to cook, consider planting a veggie garden. This is a great way to get fresh produce for your family and save money at the grocery store. Planting a veggie garden is also a great way to get your kids involved in gardening.


  1. Install An Outdoor Kitchen


If you love to cook outdoors, consider installing an outdoor kitchen. Outdoor kitchens are becoming increasingly popular and can really make your backyard stand out. Outdoor kitchens can include features such as grills, sinks, and refrigerators.


  1. Add A Pergola


A pergola is a great way to add style and functionality to your backyard. Pergolas can be used for shading, entertaining, or even just as a decorative element. Adding a pergola will definitely make your backyard stand out.


  1. Hang String Lights


Hanging string lights is a great way to add ambiance to your backyard. String lights can be hung from trees, fences, or even on poles. Hanging string lights will help your backyard look its best and make it more inviting.


In Conclusion


These are just some of the many easy ways to update your backyard and make it look its best. You can easily transform your backyard into your own personal oasis by following these tips.


Easy Labor Day Table Decor

 Can you believe that labor day is right around the corner? It seems like the summer really went by faster than ever. Now that school is in session, why not send summer out in style and welcome fall with open arms? These festive and oh so easy table decorations are perfect for a party, and they look nice long after the patriotic holiday season.

This is an easy project, and chances are, you have everything you need to make a few in your pantry!


This easy candle project is perfect to make with the kids. We used leftover dyed rice from a sensory bin and tossed a battery operated candle into the mix, and BOOM! There is a cute as can be way to decorate for the day. For FREE!


If you don't already have dyed rice laying around no worries, it is so easy to do! You can get the complete dyed rice tutorial here.

Start by putting a little red, a little blue and a little un dyed white rice into a mason jar. Shake it. Add more of each color, making sure to shake in between colors, until you fill about 3/4 of the jar.

Add a battery operated candle. Repeat as needed. Decorate tables, patios, walkways and more with these.

Find more wonderful rice ideas here.

Reader favorites include Homemade Rice Pudding.

Sushi Sensory Bin

Popcorn Candle DIY

Fall is on the way and I am itching to decorate, bake and savor the cooler weather and the bounty of last of the season produce that I will scout out in the coming weeks! This year I want to keep my decorations for autumn simple and my costs at a minimum. I am gathering inspiration from nature to make my home feel warm, inviting and seasonal.

I have been experimenting with natural supplies to create stunning additions to my decor. This super simple candle holder is perfect for adding something naturally lovely to your home this fall on even the tightest budget!

All you need is a bag of popcorn kernels and a LED tealight and a clear glass candle holder.

Simply fill the candleholder with popcorn kernels then add a battery operated tea light!

I made a short facebook video to show you how lovely this is. I love the simple touch of natural beauty this easy project offers. You could also wrap a simple burlap ribbon around the candleholder also to add another sweet touch to the finished product.


Spooky Pallet Sign

Need a last minute Halloween decoration? These spooky pallet signs are perfect for a quick craft that adds a lot of character to your space.


I have been making lots of stuff with pallets. From my cute reclaimed black cats, to some sweet serving trays to share with friends. I also made a slew of these spooky signs and shared them with a few neighbors.


These are so easy to make.  You need no skills and no special tools.  You can truly create them completely from scrap materials. If you are able to find scrap wood in a 12-18" size, that would ideal. If not, a hand saw or circular saw will be useful  in cutting down a pallet to the size you want to use.

Supplies:
An MFD board
Paint in several colors
A small paint brush
A soda tab
A screw
A screwdriver.


Directions:
Place a soda tab in the center of the board, line it up so it is even with the board at the top.
Screw it in.
Flip the board over and paint it the color you desire. I went with a light orange.
Allow to dry.
When the base coat is dry, paint Spooky on the board. I did this by hand, but you can use a stencil to get perfect letters. I was going for a creepy look, and perfection wasn't needed.
When the spooky letters have dried, dip a paint brush in another color, like green, or purple.
Extending an index finger, tap the paint brush against the finger to create splatters on the sign below.
Repeat as desired.
Allow to dry before displaying.
If you are displaying outside, spray with a sealant.


Make a few in a variety of creepy phrases and decorate your space in spooktacular, splendor without spending a cent! You can make this sign in only about 15 minutes, asides from the waiting for the paint to dry. 


If you liked this easy pallet project you might want to check out more of my favorite DIYS!

Reader favorites include:


Easy Ghost Window Cling

Halloween is near, and this cute little ghost will add a touch of fun to your windows without spooking your wallet! This is economical, adorable and easy to make!


We can't get enough Halloween crafts. Both of the kids and I enjoy creating frighteningly fun projects to get us even more excited about any holiday!

We were short on time one afternoon and wanted to make a cute and easy craft. This is what we came up with, a fun ghost for the window! This only took a few moments to complete and we loved it for a few reasons. The kids got to practice their scissor skills, which is an important skill for all kids, and they got to experiment with textures.


You will need {per 1 ghost}
 one square of white paper
4 small circles of black paper
2 slightly larger circles of black paper
A section of contact paper, transparent, to accommodate the size of the ghost you wish to make
Scissors
3 glue dots, school glue etc


Begin by placing your contact paper sticky side up
Add 2 black dots to the contact paper for eyes
Add one larger black circle of paper for a mouth
Cut the white paper to look like a ghost
Add the ghost shape over top of the eyes
Add 2 remaining eyes and mouth to the ghost
Stick it on a window for a spooky fun addition!

And there you have a super economical, fun and easy ghost craft for kids!

Find more Halloween DIYS here
Reader favorites include:
Glam Pumpkin Make Over

Easy Ombre Painted Pumpkins

This easy pumpkin painting idea brings the style of ombre to your fall decor.


I love to decorate pumpkins! In years past I usually carved them, but we painted a lot of pumpkins on our facebook live show on Quirky Momma and I have to admit, I was hooked on the options painting brings to pumpkin decorating!

This was one of my favorite pumpkins! The pumpkin was a tiny one, and the technique was simple. With a brush, 3 colors of pink paint and some mod podge, this little beauty came together in just a few moments time and was admired by all who saw it in our yard!


Supplies needed:
A Paint brush
A Pumpkin
Mod Podge to seal
3 shades of paint (I used 3 shades of pink)

Directions:
Begin by painting the bottom the darkest shade of paint you want to use.
Use the second paint in a shade a little lighter than the bottom shade
Paint the top portion in the lightest shade.
After the paint has dried, use the mod podge to seal your pumpkin so that the wildlife is disinterested in eating it, and the weather doesn't wash your efforts away!

There you have an easy ombre pumpkin for fall decorating!

You can find all of my Halloween ideas here.
Favorites include:


DIY Pumpkin Window Cling

We love to decorate for holidays and Halloween is no exception. This DIY idea makes fun window clings with simple ingredients for a one of a kind look this season!


The kids are excited about Halloween this year! As soon as they saw Halloween decor popping up in stores, they were ready to buy something! Seeing how cute they are, I couldn't deny them their wish. But, I did draw the line at 2 items. We placed a cute ghost on our door in mid-August...

Luckily, the fun of Halloween is still going strong here! The kids and I made some adorable window clings that I can't wait to share with you guys! Today we will go over how we made these cute and easy Pumpkin Window Clings!


Supplies

Transparent Contact Paper
Scissors
Black, Orange and Green Construction Paper


Have the kids tear the orange paper into little strips and bits.


Then cut the pumpkins face out of the black paper. Tear whatever black remains into small bits and strips.

Peel the backing off of your contact paper and lay it sticky side up.

Place the face of the pumpkin on the sticky side of the paper.


 Next outline the shape of your pumpkin in orange.


Then fill the outline in with orange paper.


Next tear one small bit of green paper for a stem and add it to the top of the pumpkin. Begin to fill in the rest of the area with black paper.


Then you can stick this right to your window. The little areas that aren't covered with paper will adhere to the window, but not so much that it makes peeling it off a bother. You can reinforce the edges with tape if you need to or desire.


And there you have a really easy, fun and cheap way to make a window cling! My kids had a lot of fun with this idea and I think yours will too!


You can find all of my Halloween crafts here

Glam Pumpkin Makeover

Paper Plate Witch


Grass Imprinted Concrete Garden Art


Easy Grass Imprinted Concrete Coasters are functional art. These are so easy to make; give them as a gift or use them at home for an eye catching accessory. You could also use these as garden art if you like.


This is such an easy project. When I got my first bag of concrete I wanted to start small. I wanted to use items I found around the house instead of purchasing supplies.

The first place I looked was our recycling bin, and BOOM! There was a lid, that was just the right size for making a coaster. Inspiration hit, and I was ready to create.


Supplies:

1/2 cup of portland cement
1/4 cup of water
A plastic lid, like from a chip canister
Some grass
Cooking Spray

Instructions:


Spray a plastic lid with non stick cooking spray.
Mix cement.


Pour cement into the lid, this mixture makes enough for 2, or 3 depending upon the size of the lid you use.


Add a few blades of grass.
Tap out air bubbles by tapping the sides.
Allow to dry in the sun for an afternoon.


Pop the cement out when dry. This should be pretty easy to do.


You can peel the grass out easily, or use an old toothbrush if needed to get any remaining grass out.
Paint the grass imprints.

These are great for outdoor use, if you have a really lovely table, you might wish to add 3 or 4 foam or felt pads to the bottom to protect the table, but these have not damaged my glass topped table.

Find more DIY Projects here


Darling Daffodil Crafts

Welcome spring with these darling daffodil crafts! 

daffodil crafts

Spring is near and I can think of no better way to welcome it than by crafting up some darling daffodil projects! From upcycles to wreaths, this list has a ton of pretty posey projects to bring a touch of color to your decor!

K Cup Daffodils

Toilet Roll Daffodils

Dollar Store Daffodil Wreath

Egg Carton Daffodils

Felt Daffodils

Cupcake Liner Daffodils

Paper Daffodil Wreath

Daffodil Banner

Magnetic Daffodil Planter

Which of these darling daffodil projects is your favorite? I truly love all of them and can't wait to make them with the kids!

You Might Also Like these
3d TulipsSpring Flower Crafts


11 Cheap and Effortless DIY Vase Filler Ideas


Whether you’re decorating for an event, a house gathering, or a reception, it can be a little intimidating what kind of ornaments to put up. On top of that, it can be pretty expensive too if you expect a lot of guests who have their own tables. That is why decorative table centerpieces always come in handy in situations like this.
If you ever find yourself scrambling to make last-minute additions to decorations or looking for cheaper alternatives, consider buying glass vases in bulk because they’re cheaper and there’s a lot you can do with them. You can easily customize glass vases to make centerpieces and have them fit into the theme of any party as you like.

Looking for ideas? Take a look at the list below.
Stones, Water, Candles


This sounds easy enough because you only need three things: stones, water, and a candle. You need to check the size of your glass vase if you want to achieve this because it can get crowded pretty easily. This is ideal for parties that are held outdoors and at night because, as a centerpiece, it can provide extra illumination once the candles are lit up.
Corn Kernels

This is a perfect DIY centerpiece for autumn because it fits in beside the general color theme of the season, which is reds and yellows. Corn kernels are one of the easiest and cheapest vase fillers to find because, if you love eating popcorn, you may already have some in your kitchen.

For this, you can display the kernels all on their own or add candles and maybe some ornamentation like dried maple leaves and some string. If you’re curious, here’s how the finished product should look like.

Coffee Beans

If you’re a coffee aficionado and have coffee beans lying around, consider getting a handful and turning them into vase fillers. It doesn’t matter what kind or grade you have. They’re perfect for any season, and you will be greeted by that wonderful coffee smell whenever you walk into the room.

Acorns

One of the best ways to save up on money when decorating is to use what nature has to offer. If you have a lot of acorn trees around your place, you can pick up some to use them for your own table centerpiece. This is perfect for autumn, and if you want the acorns to fit with the theme of your home or a party, you can paint them in any color you want.

Wine Corks

Show off your love for wine by using the corks as vase filler. Not only does it look like it was bought from a store, but you also recycle used items and help the environment. If you don’t have a lot of corks, you can buy a pack in bulk instead. Or you can simply fill out the vase slowly with each new wine bottle opened. You can find a simple tutorial online.

Snowflake Ornament

If you want seasonal centerpieces, snowflakes look great and would be perfect in time for Thanksgiving and Christmas. You can make use of snowflakes from your collection of Christmas-tree ornaments if you plan to get new ones for this year. Instead of throwing them out, give them a second life instead as a table centerpiece.

Fresh Citrus Fruits

For an eye-catching pop of color, you can actually use fresh citrus fruits as vase fillers. This is great for any outdoor party. All you need to do is slice up some lemons, for example, and put the slices in the vase, along with some water and some flowers. If you want to get a beautiful effect,  

make sure to use bigger glass vases.

Another popular citrus fruit choice is oranges. Take a look at this tutorial if you’re curious.

Colorful Cereals

Cereals are one of the things that you can always find in the kitchen, but not everyone realizes that they make good vase fillers as well. Colorful ones make a vase look good without you needing to spend anything. They’re great for birthday parties and other kid events.

If you want to use them for this kind of purpose, it is up to you whether you want the vases to remain as centerpieces or whether you want to use them to hold treats to give away other than the cereals.

Loose Toys

Suppose you want to tidy up your child’s room but it is hopelessly filled with a lot of random loose toys and small knickknacks that you can’t seem to place or put away. Instead of putting them in a box somewhere to be forgotten, why not display it as a centerpiece?

Put little plastic army men, bouncy balls, Lego blocks, and puzzle pieces in a vase to make it look stylish. You can add flowers, faux or real, to make it look deliberate.

Dyed Rock Salt

Substitute fake gemstones with rock salt if you want to make a centerpiece with tea candles. Rock salt is cheap, and for just a few bucks, you can actually use dyes to paint the salt grains in different colors that you like.

What’s more is that they’re biodegradable, so if you feel like changing decors or using another batch of colored rock salt, then you don’t have to worry about polluting the environment. If you’re unsure how to dye rock salt, this little tutorial will help you out.

Beans

They’re the first beads of any kind, and that is why they make great vase fillers. Depending on the occasion and look you’re going for; you can easily find beans for the task. If not, you can always spray-paint them in batches and choose to put them in the vase by themselves or with other baubles.

Get Creative

There are a lot of cheap, easy, and free things you can use for vase fillers. You only need some  
imagination and maybe a little DIY here and there to make it happen. In terms of decorations, centerpiece vases are one of the easiest to do, and their beginner-friendliness makes them a top choice for those who want to try out small DIY projects for their home.
What do you think are other vase fillers that you can easily find and use? Share what you know in the comments section below.


Whether you’re decorating for an event, a house gathering, or a reception, it can be a little intimidating what kind of ornaments to put up. On top of that, it can be pretty expensive too if you expect a lot of guests who have their own tables. That is why decorative table centerpieces always come in handy in situations like this.
If you ever find yourself scrambling to make last-minute additions to decorations or looking for cheaper alternatives, consider buying glass vases in bulk because they’re cheaper and there’s a lot you can do with them. You can easily customize glass vases to make centerpieces and have them fit into the theme of any party as you like.

Looking for ideas? Take a look at the list below.
Stones, Water, Candles


This sounds easy enough because you only need three things: stones, water, and a candle. You need to check the size of your glass vase if you want to achieve this because it can get crowded pretty easily. This is ideal for parties that are held outdoors and at night because, as a centerpiece, it can provide extra illumination once the candles are lit up.