Showing posts with label kids. Show all posts

Tropical Fruit Boats

Making food interesting to a picky eater takes patience and creativity. My son Roo is going through the phase of eating only specific foods (chicken fingers, applesauce, yogurt, cheese quesadillas). I am trying to help him experience a variety of food and enjoy eating it... Which hasn't gone well... If he lays eyes on cucumbers, he will hide. When I eat carrots, he cries for me to stop...

I am taking the approach of healthy eating to a new level by making food fun.

What could be more fun and appealing than this Tropical Fruit Boat?


Ingredients:
  • 2 cups fresh blueberries
  • 3/4 cup blueberry or grape juice
  • 2 bananas
  • 1/2 cup watermelon cubes (1/2-inch)
  • 1/2 cup pineapple cubes (1/2-inch)
  • 1 cup mango cubes (1/2 inch)
  • 2 fruit roll-up sheets, any flavor
  • 4 thin pretzel sticks, each 4 inches long
Directions:
  1. In each of 4 shallow bowls, place ½-cup blueberries and 3 tablespoons juice.
  2. Cut each banana in half crosswise on a diagonal, then split halves lengthwise.
  3. In the center of each bowl, arrange 2 banana slices to form the sides of the “boat.”
  4. Evenly divide the watermelon, pineapple and mango in the banana boats.
  5. To make the boat “sails,”: on a cutting board, lay one fruit roll-up sheet over the other and press together; cut the double layer into 4 triangles.
  6. Make 3 small cuts along one edge of each triangle; thread onto pretzel sticks.
  7. Push the pretzel sail into a fruit cube.
  8. Serve immediately.


Thanks to my pals at the Blueberry Council for supplying the recipe and image.

ABC Jar Find It Style

Being the mother of a 4 year old is a lot like being a boy scout... We have the same motto anyhow. Always Be Prepared. For me, that means always have a change of clothes, baby wipes, a snack and toys on hand.

In my purse you will always find a few small toys. While I like for Roo to play with cars, action figures and puzzles- I want to keep him entertained and I want him to learn or to brush up on what he knows via playtime whenever it is possible.

I created the perfect size toy for carrying in a handbag or diaper bag. This is ideal for pulling out on a long car trip or at a restaurant.


To make an ABC Jar : Find It Style  you will need:


a small baby food jar ( I used Beechnut Stage 2 size)
beads
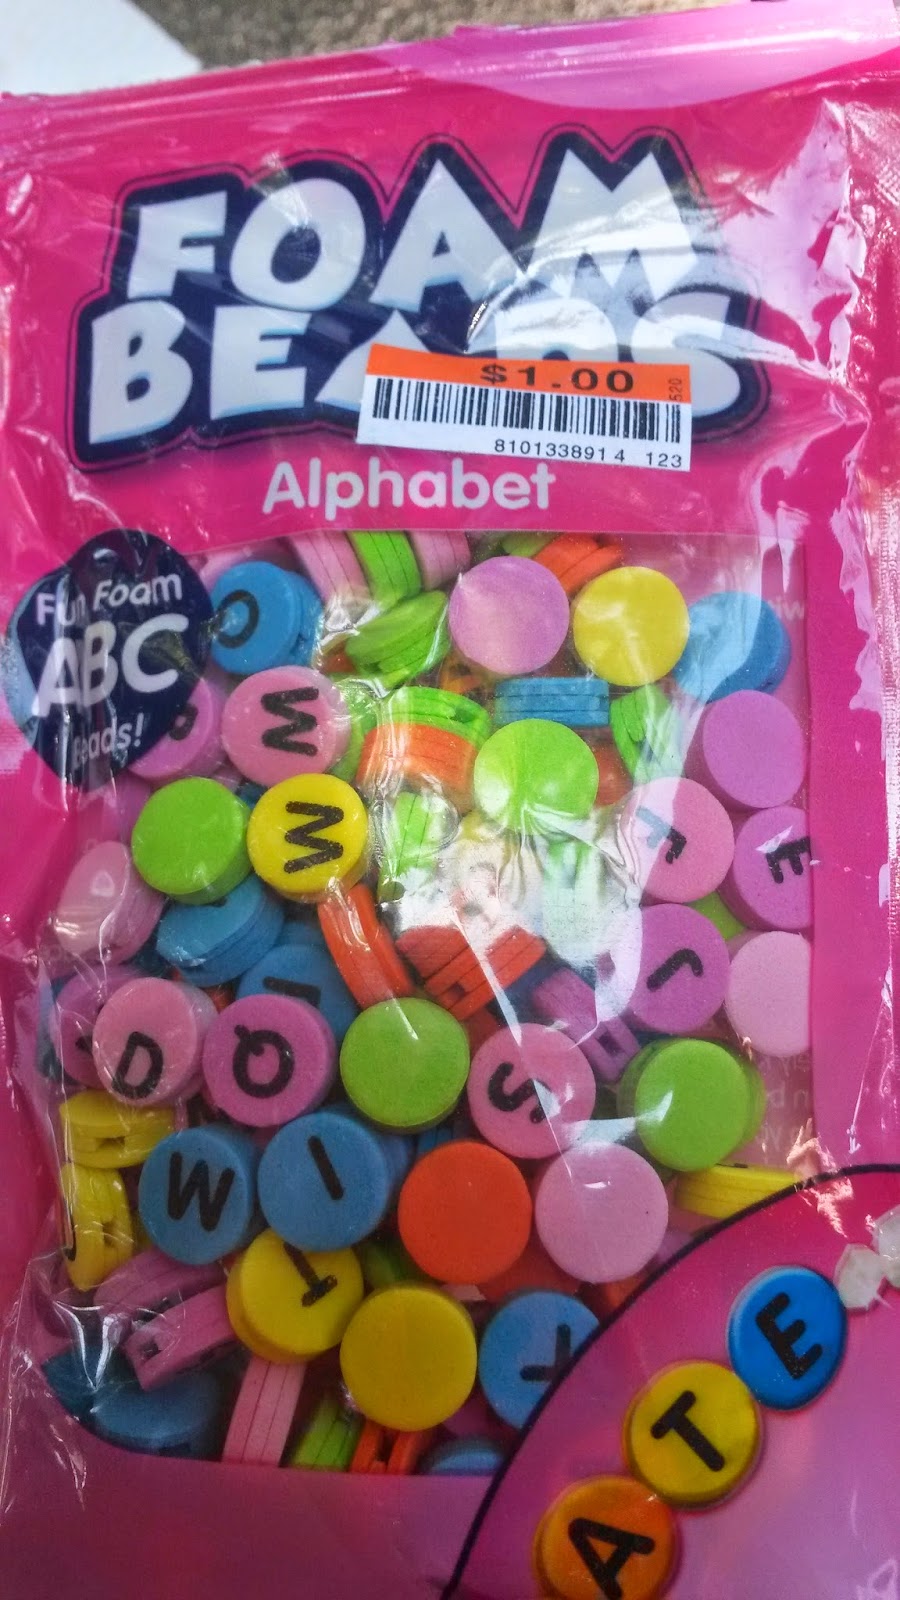
foam abc beads
glue


Make sure your baby food jar is clean and dry.


Pour your beads into the jar, filling it 3/4 of the way full


Add 10-15 ABC Foam Beads

Line the lid with glue
Seal the jar
Shake

There you have a DIY toy that will help kids with letter recognition and keep them busy shaking the jars to find more letters.

My idea behind this was that Roo knows his ABC's really well, practicing letter recognition out of the sequence he recognizes the alphabet in would be good practice.

Whenever I pull the ABC Jar out of my purse I get an average of 6 minutes of entertainment while Roo is shaking and spotting letters.


Egypt Themed Sensory Play

Last week I read 2 fun books from our collection with Roo and Harper {Where's My Mummy and 10 Little Mummies} when inspiration hit for a fun play session.

The kids liked the stories, especially Where's My Mummy. We talked about what the mummies are. I reminded Roo about our trips to the Ohio Historical Society where saw a real mummy. We talked about pyramids and how they look like triangles.

Then I captured his attention on the subject of mummies and Egypt for days with a new sensory bin.

For about 6 weeks I held onto the Egyptian Toob from Safari LTD. I knew I wanted to involve these figures in a sensory play session, but I was stumped on what to use on the base. I knew I could use real sand, but I wanted to take it a step further and avoid a sand mess.


It dawned on me to use granulated brown sugar, Roo could touch it, smell it and taste it.


I poured about 3/4 of a bag of Domino Brownulated Light Brown Sugar in a plastic bin.


Next I added assorted Egyptian figures from our Toob.

And a few plastic palm trees.


When it was time to play I gave Rolf a spoon, a fork and a small measuring spoon so that he could dig around in the "sand". He was really interested in digging. Then he smelled the sand and said "yummy!" I told him to taste it, he was hooked... things got a little out of hand from there, he was licking his hand, sticking it in the "sand" and licking it off! Ha! He didn't make it to playing with the Egyptians...


While this sensory play session resulted in a sugared up, sticky little mess of a boy, it was fun. Rolf used his sense of touch, smell and taste... He got to dig in the sugar sand and he says he had fun... MISSION ACCOMPLISHED!

What is Sensory Play?

Sensory play is any activity that engages a child's senses, such as sight, sound, touch, taste, and smell. It is a vital part of early childhood development, as it helps children learn about the world around them and develop important skills.

There are many benefits to sensory play, including:

  • Improved cognitive development: Sensory play helps children develop their problem-solving skills, memory, and attention span.
  • Enhanced language skills: Sensory play helps children learn new vocabulary words and develop their communication skills.
  • Improved fine and gross motor skills: Sensory play helps children develop their coordination and dexterity.
  • Increased social and emotional skills: Sensory play helps children learn to interact with others and express their emotions.
  • Reduced stress and anxiety: Sensory play can be a calming and relaxing activity that can help children cope with stress and anxiety.
There are many different ways to incorporate sensory play into your child's day.

Do your kids enjoy sensory play? I would love to hear about your favorite sensory activities in a comment.

You can find more favorite sensory play ideas here.
Sensory Party in a Bag
Rainbow Disc Sensory Bag


DIY Kids Reading Nook and Book Storage Solution

We have moved into our house and are now in the stages of making it work for us. The rooms are all spacious, there are closets! But we have a mass of childrens books fitting for a small library. After filling the only 3 shelves available with books, I had to get creative about storing them but I also wanted to come up with something functional.

I got an under the bed storage tote. I filled it with about 50 books.


I placed the lid on it and immediately my daughter dashed into see what was up. She is a little bookworm and the idea of several hundred available books really appealed to her... and the mess maker in her too.


                  From here I got a soft blanket. and covered tote of books.


I added a few favorite stuffed animals, but they were instantly snatched away by the kids. so I gave them a pillow and a small basket of books at the side of this reading nook.


As you can see, it was instantly put to use by my sweet book loving daughter.


So, for about $8 I created a storage solution and a seating area for the kids! This has worked well because the kids like to lay down and read, and the tote filled with books supports their weight and is just the right length for them to do so.


Feed Me Fine Motor Activity

I have always encouraged fine motor play in my children. Not only is it important for their development, but there are so many ways to offer an invitation to fine motor play!


A well-meaning friend purchased tennis balls for my senior dogs. Bless her heart, but my pooches are too old to do much fetching. As much as we love the dogs, truth be told, they are hounds and have always been prone to take it easy; to sleep in bed only waking for food, water, and a walk. As I type, both are snoozing on pillows at my feet. No fetch will be played willingly by these dogs!

My kids were delighted. Balls! In the house?! YAY!!

I acted fast. With a moment of my time and some very basic supplies, my kids were distracted from the idea of throwing balls and were enthralled with the idea of feeding the ball.

To make a feed me ball you will need

A tennis ball
A utility knife
2 peel and stick eyes or a black magic marker to draw eyes
A few pom poms or cotton balls


The first step is the trickiest. Use caution while using the utility knife to cut a slit in the tennis ball, this will become the mouth.


Next affix or draw the eyes. We went with what we had on hand and used small stick on eyes. The kids and I agreed that really big eyes would be lots of fun!


After the eyes have been added you can offer the pom poms or cotton balls along with the ball.


Play combined with fine motor skill development is ideal for kids of a variety of ages. Both of my kids have fun feeding things to the ball over the years. From cotton balls to barbie doll shoes. The fine motor aspects remain, but we have added in simple math, counting, and color sorting to the ways we use the feed me ball.

You might also enjoy these 7 Ways to Entertain a 3 Year Old.

3D Paper Tulip Craft

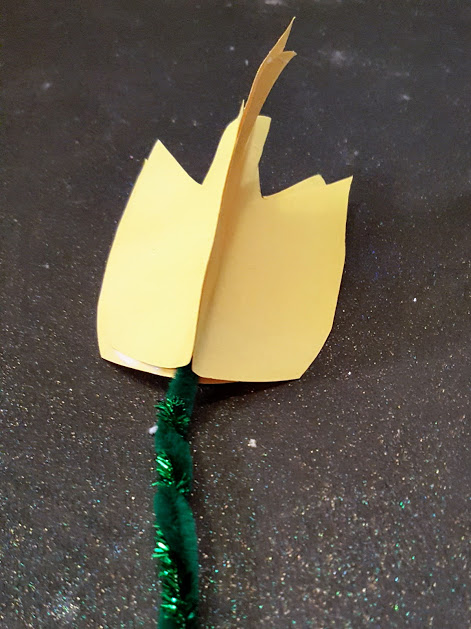
This easy craft is perfect for spring! Requiring simple supplies, this 3 d tulip craft comes together in a matter of moments to create a sweet craft for the kids!


This craft comes together super fast to create a cute 3 d project that is perfect for spring! These tulips are pretty in any color! So, feel free to use a different color than yellow if that is what you like!

We made these on a rainy day to get crafty and pass the time indoors. We shared these with special friends to brighten their day too! How fun right?!
You will need:
3 sheets of yellow paper
school glue
green pipe cleaner
scissors

To begin, fold 3 sheets of paper in half. 
Draw your tulip shape on half of the paper, then cut that
Glue on half on to a second half, then glue the third sheet.
Stick your pipe cleaner in the center of the flower and secure with extra glue.

I think a bouquet of these would be a fun way to add a touch of spring to your decor! Stick them in a jar or vase for flowers that won't wilt!


You might also like these crafts:
Toddler Tulip Art
10 Spring Flower Crafts


Paper Fortune Cookies for New Year's Eve

New Year's Eve is just a few days away! To make the evening extra fun for the kids, I have been making these cute paper fortune cookies so they can open one on the hour and have fun reading their fortunes to each other!


This is such an easy craft idea!! It can be used for parties, holidays or even as place markers at a dinner party!


All you need is scrapbooking paper
Glue
Scissors
Paper and a Pen

To begin, cut several uniform circles from paper.


Gently fold the paper together, but only make a small crease in the center.

Unfold the circle, placing it so the crease runs from 9 o’clock to 3 o’clock.  Place a small dot of glue at 3 o’clock.


Fold the circle and press the paper onto the glue dot, making a taco shape.


Gently press the crease you made in step 2.  Place a glue dot along the folded side of the taco — alongside the crease.


Gently bring the two ends of the 'taco' together.  Pinch it together so that the glue dot holds the two halves together.


Add a strip of paper with your fortune inside.

You might also like these yummy pizza ideas for New Year's Eve.


Christmas Math Printable

Christmas is near and my kids are excited! 
Every day begins with the all important question of how many more days til Christmas?!

This year I am taking that excitement for the holiday and turning it into a fun way for Rolf to practice his addition skills and get a little coloring time in with this fun and free printable math worksheet!

This is ideal for first and second graders. it gives them a few problems to work on and a little art time too.  Print a few for your kids, or a stack to entertain them during a party or before the holiday meal is served!


                                                            Print the Math Worksheet here 

If you have a kiddo that will love this worksheet, let me know in a comment!


You might also like this easy christmas ornament idea.


Paper Plate Spider Craft

This cute craft is perfect for Halloween, it is easy to make and the results are so cute you will want to display the finished project so everyone can see how creative your little crafter is!


We are big on holidays! We get excited about them all; Easter, Valentine's Day, Memorial Day, of course Halloween is a big one too!

This year we started crafting up Halloween fun maybe a little too early, but we couldn't resist! This is one of the first ones we made and it was so easy and cute!!


This post contains affiliate links.

All you will need is:
A paper plate
A piece of black construction paper
8 googly eyes
A black kwik stik
school glue
Scissors


Paint your paper plate black with a Kwik Stik.
Cut 8 strips of paper for legs and glue them on, 4 to a side
Add 8 eyes
Give your spider a smile and you are done!


Find more of our favorite halloween ideas here
Favorites include

Easy Paper Apple Craft

Every day, my little girls says, "Let's make a craft!" I love her enthusiasm and always encourage activities we can do together. On this particular day, we were anxious to get into some fall themed crafts, and we are always super excited to kick off fall with the harvesting of apples!

This craft was so incredibly fun! It was a bit of a challenge for my almost 4 year old, but we worked together to get it right.


You will need:
A square of heavy white paper {Ours was about 6'' x6''
A piece of green, red or yellow construction paper
School Glue
A tiny strip of brown paper for the stem


To begin we made thin strips of green paper that were 4 inches longer than the square of paper
Next we began folding those strips of green paper so we had 2 folded edges per strip
We glued these on the white paper
Working in a circle we kept gluing both sides of the strips on to the square, being careful to not disturb the other strips of paper
At the end, we added a tiny stem to the top.


We liked this apple craft because it was challenging, a good exercise in patience for both Harp and I. It was also really cute when it was finished! This was a fun craft to follow up with apple slices as a snack!


Easy Apple Tree Stained Glass Window

Cute and easy to make, this kids craft adds a pretty touch to any window, just like stained glass!


We love to craft with contact paper, it is so much fun to use in so many projects! But, one of my favorite uses for it is to make 'Stained Glass' or window decals! These are so cute!

With fall being on the way, our thoughts drift towards the apple orchard almost every weekend. We head out for the time together as a family, harvesting fruit, eating fresh donuts and playing outside. In anticipation of the fun fall weekends that are to come, we made these easy as pie Apple Tree Stained Glass projects.

You will need:
one square of transparent contact paper per decoration
assorted colors of tissue paper, we used green and yellow
one strip of brown construction paper

Lay your contact paper sticky side up
Place your brown paper on the sticky paper to form a trunk
Next cut small circles of yellow or red tissue paper for apples
Place the apple cut outs around the tree
Fill in the leaves using green tissue paper
Leave a few sticky places without paper to easily affix to the window for displaying.


minions puppets

This super simple popsicle stick craft brings the fun of the minions to your craft time! These are great for book-markers or as the star of a dramatic play session!


There is nothing like a toy you make yourself! On a rainy day a little imagination can go a very long way. We made these DIY minions puppets on a whim and had so much fun playing with them! I know your kids will like them too! They came together in a few moments time and kept the kids entertained for at least an hour!  

To make this easy Minions Puppet Craft you will need:
craft sticks
Blue and Yellow Paint
Craft Eyes

Instructions:
Paint the bottom half of the craft sticks blue.
Paint the top half yellow.
Add an eye and here you have easy minions puppets!

If you have an idea for handmade puppets for toddlers and preschoolers I would love to hear about it in a comment. 


Mermaid Tail Craft

This easy mermaid craft requires basic supplies and creates a cute craft in under 5 minutes. Your mermaid fans will flip a fin for this easy craft!


My 3 year old has recently discovered the Little Mermaid. Mermaids are a frequent topic of conversation, as are unicorns, kittens, and Minnie Mouse. I had an idea to make a fun little craft with Harper that would keep her day dreams flowing like the tide. We were thrilled with how cute it turned out and how easy it was to make.


I loved this craft for my preschooler because it used her fine motor skills, she got to use her scissor skills and it involved glitter glue! Who doesn't like glitter glue!?


Supplies:
3 craft sticks
1 triangle of construction paper in any color
A heart shape of green or blue construction paper
8-12 circles of blue and green paper
Glitter Glue

Instructions:
Glue the craft sticks into a triangle shape.
Glue the triangle shaped paper onto the craft sticks.
Begin layering the circles of paper on the triangle to form the scales.
Add the heart shaped paper with the point in.


This was such an easy craft that was a lot of fun for my 3 year old!  It was easy, but it offered a little challenge to her with the layering of the scales.

You might also like this glitter rain drop craft.

You can check out the Mermaid Tail video on youtube to see me make this craft.