Showing posts sorted by date for query paper plate. Sort by relevance Show all posts

Fun and Creative Kids Activity: Stamping Bunches of Grapes Process Art

 Looking for a fun and creative kids activity that is both educational and festive? Look no further than stamping bunches of grapes with pencil erasers and wine corks! This activity is perfect for kids of all ages, and it can be enjoyed indoors or outdoors.


We love to paint with all kinds of things! From wine corks, to dried flower heads, and everything in between. This easy painting project is perfect for kids of all ages. Little ones will love working on a few bunches or grapes, while tweens and teens can create more elaborate works of art.

What is Process Art for Kids

Process art for kids is a type of art where the focus is on the process of creating the art, rather than the finished product. This type of art is often open-ended and allows kids to be creative and expressive. There are many different types of process art that kids can do, such as:

  • Painting
  • Drawing
  • Collage
  • Sculpture
  • Performance art
  • Installation art

Process art is a great way for kids to explore their creativity and to learn about different art materials and techniques. It can also help them to develop their fine motor skills and their problem-solving skills.

Here are some tips for doing process art with kids:

  • Provide a variety of art materials and let kids explore them.
  • Don't be afraid to get messy!
  • Encourage kids to be creative and expressive.
  • Don't judge their art.
  • Celebrate their creativity.

Process art can be a lot of fun for kids. It's a great way for them to express themselves and to learn about art. So get creative and let your kids explore the world of process art!


Supplies:

  • Purple Paint
  • Green Paint
  • A paper plate
  • A pencil eraser
  • A wine cork
  • White paper


Begin by stamping one purple dot, then on the next row, stamp two. Repeat thru 4 to 5 rows of grapes.


Repeat until your paper has plenty of purple bunches of grapes. 


Now grab your wine cork and dip into the green paint.


Fill the blank space in between grapes with green dots for leaves. When you are finished your paper should look like this.


So pretty! Let this dry and display it somewhere in the house. You could stick it on the fridge, but this turns out so cute you might want to frame it.


This is a perfect spring or summer craft for kids of all ages. It is easy, and needs no special supplies. I know you will have fun with this process art project.


Find more fun kids craft ideas here:

Pineapple process art

Cork and Button Apple Trees


Here are some process art for kids ideas:

  • Painting with natural materials: Gather some natural materials, such as leaves, flowers, twigs, and grass. Dip the materials in paint and then stamp them onto paper.
  • Collage: Collect a variety of materials, such as magazines, newspapers, fabric, and yarn. Cut out shapes from the materials and then glue them onto paper to create a collage.
  • Sculpting with playdough: Playdough is a great material for sculpting. Kids can use their imaginations to create anything they want, such as animals, people, or objects.
  • Performance art: Performance art is a type of art that is performed in front of an audience. Kids can create their own performance art pieces, such as dances, songs, or plays.
  • Installation art: Installation art is a type of art that is installed in a specific space. Kids can create their own installation art pieces, such as sculptures, paintings, or photographs.

These are just a few ideas for process art for kids. There are many other possibilities, so get creative and let your kids explore their imaginations!

Fantastic Flower Crafts for Spring


Bloom Where You're Planted: Unleash Your Creativity with Flower Crafts!

Flowers bring color, joy, and a touch of nature's beauty into our lives. But their magic extends far beyond the vase! Today, we're celebrating the art of flower crafts, a vibrant world where creativity blossoms alongside blooming details.

Whether you're a seasoned crafter or just starting your artistic journey, flower crafts offer something for everyone. From simple projects perfect for little hands to intricate designs that challenge experienced makers, the possibilities are endless.


We love crafting flowers. Here are a few of my favorite projects from over the years.

3d Tulips

Ten Cute Tulip Projects

Play Doh Cactus

Sock Roses


Here are just a few reasons to embrace the world of flower crafts:

  • Unleash your inner artist: Flower crafts are a beautiful canvas for expressing your creativity. Experiment with different colors, textures, and materials to bring your unique vision to life.
  • Embrace mindfulness: Crafting can be a wonderful way to unwind and de-stress. The repetitive motions and focus required in many flower crafts can be a form of meditation, allowing you to find peace and tranquility in the creative process.
  • Spread the joy of handmade: Handmade gifts hold a special place in our hearts. Whether you're crafting a vibrant bouquet for a loved one or decorating your home with blooming creations, flower crafts are a thoughtful and heartfelt way to share your creativity with others.
  • Upcycle and repurpose: Give new life to everyday objects! From using leftover fabric scraps to crafting with recycled materials like cardboard tubes, flower crafts encourage resourcefulness and sustainability practices.
  • Bond with loved ones: Crafting is a wonderful activity to share with friends and family. Get together for a crafting session, teach younger generations the joys of handmade creations, and create lasting memories together.

So, gather your supplies, let your imagination bloom, and dive into the world of flower crafts! With a little creativity and these timeless projects, you can bring a touch of floral flair to your life and the lives of those around you.

Ready to get started? Explore these links, from some of my favorite bloggers for a vast array of flower craft tutorials, or simply grab your favorite crafting materials and let your creativity bloom!


 Paper Roses by Crafting Jeannie

Flower Garden Sensory Bin by Sweet Silly Sara

Tissue Paper and Twig Flowers by Barley and Birch

Paper Plate Sunflowers by The Printables Fairy


Felt Roses by Two Kids and a Coupon

Button Flower Pins by Artsy Fartsy Mama

Fingerprint Flower Pots by Crafts by Amanda

Pressed Wildflower Bookmarks by An Off Grid Life

Water Bottle Flowers by Kid Friendly Things to Do

Paper and Seed Sunflowers by Easy Crafts for Kids


3d Pop Up Flower Cards by Mommy Made That

Paper Sunflowers by The Inspiration Edit 

Handprint Flowers by Little Ladoo

Flower Handprint Card by Simple Everyday Mom 

Pressed Flower Suncatchers by In the Playroom

Cupcake Liner Flowers by A Little Pinch of Perfect

Tissue Paper Flowers by Mom Wife Busy Life 

Egg Carton Flowers by The Boondocks

Mini Flower Wreath by Sustain My Craft Habit


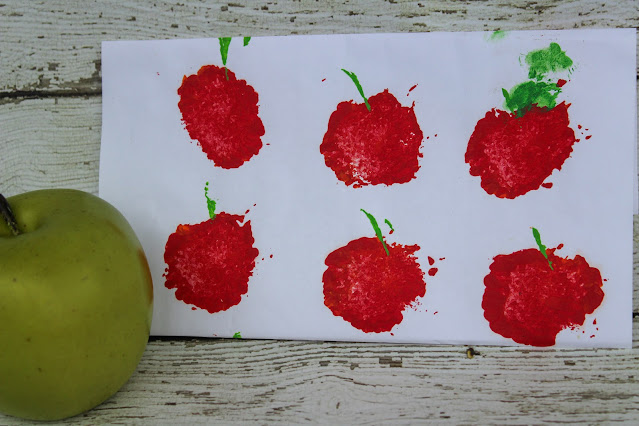
Sunflower Stamped Apples

 Kids are going to love this hands on art project that incorporates nature to make a fun print that looks great when displayed! It is easy, needs the most basic supplies and turns out to be so cute!  Make this apple stamping art project after a visit to the orchard, or just as a fun craft to do together.


Photo Credit: Sara Lehman.


Aren't these apples the cutest thing for little hands? All you need is a few colors of paint, a sheet of paper and a dried up sunflower head to make these with your kids. This is great for younger kids.


We visited the farmers market and purchased some sunflowers a few weeks earlier. After they had started to dry out, we plucked the petals off and were left with the heads.

Harp and I thought it would be fun to paint with them, so I grabbed a few bottles of cheap paint and some paper. This is what we came up with.

Supplies:
Paint in red, green and yellow
Paper Plate
Sunflower

Photo Credit: Sara Lehman.

Pour  paint onto a paper plate. You need about a quarter sized drop.

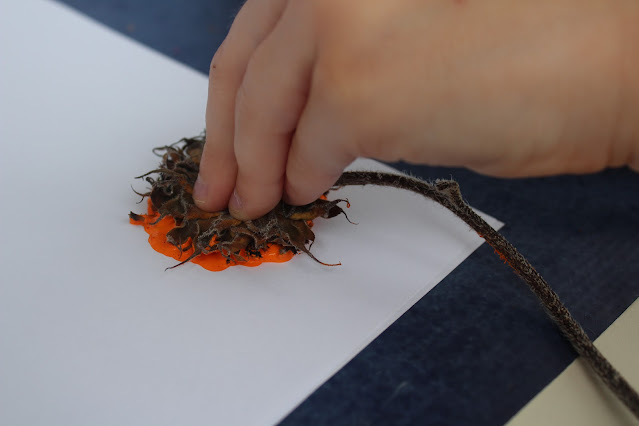
Press your sunflower head into the paint and press it onto the paper.

Repeat as desired.

Photo Credit: Sara Lehman.


Find more fun kids art projects here:
Pineapple Process Art
Christmas Tree Art
Cork and Button Apple Tree Art


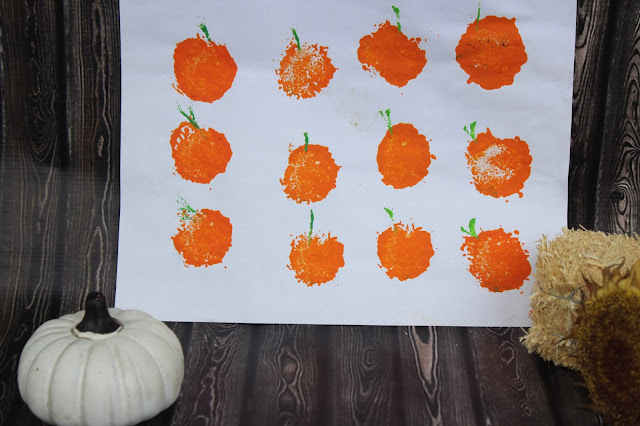
Sunflower Stamped Pumpkin Patch Art


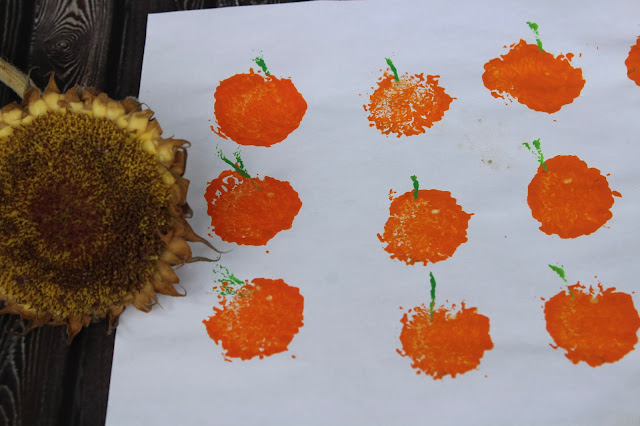
This adorable pumpkin patch art is great for kids of all ages! Made with simple supplies like paint, paper and a sunflower head, this is a great way to create art using nature!


Harper and I love to paint together. We have been crafting side by side since she was just a tiny toddler, strapped into a high chair for safety. We have painted pineapples, apples, baskets of fruit and even Christmas trees. We usually use corks to create our process art, but we had a bouquet of sunflowers that had seen better days, and well, inspiration hit.

We decided our fridge just had to have a pumpkin patch scene. We are all about creating refrigerator masterpieces 

Supplies:

Orange paint

Green paint

A sunflower head

White paper

A paper plate


Pour orange paint and a small amount of green paint onto a paper plate.


Invite your child to press the sunflower head into the orange paint.

Encourage your child to press the sunflower onto the paper.


Use a stem, petal, or other small item to form the stem of the pumpkin with the green paint.

Allow the paint to dry, then


These were so much fun to make! And I think they turned out really cute! Harper was very proud of her efforts. Preschoolers can handle this project, as well as elementary aged kids like Harper. Your kids might also like to draw little pumpkin faces on these after they have dried.


I hope you get a chance to try this project with your family, it is the perfect project for a fall afternoon!

Find more fall ideas here.


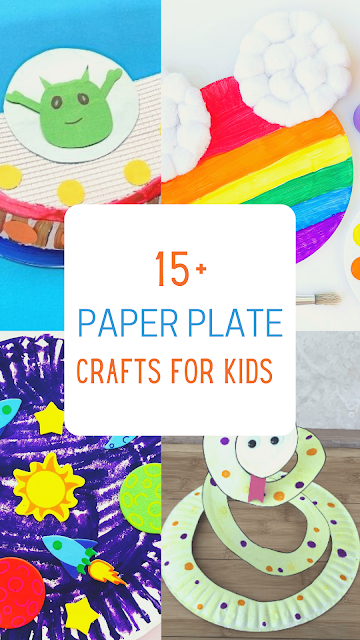
15+ Paper Plate Crafts for Kids

If you are looking for easy ways to keep the kids entertained on a cold winter day; this is the place for you! I have found some really fun paper plate craft ideas for kids that are perfect boredom busters! These are all fairly easy, and kids of all ages will have fun with these ideas! Be sure to click thru the links for the tutorials.


BB8 Paper Plate Craft by Attachment Mummy

This paper plate craft is perfect for Star Wars fans! It comes together with basic supplies and includes

a free printable template to make it easy for all skill levels.


Paper Plate Fruit Fans by Family Focus Blog

These fruity fans are the perfect way to beat the summer heat with a craft that kids of all ages can enjoy! 


Alien Spaceship Craft by Easy Crafts for Kids

This craft is so cute it is practically out of this world! It all starts with a little imagination and a paper plate.


Mermaid Twirlers by Red Ted Art

These cute little mermaid twirlers are nothing short of adorable and they are bound to make a splash

during craft time!


Yellow Submarine by Lil Tigers

This craft is so creative and gives kids an ocean view like they were diving in a submarine! 


Paper Plate Sunshine Craft by The Soccer Mom

This is the perfect craft for a rainy day! It is bright, colorful and spreads cheer to all who see it!


Space Themed Plates by Glitter on a Dime

Kids who love outer space will be over the moon for this easy paper plate craft that proves that the sky's

the limit to their creativity!


Rainbow Fish Craft by Two Pink Peonies

Pair storytime with a colorful and engaging craft! This rainbow fish craft is perfect for preschoolers!


Paper Plate Woven Bowls by Craftsy Hacksy

This introduction to weaving makes for a great paper plate craft! This is a great craft to make and share

with someone special!


Paper Plate Monkey by Mom Wife Busy Life

This paper plate craft is so cute you might go bananas for it! Kids of all ages will love to make their own

monkeys!


Rainbow Mickey Mouse Craft by Grace Giggles and Naptime

This Mickey Mouse craft is so colorful and cute! Kids are sure to be all cheers for this craft with Mickey

Ears!


Paper Plate Snakes by Mom Brite

This cute and easy craft will slither into your heart! Kids will love making these paper plate snakes!


Paper Plate Animal Masks by Crafts for Toddlers

These masks are so much fun for little kids! They can make a craft then engage in dramatic play for a

really great afternoon!


Snow Globes by Ottawa Mommy Club

These are perfect for kids! A snow globe they can handle with no feat of breaking it, and they are adorable

too!


Eric Carle Inspired Cats by Moms Who Save

This is a visually stunning craft that is perfectly paired with an Eric Carle story! Save this idea for a rainy

day activity for kids of all ages.


You can find more fun paper plate crafts here:

Paper Plate Lions

Paper Plate Witch

Paper Plate Crowns


Nashville Hot Chicken Fried Potatoes

Let me tell you about the tastiest way to make fried potatoes ever. If you like the flavors of Nashville Hot Chicken, then this is the place for you! These Nashville Hot Chicken Fried Potatoes are so good that you are going to crave them all the time. Luckily, they are easy to make and are a cheap and delicious side dish to so many dishes.

My son, sweet Rolf, is 12 years old now. He is only about 2" shorter than I am. His feet are twice the size of mine. He is so beautiful... but he has an appetite like no other. But, he is PICKY. I am always looking for ways to fill him up, and if I can get him to try something new, then that is wonderful. 

I tried this tasty and easy fried potato recipe for a side last week and my family loved it. Even Rolf. He has asked me to make these again already. You only need 5 ingredients to make these and they taste so good! Let me tell you how I made these.


Ingredients:
4 tablespoons of Nashville Hot Chicken Seasoning (I like The Spice Lab's version)
1/2 cup - 1 cup Buttermilk 
1/2 cup of flour
1 -2 large potatoes
Oil for Frying


Directions:
Slice your potatoes using a slicer like pictured above. You want them to be thin.


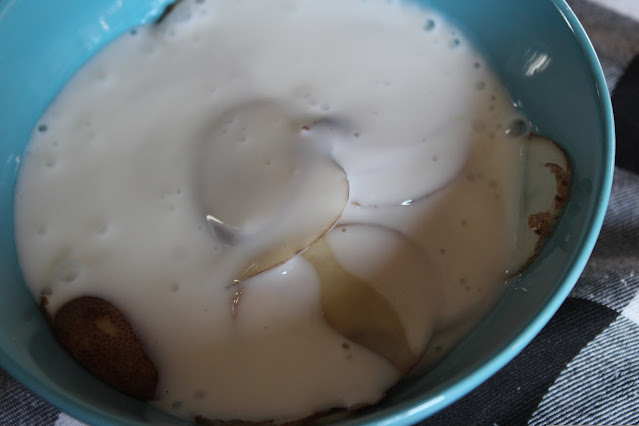
Pour the buttermilk over your potatoes. If you are only making one large potato, use 1/2 a cup. For more potatoes, add more buttermilk.


Add 2 tablespoons of Nashville Hot Chicken seasoning to the buttermilk.
Gently toss so that the potatoes are completely covered with the buttermilk and seasoning.
Allow to rest in the fridge for an hour.

When the hour has passed (this is so important for the flavor!)
Mix the flour and the remaining 2 tablespoons of hot chicken seasoning.
Stir.
Dredge the potato slices through the flour.


You can just make a single layer of potatoes on a plate or something as you work your way through the slices of seasoned potatoes.


Pour your oil into a saucepan. 
Heat over medium heat for a few moments until the oil is hot enough to fry. I am sorry, I have no idea what temperature I had this oil. I just know how to fry potatoes in oil after all these years in a kitchen. HA!
I guess, I would say, I treated it just like I would fried chicken?

When the potatoes were nice and crispy, and golden brown, I pulled them out of the oil to drain on a paper towel. Use a slotted spoon!

Repeat with remaining potatoes, and these are the end results.


They have that whole spicy chicken vibe, but they are just potato slices. 
They are SO GOOD! 
These would be great for satisfying a fried chicken craving on a potato budget.  But, they are also just a great way to make potatoes super enticing on the side of any meal.


If you try this recipe, I hope you LOVE it! Be sure to save this to your pinterest food board. It would be great if you would share this recipe on social media.

Find more of my tasty food ideas here:

Lego Stamped Pumpkin Art

 Harper and I love to paint with, well, anything but a paint brush! Last week she came home from school and asked me if I wanted to make something with paint, and how could I resist the invitation? This lego pumpkin idea was just the thing. It pairs cute and creepy together just right.


This is such an easy activity, and it is fun for kids of all ages! Even Rolf, who is 12 now, was curious about this and told us it was a "cool idea" before dashing back to his busy preteen activities. 


Supplies:
Orange Paint
Black Paint
Green Paint
Legos
Paper Plate
Paper


Directions:

Pour a small amount of orange, black and green paint onto a paper plate.

Offer your child legos in assorted sizes and paper.

Encourage your child to dip a lego into the orange paint and make the shape of a pumpkin.


Now, fill that shape in with more lego stamps.


When you have filled in the shape of the pumpkin, dip a lego into the black paint and make a face.


Next, give your pumpkin a stem with the green paint.
Allow to dry and display.


These were a really fun, kid led Halloween craft. I know your kids will love making pumpkin art this way.


You can find all of my Halloween crafts here

Painting projects here:

Reader favorites include:

Pumpkin Window Clings

Ghost Play Dough Ornaments