Showing posts sorted by relevance for query sensory. Sort by date Show all posts

Cat in the Hat Pattern Making Sensory Bin

This year in honor of Dr.  Seuss's birthday we made this easy and fun Cat in the Hat Pattern Making sensory bin. This is a fun way to put your puffle to good use and work on pattern making skills which later help kids grasp math concepts.


This post contains affiliate links. 
We love sensory bins, bags and play! Both of my kids still get excited when they see I have a new bin ready to explore. This one was a huge hit because they had been itching to get their hands into pluffle. This is such a fun squishy foam! It is a must have for sensory play!


Supplies:
Assorted red and white items.We used cotton balls, feathers, legos, mini clothespins and glittery Christmas scatter
Measuring spoons, tongs and other fun items to pick up the items in the bin with.
A large tray or a plastic storage bin.


Directions:
Pour pluffle on to a tray or into a storage bin.


Make sure you take a moment to squeeze, form and otherwise take in the pluffle; it is a great sensory play option and adults will enjoy the texture too.

Next, offer your child an assortment of red and white items.


We used tiny clothespins, legos in red and white, feathers, cotton balls, and Christmas scatter that was glittery and red.

Encourage your child to recreate the stripes of the Cat in the Hat's hat.
This is a great opportunity to use fine motor skills with the spoons and tongs. Encourage your child to try placing the items with those tools as well as their fingers.


When play time is over, you can snap a lid on the bin, or put it all back in the pluffle container for future play sessions. Pluffle never dries out!


You can find all of my sensory ideas here.
Favorites include:
Rainbow Rice BinVeggie Garden Sensory Bin


Feeding Sharks Sensory Bag

This shark feeding sensory bag is tons of fun  for little hands! Made with super simple supplies, this sensory bag is perfect for shark week, or anytime your kids need some fin flipping fun!

I have quite a collection of blue, gray and blue gray paint samples in my kitchen junk drawer.  I love to paint. Walls, cabinets, boards, trim. Anything that requires no real thought nor detail is my jam so I am always grabbing samples of my preferred colors in hopes of finding a new project.

I finally found good use of some of the paint samples with this feeding sharks sensory bag. It wasn't too complicated to put together and my kids thought it was awesome. I hope your kids do too!


This post contains affiliate links.
Supplies:
Hair gel
Scissors
Paint samples
A zipper seal sandwich bag
Water Beads


Directions:
Cut a shark from a grayish blue paint sample. Make sure the shark has an open mouth!
Cut a few assorted sized fish from any other color paint samples.


Fill a zipper seal sandwich bag with hair gel.


Add a generous amount of glitter to the bag.


Add a few water beads to the bag. 


Add the shark to the bag, and the fish too.


Close the bag and offer it to your child. Encourage the child to feed the shark the fish.


This is a fun quiet time activity for toddlers and preschoolers. If your kids don't have "nice hands" you can reinforce the edges with duct tape to prevent any accidental bag busting that could occur.

You can find more of my sensory bag ideas here
Reader favorites include:

Rainbow Rice Sensory Bin

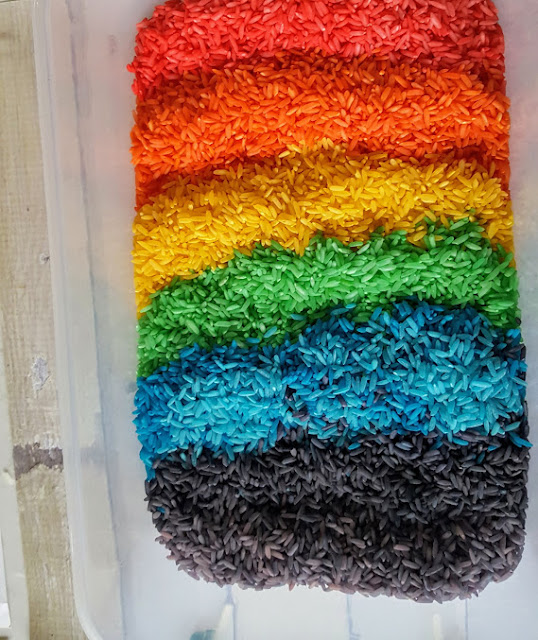
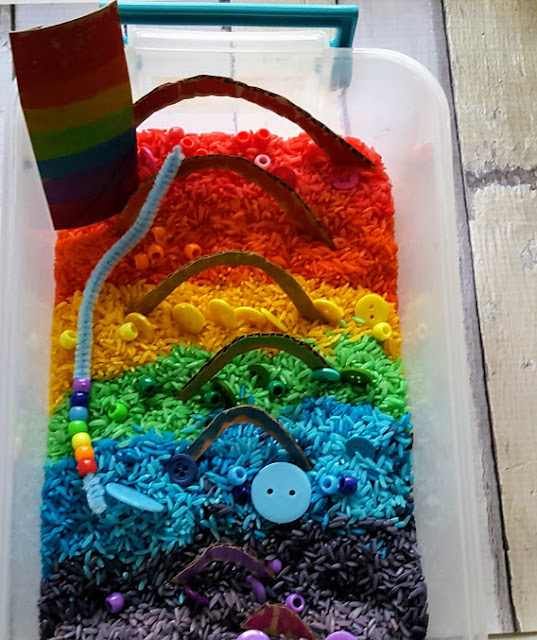
Both of my kids love sensory play! They can spend hours engrossed in a sensory bin, exploring. We made this easy rainbow rice bin to Harper's delight. She had so much fun sorting, threading and mixing the colors up. 


This bin has it all. And I do mean IT ALL. My 5 year old stood with wide eyed wonder before this bin. She adorably said "You made this for me?!" As she dove into the colors of the rainbow. It has colorful rice to touch, fun beads to sort and thread, and a puzzle as an added bonus. It touches on so many fun sensory features and functions too. The best part about it is that I spent less than $2 to make this bin with smart shopping at Dollar Tree. But, for your convenience I am linking to my favorite paint markers on amazon. You want to get these! And if you do from my affiliate link, I will earn a little amazon credit.


Supplies:
Dyed rice in the colors of the rainbow
Buttons
Beads
Pipe cleaners
Cardboard
Scissors
A sandbox tool, kitchen spoon or tongs

Directions:
To make the rainbow puzzle:
Cut a rainbow shape from the cardboard; I used a half of an oval shape about 6” long and 4” high.
Cut that cardboard rainbow form into 7 sections. Cut the sections with the shape of the rainbow, so
that they will fit back together. This forms a simple puzzle for little hands to explore.
Color or paint the sections of cut cardboard to represent the colors of the rainbow; red, orange,
yellow, green, blue, indigo and violet.
Set aside.

    To form the rainbow rice base:

    If you don't want to color the rice you can buy it on amazon
    Layer the rice in the colors of the rainbow in the box; red, orange, yellow, green, blue, indigo and violet.


    As you have your rainbow base down begin add beads to the rice base.


    Nestle the rainbow puzzle sections into the coordinating color of rice.


    Add a pipe cleaner or two.


    Add a sandbox tool, kitchen spoon or tongs to offer new ways to explore!


    With supervision, invite your child to explore the colors of the rainbow, to thread the beads onto the pipe cleaners and to build the rainbow puzzle. 


    When playtime is over, you can snap the lid on the box to store for future play sessions. 


    While the children are naturally going to mix the colors together, that is okay! The next time they explore this sensory bin, they can work on their sorting skills!


    If you make this bin with your preschoolers send me a picture on facebook.


    Don't miss these rainbow craft ideas 

    Reader favorites include:

    Rainbow Crafts for Kids

    Rainbow Coasters


    You might also like this In the Sky Sensory Bin.
    Find all of my sensory bin ideas here


    How to Dye Oatmeal without Water for Sensory Play

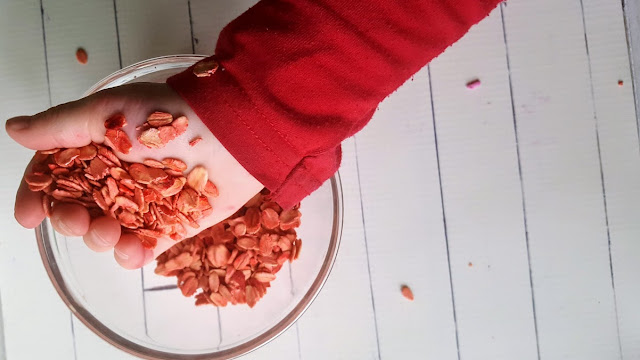
    Dyed oats are perfect for sensory bins! You won't believe how easy it is to dye them without any water!


    I have made a ton of sensory bins for my kids over the years. We have explored rice, beans, sand and even straws as fillers. I knew I wanted to try something different, and inspiration was as close as my pantry. I pulled out some oatmeal and got busy experimenting.


    First, I tried soaking the oats in dyed water. That was a fail. They clumped together and formed a soggy mess. I couldn't dry them out. 

    Next, I thought about how we dyed rice, and decided to try that method on oats. The results were perfect. The oats didn't clump together and they are so soft!


    To dye oats you will need:


    • One cup of oats 
    • Food coloring of your choice
    • Hand sanitizer
    • One Ziploc bag


    Directions:


    • Pour the oats into the bag.
    • Add 7 to 10 drops of food coloring.
    • Add a generous dollop of hand sanitizer to the bag.
    • Seal the bag and shake until all of the oats are coated.
    • Pour the oats on a paper towel or paper plate to dry.


    Dyed oats are perfect for sensory play. Stay tuned for bins that use dyed oats.

    You can find all of my sensory content here


    Sushi Sensory Bin

    A few weeks ago while shopping at my Kroger I saw these adorable erasers- sushi style- in the clearance section. At 69 cents they were a steal. I couldn't pass them up! My husband said "What are you going to do with them?".

    What am I going to do with them? Make a sensory bin of course! A Sushi themed sensory bin sounded like fun to me!

    I picked up a bag of long grain white rice, one pound was on sale for $1.09. I used this as my base.


    My son was intrigued. He couldn't wait to get his hands in the bin of rice!

    Next we added our Sushi Erasers.


    Again, Eager Hands were grasping to get involved. Not that I can blame him!

    Finally, we finished the bin off with a pair of chopsticks.


    And there you have our under $2 sensory bin! It was easy to make and fun for Roo to play with.

    I liked that we could enjoy the feeling of rice when we touched the bin, the rice was fun for roo to dig around in. He likes the way it sounds when he picks up a handful and drops it in the bin. The chopsticks are great for his fine motor skill development.

    When he grew tired of picking up the erasers with the chopsticks he fed rice to an assortment of dinosaurs. Then he decided to toss handfuls of rice into his barnyard toy for the other animals to eat... and yes, it got messy. But, I went with it! After all this was my big idea of fun and dried rice is pretty easy to sweep up.

    Do you engage in sensory play with your kids? I would love to hear about your favorite sensory bins.


    Flying High In the Sky

    This easy to set up sensory bin is perfect for little hands. It is fun to sort thru and play in, and it has a really fun feature for night time play; this Flying High in The Sky Sensory Bin Glows in the DARK!


    We have been making sensory bins for about 8 years now.Even though Rolf is a tween and is generally too cool for my projects, even he wanted to get his hands into this one. I used things we had in our craft supplies, but for your convenience I added affiliate links to help you find some of these items that you may not have.


    Supplies:
    A Storage Bin with a lid
    Neon Blue Food Color
    A zipper seal baggie
    White Rice, Uncooked (2 cups)
    Tongs
    Glow in the Dark Stars
    Cotton Balls


    To dye the rice
    Place 2 cups of white rice into a zipper seal baggie.
    Add 2 tablespoons of non toxic glow in the dark paint (I used art deco brand) and 10 drops of neon blue food color to the baggie.


    Seal and shake well.
    Pour the rice on a paper towel, paper plate, or something like an old cookie sheet and allow to dry for about 4 hours. You may need to stir halfway through the drying time.

    To assemble the bin:
    Cut several sections of rainbow ribbon in various lengths from 1 to 3 inches.
    Gently "fluff" several cotton balls to resemble clouds.
    Pour the dry, dyed rice into the storage bin.


    Bury several sections of rainbow ribbon in the rice bin.
    Place the remaining rainbow ribbon on the top of the bin.
    Bury several plastic glow in the dark stars in the rice bin.
    Sprinkle the remaining stars on top of the bin. 
    Add fluffy cotton clouds to the bin.
    Add the planes and helicopters from the tube of Toobs 


    Add a pair of tongs to the bin and invite your child to explore.
    The tongs add a challenge to the bin, which is excellent for practicing fine motor skills.


    I like to make sensory bins in a container with a lid,so we can snap the lid on it when play time is over and revisit the activity later.  For bins like this that are fun to play with anytime, that comes in handy because my kids want to dig around in this one all the time!


    Here is the bin after dark. We LOVE glow in the dark activities


    Some of our favorite glow in the dark activities include:
    Find more sensory ideas here:

    Easy Fine Motor Sensory Ball Activity


    Preschoolers will love this easy to set up and totally engaging sensory ball activity. It combines fine motor work and sensory play for a boredom buster with benefits. Best of all this activity is super affordable to set up. You can get everything you need at the dollar store.


    If you have been reading this blog over the last decade, you might know I am passionate about fine motor and sensory activities. I love creating activities that are fun and benefit development. This is no exception. It is so easy to set up, but it is engaging for kids and helps them build fine motor skills. No fancy equipment required.


    All you need to make this fine motor ball is two simple things.
    A bumpy ball 
    Tiny rubber bands


    This is so easy to set up.

    Simply stretch the bands over the bumps of the ball
    For younger children, use fewer bands
    To challenge older children use more bands and make the loops complicated. 


    Offer the ball to your child and encourage them to remove the bands. 
    Have your child place the bands in a container, storage bag etc as these can be a choking hazard and dangerous to pets. Supervise this activity please!


    If you are looking for more sensory and fine motor activities check out these popular posts.