Showing posts with label preschool. Show all posts

Easy Angry Bird's Pig Paper Craft

My little boy is in school all day now. This has been an odd adjustment, let me tell you. Considering we spent basically every moment together until school started this year has been nothing short of horrible for me. I sobbed like someone told me we would never see each other again, he belongs to school now....

On the first full day of school, I was feeling pretty terrible. I missed Rolf. I felt like I let his childhood slip past me and I wasted so much time being irritated or upset, or distracted by irrelevant things and those days were gone. Melodramatic? Yes. But, that is how I felt!

So, as I was consumed with missing Rolf that day, Harper and I decided to make something for Rolf to make him smile and pass the time while she waited on her playmate and I waited on my cutie pie.

Rolf is really into Angry Birds, so I knew that this was going to make him smile and Harper had fun playing with her Piggy too!


To make a Paper Pig from Angry Birds you will need:

Scissors
Glue
Green Construction Paper
White Construction Paper
Back Construction Paper


Instructions:
Cut one large circle, One smaller oval, 2 Triangles, One tail from the green construction paper.

Cut 2 small circles, 3 larger circles from the black construction paper.

Cut 2 circles from the white construction paper.

Glue the 2 white circles onto the largest green circle in the place of eyes.

Glue the green oval to the middle of the green circle for the snout.

Glue the 2 larger circles of black onto the snout for nostrils.

Glue the last black circle on for a mouth.

Glue the 2 smallest black circles onto the eyes for pupils.

Add the 2 green triangles for ears.

Add the squiggly tail at the bottom!


And there you have an easy peasy Angry Bird's Pig Paper Craft!


Paper Cookies A Preschool Food Craft

My kids are so cute! They always want to help in the kitchen! When I do dishes, my daughter Harper will push a chair into the kitchen and climb up to the sink. She will say "I can do this Mom!" or she will want to help make coffee and push all of the buttons. If there is cooking involved my son dashes in, ready to help! I welcome their company in the kitchen 90% of the time. But, as any mom will tell you, there are times when having small kids in the kitchen is not the best idea.

On those rare times, I feel bad to deny their help, so I came up with a few fun food crafts that the kids can make while I am occupied with a complicated recipe.  The first one we did as you might recall was a pizza craft. The kids had so much fun making pizzas! We have made several of these since the post!

Tonight I was frying chicken, a rare thing that I admit, I am not so great at. I didn't want the kids to get splashed with hot oil so I entertained them with a paper cookie craft. It was a huge hit!


This was incredibly easy for the kids to make, the materials were super simple making preparation a breeze for me, and best of all- this craft does not require anything special. Seriously, you are going to have the supplies in your house!


Materials Needed to Make Paper Cookies

Several Brown Paper Bags or brown or yellow construction paper
Glue
Sprinkles
A Paper Plate

Instructions

To begin, cut circle shapes in the brown bags or construction paper as your cookie base.
{I cut about 30 circles at a time so that we can do this craft multiple times}.


Place as many circle cookie shapes as you like on the paper plate.
Drizzle glue onto the circle 'cookies'
Decorate with sprinkles
Allow to dry.

This was so fun for the kids! We will be making these again soon I am sure! Do you like to do paper crafts with your kids? I would love to hear about your favorites!

DIY Sorting Toy {Fine Motor Activity}

One of the things I love about being a mom is that somehow, my kids think I am magical when I come up with a fun way to play out of the blue. No matter how simple the activity, they are always interested and amazed. I know I complain sometimes about how hard parenting is, but you know, the tough moments are so worth it. Little kids are so fun and so sweetly simple in what it takes to get them interested in learning new skills and practicing their existing ones.


One of our favorite upcycled activities was completely simple to create and both of my kids played with it for hours! If you have toddlers or preschoolers in your home, this DIY Sorting Toy is a must make. It offers kids a simple fine motor activity as well as a chance to practice sorting, counting, differentiating between sizes and identifying  colors.

You will need:
a clean an empty egg carton
assorted pom poms {use different colors and sizes for additional sorting challenges}
Tongs or Tweezers for Children 


As you can see all I did was dump a handful of pom poms into a clean and dry egg carton. I laid a pair of rubber tongs for kids down and let Roo explore this option on his own. 

He sorted and sorted! He worked on his fine motor skills, his colors and sorting by size. 
This was an upcycle project that was super easy to put together and that my kids had a lot of fun learning and playing with!


Cupcake Liner Crafts

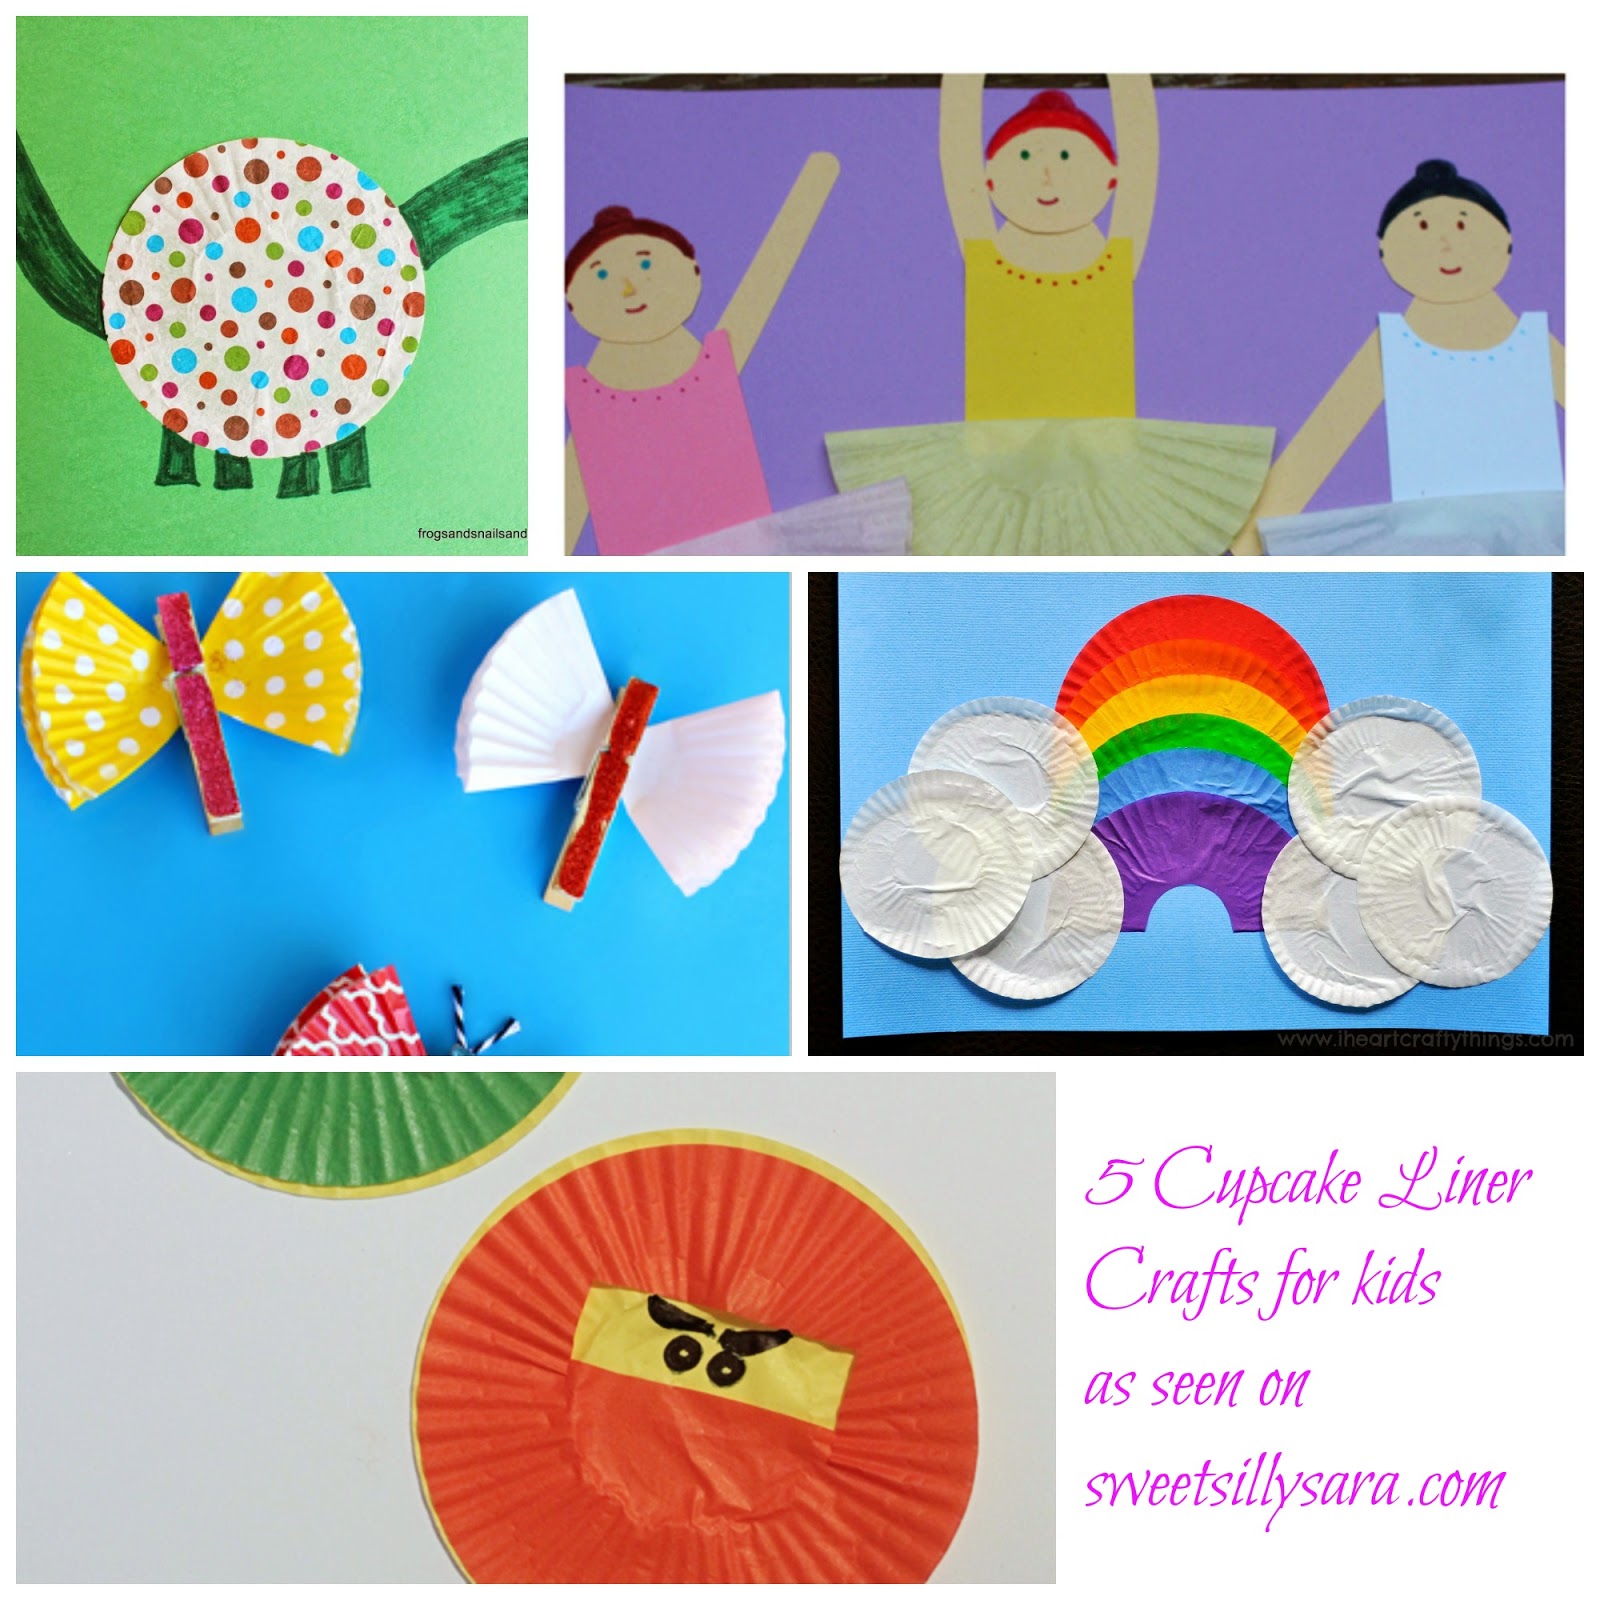
We are always looking for fun crafts to make! When I saw these ideas for cupcake liner crafts the wheels in my head started to spin. These ideas are adorable and easy enough for your toddler or preschooler to make!
I hope this collection inspires you to pull out your cupcake liners and start creating!


Your little princess will love making these Tutu Princesses from Well Nourished Nest.


On a rainy day you might want to try your hand at this Cupcake Liner Rainbow from I Heart Crafty Things.


These Cupcake Liner Butterflies from Crafty Morning might flutter their way into your heart!


If your little one likes Ninjago, don't miss this super cute and simple Ninjago Craft from Love and Marriage Blog.


If your little one loves all things Dino, you can't go wrong with this Cupcake Liner Dinosaur from Frogs, Snails and Puppydog Tails.


Do you have an idea for a fun cupcake liner craft? I would love to hear from you!

Lava Jars {Hands on Science}

Last fall my son and I made a fun project together, we called them lava jars as they were inspired by lava lamps and we had a ton of baby food jars on hand. Harp was emptying out at least 6 a day back then.

I first filled the jar with half water, half baby oil. We added a few drops of food  coloring to the mixture, closed the lids tightly and watched to see what would happen.

We decided that this jar was the ocean based on color and the imagination
of a 4 year old

There was some slight bubbling, but nothing major.

We agreed the jars were neat... but what could we do to make them react differently?


We both liked the color of this jar the best.


We went inside and looked around. We found some antacid tablets and decided to introduce them into the mix to see how the oil/water jar reacted.


We started to notice bubbles forming right away. It definitely simulated a lava lamp!


I made a really short little video demonstration of the reaction of adding the antacid to the oil/water mixture.


My son had fun with this project. It was a fun challenge to see what we could do with common household products, and it was even more fun to engage him in a science project.  We think these would be fun with glow in the dark stuff inside. We hope to try this again in a few months with that idea.

Sushi Sensory Bin

A few weeks ago while shopping at my Kroger I saw these adorable erasers- sushi style- in the clearance section. At 69 cents they were a steal. I couldn't pass them up! My husband said "What are you going to do with them?".

What am I going to do with them? Make a sensory bin of course! A Sushi themed sensory bin sounded like fun to me!

I picked up a bag of long grain white rice, one pound was on sale for $1.09. I used this as my base.


My son was intrigued. He couldn't wait to get his hands in the bin of rice!

Next we added our Sushi Erasers.


Again, Eager Hands were grasping to get involved. Not that I can blame him!

Finally, we finished the bin off with a pair of chopsticks.


And there you have our under $2 sensory bin! It was easy to make and fun for Roo to play with.

I liked that we could enjoy the feeling of rice when we touched the bin, the rice was fun for roo to dig around in. He likes the way it sounds when he picks up a handful and drops it in the bin. The chopsticks are great for his fine motor skill development.

When he grew tired of picking up the erasers with the chopsticks he fed rice to an assortment of dinosaurs. Then he decided to toss handfuls of rice into his barnyard toy for the other animals to eat... and yes, it got messy. But, I went with it! After all this was my big idea of fun and dried rice is pretty easy to sweep up.

Do you engage in sensory play with your kids? I would love to hear about your favorite sensory bins.


In The Sky Sensory Bin

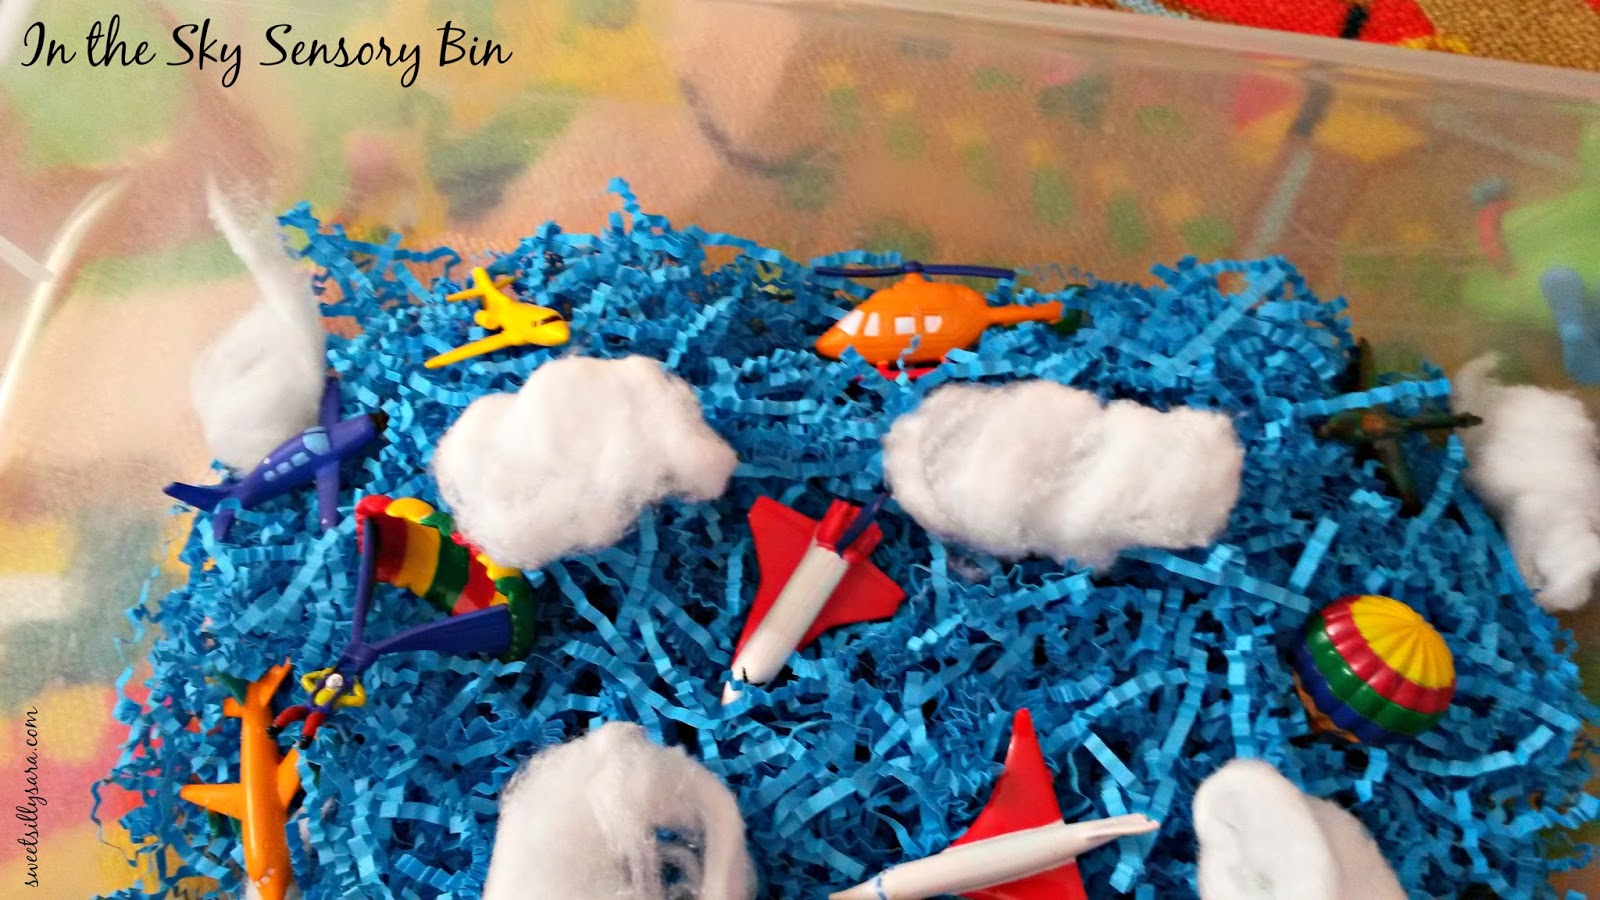
Roo loves waking up to find a new sensory bin waiting on him! I love making something fun for him and knowing he will happily play with this new bin for a few hours. I got a great deal on a Toob from Safari LTD and I couldn't wait to make the In the Sky Sensory Bin.

I started with a base of Easter paper grass stuff and a few cotton balls.

Photo Credit: Sara Lehman.

I pulled the cotton balls apart slightly to fluff them up a bit.

Photo Credit: Sara Lehman.


Gently pull your cotton ball apart until it looks like a fluffy cloud.


Photo Credit: Sara Lehman.

Next add a handful of planes and balloons- or a toob (In the Sky).

Photo Credit: Sara Lehman.

And you have a neat sensory bin for kids that incorporates fun with their senses. The paper Easter grass and the cotton ball clouds offer different textures to feel. The paper grass engages the sense of hearing as it crinkles when touched. The colorful blue base engages the sense of sight with a visually appealing color. The planes open the doors to imaginative play.

Photo Credit: Sara Lehman.

Roo liked this sensory bin. He was amazed at the planes inside and he caught on quickly that the bin was the sky. He excitedly showed me all of the clouds, several planes and the paper grass which he thought was pretty neat stuff. After about an hour of playing planes he smiled and picked out a few dudes and told me it was bubble bath time! The In the Sky Sensory Bin can double as a bubble bath sensory bin in the imagination of a child.

Thanks for reading! I would love to hear about your favorite sensory bin ideas.