Showing posts sorted by relevance for query rolf. Sort by date Show all posts

Print the I is for Igloo Coloring Page

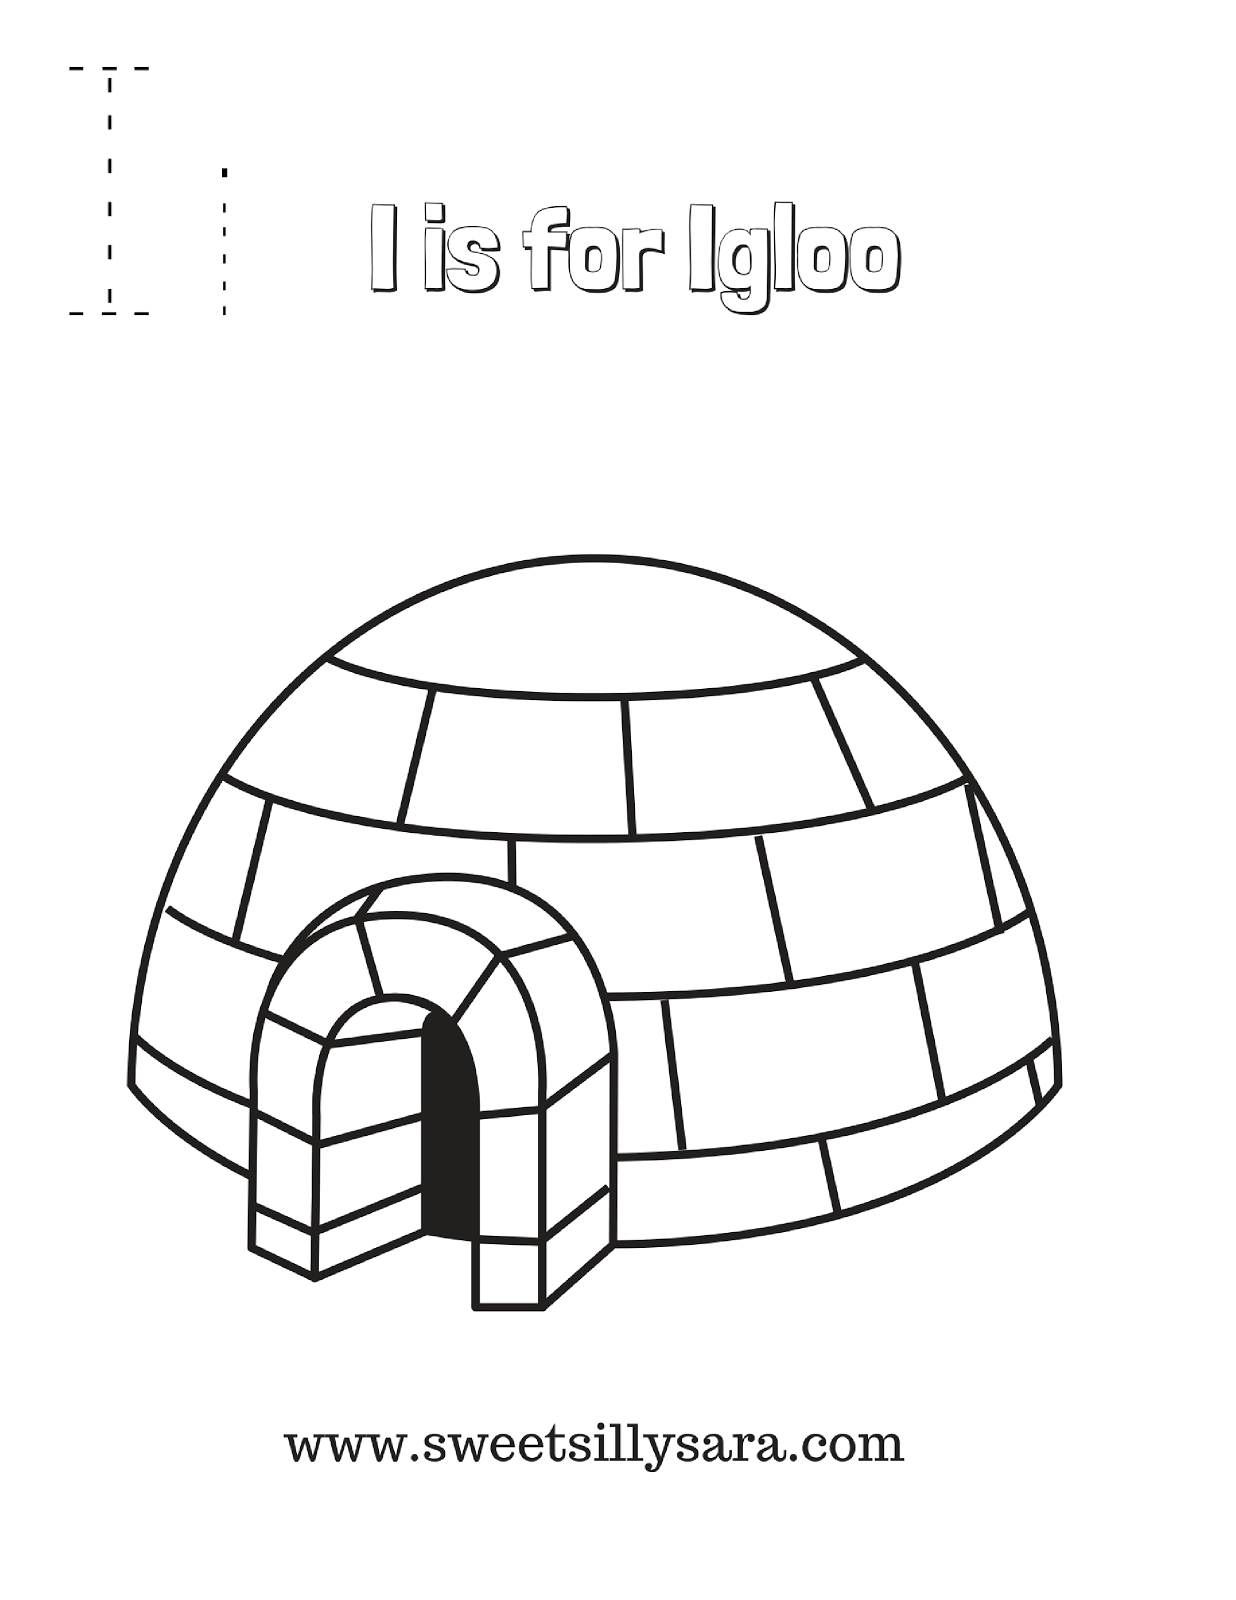
School is out but we are still working on our letters! When the temps reached 92 last week, all Harper and Rolf could think of was popsicles, ice cream and playing with the hose. It seemed fitting to make an igloo for the letter I!

This printable combines handwriting practice and coloring for the win.
This post contains affiliate or compensated links.

To keep the fun of igloos going, we got some fun Toob toys from Safari LTD. We went with the Arctic Toob series because it had so many fun options including a seal, a fox, a whale, an igloo and more! Harper loved adding these fun toys to a bin of ice for a fun sensory experience.

We followed it up with a great book, Curious George Builds an Igloo. An afternoon playing in ice, learning about the letter Ii, and reading a great story in the cool comforts of our house made for an experience that even Rolfie, who is too cool on his own, couldn't resist getting involved in!


Pin this page for later, or share it with a preschool parent!

You can find more FREE preschool printables here

A
B
C
D
E
F
G
H

Ladybug Craft

Paper, glue and a few fun craft eyes come together to create a cute ladybug craft your older kids will LOVE to make!


Partner, sponsored or affiliate links may be included!

I made these with Rolf, who is 8. We quickly discovered that a hot glue gun is a necessity for creating these!  

Otherwise, the supplies are quite common, making these perfect for a quick afternoon craft, or a way to make something worth bugging out over on a day that is maybe rainy, or too hot to get out and play! 

Supplies
Directions

  • Cut a circle in the size of your choice from the red paper.  With the leftover paper, cut 4 strips that are about 1" longer than the circle you just made. This will be your body.
  • Fold all of the ends of red strips over, then begin gluing them on the red circle. Glue the "tabs" you just created by folding ends. As you can see, I started with one strip going across the circle, then I continued until the strips had formed a shell.
  • Cut an oval-ish shape from the black paper, glue this under the shell you just made to form the head.
  • Add 2 craft eyes to the head.
  • With a marker, carefully add black dots.
  • Allow to dry, and you have a fun 3D Ladybug!


3d Paper Ladybug

You might also love this other fun 3D Ladybug that we made a while ago!
If you are looking for even more buggy fun, we made ladybug valentine cards . Don't forget about our B is for Butterfly craft and coloring page too!

Biz Works Better, But Why?

Life with kids can get messy; both figuratively and literally! Between sports and grass stains and excessive dirt and art classes, there are always a few good stains awaiting me in my laundry.

This conversation has been sponsored by BIZ, but the ideas are my own.

A few years ago a stain from grass or markers might have been enough to send a shirt or pair of pants to the trash can, but these days I don't sweat it. I tackle stains like it is no one's biz-ness. My laundry room is stocked with Biz to fight stains for me.


Biz works better than other brands because it contains the ingredients needed to work on ALL STAINS!  It has enzymes for grass, blood and milk stains. It has peroxide for juice and pasta sauce stains. It has whitening agents to get clothes brighter than ever. It has detergents for dirt and mud. It has all of my bases covered in one handy package.


We are a crafty family, so we get messy! The kids are usually covered in something from head to toe. Asides from it being evidence of a day well spent, it shows we lived, made memories and created something lovely, took an adventure or just had a good time! When I use BIZ, I can keep the good times rolling without stressing over the laundry.


Regardless of if Rolf is out on the field, or just making something cute, he can wear his outfit another day without looking like a mess, no matter how much of a mess he might have been!Harp might have decorated herself instead of her art, but we don't even consider it, her outfits are safe from stains and can be cleaned up fuss free.

We like Biz powder and liquid equally, both work wonders without any elbow grease required! How do you tackle tough stains? Biz costs about $3 a bottle and is literally the best stain fighter we have ever tried. I would love to hear your best laundry tips in a comment!


Teton Sports Celsius Jr Sleeping Bag Review

My husband loves the great outdoors. He is athletic and adventurous. He loves hiking, fishing, swimming and camping. I am an indoor girl. I appreciate the beauty of nature and I am not afraid to go out and get dirty from time to time, which makes things work well. I don't always want to tag along on Adam's great adventures, but I will go along when the timing is right.

When we found out we were going to be the proud parents of a little boy, my husband had a twinkle in his eye. He instantly started talking about taking him on a camping trip. When Rolf was 6 weeks old, my husband was ready to go camping... 

Well, as you will probably guess, the camping adventure didn't take place at that time. I have honestly been less than ready to send my little boy out to sleep under the stars. I know I tend to get a sore throat when I camp, and without a proper sleeping bag, I knew the same would happen to my son.


Teton Sports sent my son a Celsius Jr Sleeping Bag. This is a fantastic sleeping bag! I expected it to be much shorter than it is. It was in all honesty the ideal size for me to use. I am only 5'2" tall and I swim in the standard size sleeping bag.

My husband knows outdoor gear, and he was most impressed with the quality, function and portability of  this sleeping bag. It weighs about 2 and a half pounds, so it isn't too heavy for carrying to a campsite. The zipper is durable and easy for little hands to pull up and down. We loved the design of the sleeping bag, it has a very attractive pattern. My favorite feature is that you can unzip at the bottom for sticking your toes out if you get too toasty. This appeals to both my son and myself. Neither of us like to have our feet covered while we sleep.


This is a great sleeping bag for spring, summer and fall camping. It will keep your kid toasty and looking stylish in the process. We didn't get to test it out in the great outdoors, but we did have a semi-camp out in the living room. We popped up our play tent and tossed the sleeping bag inside for a nap. It was comfortable, warm and a super fun way to rest for my son.

You can buy this sleeping bag on Amazon, it would make a great Holiday gift for a little adventurer on your shopping list.


Flying High In the Sky

This easy to set up sensory bin is perfect for little hands. It is fun to sort thru and play in, and it has a really fun feature for night time play; this Flying High in The Sky Sensory Bin Glows in the DARK!


We have been making sensory bins for about 8 years now.Even though Rolf is a tween and is generally too cool for my projects, even he wanted to get his hands into this one. I used things we had in our craft supplies, but for your convenience I added affiliate links to help you find some of these items that you may not have.


Supplies:
A Storage Bin with a lid
Neon Blue Food Color
A zipper seal baggie
White Rice, Uncooked (2 cups)
Tongs
Glow in the Dark Stars
Cotton Balls


To dye the rice
Place 2 cups of white rice into a zipper seal baggie.
Add 2 tablespoons of non toxic glow in the dark paint (I used art deco brand) and 10 drops of neon blue food color to the baggie.


Seal and shake well.
Pour the rice on a paper towel, paper plate, or something like an old cookie sheet and allow to dry for about 4 hours. You may need to stir halfway through the drying time.

To assemble the bin:
Cut several sections of rainbow ribbon in various lengths from 1 to 3 inches.
Gently "fluff" several cotton balls to resemble clouds.
Pour the dry, dyed rice into the storage bin.


Bury several sections of rainbow ribbon in the rice bin.
Place the remaining rainbow ribbon on the top of the bin.
Bury several plastic glow in the dark stars in the rice bin.
Sprinkle the remaining stars on top of the bin. 
Add fluffy cotton clouds to the bin.
Add the planes and helicopters from the tube of Toobs 


Add a pair of tongs to the bin and invite your child to explore.
The tongs add a challenge to the bin, which is excellent for practicing fine motor skills.


I like to make sensory bins in a container with a lid,so we can snap the lid on it when play time is over and revisit the activity later.  For bins like this that are fun to play with anytime, that comes in handy because my kids want to dig around in this one all the time!


Here is the bin after dark. We LOVE glow in the dark activities


Some of our favorite glow in the dark activities include:
Find more sensory ideas here:

Easy DIY Ladybug Valentine's for Kids with Welch's Fruit Snacks

Valentine's Day embraces all things sweet! From cards to decorations and of course, the treats!

Thanks to Welch's Fruit Snacks for se

This year we are making an effort to offer healthier alternatives to the standard miniature chocolates and hard suckers. Our go to choice was fruit snacks and naturally, we turned to Welch's this year! They have these awesome emoji designs out just in time for Valentine's Day!


Inspired by the warm fuzzy feelings that my children give me when they are happy, I came up with this sweet little handmade Valentine to share with Rolf's classroom at their party next week!

These are so cute and easy to make!


One black sheet of construction paper
One red sheet of construction paper
2 googly eyes
One long section of red ribbon
One pink doily heart
Glue
Scissors
Stickers
Welch's Fruit Snacks


Begin by cutting an oval for the body, a medium size heart for the head and several smaller hearts from the back paper.

Cut 2 smaller ovals and a small red heart from the red paper.

Place the two red ovals on the sides of the black oval for wings.

Cut your heart doily in half. Glue one half on each wing.

Add the black heart to the top of the wings to make a head.

Glue 2 googly eyes on the heart head.

Glue the small red heart for a mouth on the head.

Curl on 3 inch section of ribbon for the antenna.

Decorate the body with the small black hearts and a few fun stickers!

Take the rest of the ribbon and tie it around the body, then affix the fruit snacks to the back of the card.


There you have a sweet and cute candy free Valentine Treat!


Welch's Fruit Snacks are available in these fantastic 28 count packages that are perfect for Valentine treat sharing, or just a tasty after school snack! Have you ever given fruit snacks at a holiday party?


Cork and Button Apple Tree Process Art

This cork and button apple tree process art is perfect for preschoolers or kindergartners this fall. It is an easy activity that requires very little prep. 


We love process art, and we love all things fall around here! Harper and I have been hoarding fall decor since we saw the first adorable decorative pumpkin in stores back in July. Rolf is not so quick to jump seasons, but on the first of September, he said "Finally! It is September. Now we can buy all the pumpkins we want without comment." HA! 


Harper and I felt like painting and wanted to start on some fridge decorations for the season. We came up with these adorable cork and button apple trees. They are so worthy of displaying! Plus, they are easy to make!
 

Supplies Needed: 
Paint in Brown and Green
A Wine Cork
A Paper Plate
White Paper
Buttons
Glue


Directions:
Pour a quarter sized drop of both the brown and the green paint onto a paper plate.
Offer your child the cork.
Encourage your child to first stamp the trunk of the tree with the cork.
Then ask your child to give the tree leaves with the green paint.
Allow to dry for about an hour in a warm, sunny place.


When the paint has dried, offer your child the glue and some buttons. We used yellow for this project to make the kind of apples we like. Feel free to use red, green or even a mix if you like. As you can see below we also made one with red buttons, just because we had so much fun the first time.


Encourage your child to spread out the buttons, pressing them onto dots of glue.


Allow the glue time to dry. Then display! This is perfect for refrigerator art!


Are you looking for more awesome apple art projects for kids? 
Here are some favorites:


15+ Winter Books for Preschoolers

The winter Rolf was 3, it was cold! We spent a lot of time curled up in his tiny little boy bedroom with stacks of books at our elbows. We read everything we could get our hands on in his tiny room, where it was the warmest!

Well, here we are again, in the midst of winter, and I happen to have another preschooler to snuggle up with and read the cold days away with! This year, we have picked 15 books that we felt like we MUST READ and I am happy to share our list with you for winter reading with your little one.

I am a participant in the amazon affiliate program. Should you make a purchase from one of these links I will earn a small commission. These titles should also be available at your local library.


Animals in Winter

The Thing About Yetis

Let It Snow

The Mitten

My Snowman,Paul

Winter Dance

The Snowy Day

Tracks in the Snow

Dream Snow

Snowmen at Night

The First Day of Winter

Pizza Pie Snowman

Winter is Here

The Animals Winter Sleep

There Was an Old Lady Who Swallowed Some Snow

Welcome Winter


I have a collection of snowman painting ideas you might also want to check out for a fun winter day with your preschooler!

Christmas Math Printable

Christmas is near and my kids are excited! 
Every day begins with the all important question of how many more days til Christmas?!

This year I am taking that excitement for the holiday and turning it into a fun way for Rolf to practice his addition skills and get a little coloring time in with this fun and free printable math worksheet!

This is ideal for first and second graders. it gives them a few problems to work on and a little art time too.  Print a few for your kids, or a stack to entertain them during a party or before the holiday meal is served!


                                                            Print the Math Worksheet here 

If you have a kiddo that will love this worksheet, let me know in a comment!


You might also like this easy christmas ornament idea.


Free Easter Coloring Pages


Just in time for Easter I have three free coloring pages for your kids! Print as many of these as you like; there is an easy Easter Egg page for little ones, an Easter basket coloring page for elementary ages and a pattern egg page for older kids. But, really all 3 would work for any age!


Share these with a friend, or pin them for later.

These free coloring pages would be great for keeping the kids busy on the rainy days before Easter, or to keep them occupied at the table before Easter dinner.

If your kids color any of these pages, I would love to have you snap a pic and share their artwork with me on facebook. Rolf and Harp will color a dozen of these each in anticipation of coloring easter eggs!


Lego Stamped Pumpkin Art

 Harper and I love to paint with, well, anything but a paint brush! Last week she came home from school and asked me if I wanted to make something with paint, and how could I resist the invitation? This lego pumpkin idea was just the thing. It pairs cute and creepy together just right.


This is such an easy activity, and it is fun for kids of all ages! Even Rolf, who is 12 now, was curious about this and told us it was a "cool idea" before dashing back to his busy preteen activities. 


Supplies:
Orange Paint
Black Paint
Green Paint
Legos
Paper Plate
Paper


Directions:

Pour a small amount of orange, black and green paint onto a paper plate.

Offer your child legos in assorted sizes and paper.

Encourage your child to dip a lego into the orange paint and make the shape of a pumpkin.


Now, fill that shape in with more lego stamps.


When you have filled in the shape of the pumpkin, dip a lego into the black paint and make a face.


Next, give your pumpkin a stem with the green paint.
Allow to dry and display.


These were a really fun, kid led Halloween craft. I know your kids will love making pumpkin art this way.


You can find all of my Halloween crafts here

Painting projects here:

Reader favorites include:

Pumpkin Window Clings

Ghost Play Dough Ornaments

Super Soft Playdough

This super soft playdough recipe is so easy to make. It requires no cooking and is made with a unique ingredient for squishable soft results.

Super Soft play doh made with hair gel


Rolf and Harp are both crazy for play doh. They go through several cans a week on average. I tried making a scented play dough when they were smaller, but we found that it molded really fast. That was enough to make me not want to make it again for YEARS.

play doh made from hair gel


This post contains affiliate links. If you make a purchase I earn a small advertising fee at no additional cost to you.

Last week they needed play dough and the idea of going to the store for playdough to keep my sanity, because like I said, they NEEDED it (ie the little one was whining for it. Anyone ever see that old movie the Creepshow? Recall the old man chanting for cake? Harp was kinda like that but she was making a fuss for PLAY-DOH) made me feel a little overwhelmed.

homemade play doh


Going to any store with a tired, demanding child sounds like the worst idea ever. So, I decided to just make it again and hope for better results.

I made this playdough with a bottle of cheap hair gel, because doesn't everyone have hair gel as a craft supply? The results are super soft and squishable.

play doh supplies

Ingredients

1/2 cup of clear hair gel; the cheap stuff from the dollar store will work just fine!
1/4 cup of water
1- 1.5 cups of flour 

Directions


Place 1/4 cup of water and 1/2 cup of clear hair gel in medium size bowl.

play doh supplies

Add 5 drops of neon food coloring to the liquid mixture.


homemade play doh

Stir until well combined.


Add 1 cup of flour to the liquid.


Begin stirring until the contents begin to clump.
At this point, you will decide if you need to add additional flour. If the mixture feels sticky, add an additional 1/4 cup of flour, and continue to stir.

diy play doh


When the flour has been incorporated, test for stickiness. 
Add additional flour if needed
When the playdough is not sticky, it is ready to play with!

super soft playdough

Store in an airtight container when not in use.

diy play doh

Find more crafts here: