Showing posts with label veggies. Show all posts

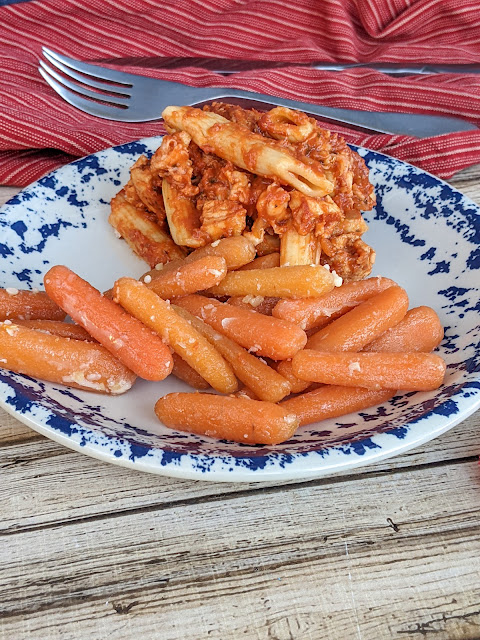
Instant Pot Butter Garlic Glazed Carrots

 Carrots are such a good side dish to add to your meal plan because they are so affordable. This recipe makes them super easy to make. Plus this recipe is great for kids; it is lightly sweet, very buttery and has just the right amount of garlic to spice things up.


I know I am not the only one who has been feeling the strain of the economy. Groceries cost more, gas prices are high, and the cost of cooling the house all summer and running the sprinklers to keep the kids cool has caught up with us. I have been trying to shop smart and make the most of our budget at the grocery shops.

I have found that carrots are a great side dish to serve my family. It fills them up, and it is something different. We like carrots, but honestly, I don't know if I have ever really cooked with them, aside from making a pretty good carrot soup on occasion. Carrots are especially nice when they are marked down in the produce section. A few weeks back, I found a one pound bag of organic whole carrots for 49 cents. I sliced them into rounds and prepared them like this. Everyone liked them. So when I found mini carrots at Kroger, marked down to 79 cents, I grabbed 2 bags and worked them into our meals.

This recipe is good because it is so easy to make if you have a pressure cooker. It goes well with a variety of beef dishes, chicken, or fish and I even served it with leftover pasta last night. 


Ingredients
1 pound of baby carrots

3 tablespoons of butter

1 tablespoon of minced garlic

½ c light brown sugar

1 ½ to 2 cups of water


Add brown sugar, butter and minced garlic to the instant pot.


Add carrots, and cover with water.

Give everything a stir to make sure the carrots are covered with the water.


Place the lid on the instant pot.

Seal the instant pot.

Use the manual setting, and set the timer for 8 minutes.

When the timer dings, allow the instant pot to naturally release pressure for 3 minutes, then use the quick release valve.

Remove the lid and stir.

Serve the carrots immediately.

Store leftovers in an airtight container after they have cooled.


These are so tender, and have such a great flavor. I am sure you are going to love it.  Plus it is fuss free and you can probably get 2 meals worth out of a bag of carrots if you are cooking for 4 like I am. If you don't want to eat carrots 2 nights in a row, you can freeze the remaining carrots. You know how I feel about freezing veggies! Do it! I would recommend blanching them first though.


This carrot patch activity might be a good way to get the kids excited about carrots before serving this side.


This sheet pan shrimp, potatoes, carrots and asparagus recipe is also a great way to use up any leftover mini carrots you might have after serving this.

How To Freeze Mini Sweet Peppers

 If you have time to visit your local farmers market this week; this is the time to stock up on all the tasty little peppers that are available right now. I am a farmers market enthusiast for sure. There is nothing quite like a basket of freshly picked, locally grown veggies for $1. 

Sliced Mini Peppers, ready for the freezer


I have been buying everything in season from sweet onions, to asparagus and corn on the cob and sticking it in my freezer for the winter. I wish I could can, but I have a cook top stove and have been told those don't heat evenly for safe canning.

Last week, my favorite farmer at the market had small baskets of mini sweet peppers, jalapeno pepper and wax peppers for $1. I was told they were picked that morning. They were perfect, beautiful and vibrant, they smelled like summer should. I bought 3 baskets of each. We kept a basket that we mixed from the variety aside for fresh eating, and then I prepared the rest for the freezer.


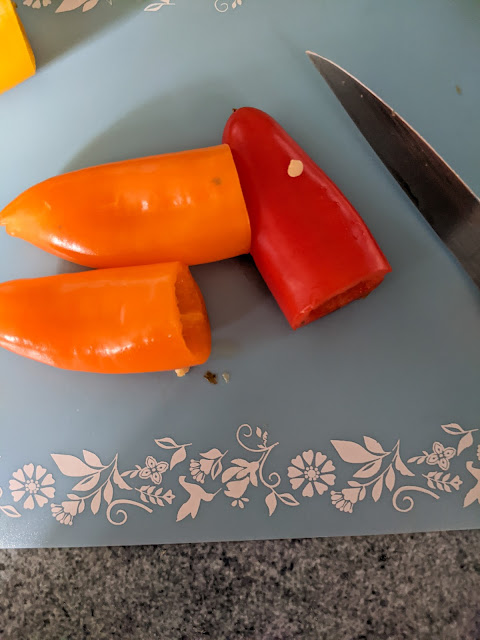
Wash and cut the tops off of the mini sweet peppers.

Clear out the seeds and slice them at desired thickness.


Lay the peppers on a paper towel to dry the juices.

Place the peppers in a single layer on a plate.

Pop the peppers in the freezer for 45 minutes.

Remove from the freezer and transfer to a freezer bag or a food saver bag. Try to remove as much air as possible.


Place in the freezer for up to 1 year.


I usually add 3 or 4 peppers per food storage bag, because that is the amount that my family uses, but, you can adjust the amount of sliced peppers you add to each pack.

You might be wondering how to use the pepper slices after they have been frozen?
I like to add them to crock pot meals, casseroles, scrambled eggs, etc. 
They are perfect for sheet pan fajitas. 
I like to mix the peppers and onion together to freeze for easy chili veggies.
In general, they are perfect for use, just like any other frozen peppers you might buy at the store, but so much cheaper! I can make several packs to use later for about 25 cents each.


Find more money saving ideas here:

6 Things Not To Bargain Shop For 


How to Freeze Vegetables for Winter

 Summer is a season that is filled with my favorite things! From working in my small garden, to watching my kids swim in the pool. To auction season where I scout for furniture to refinish and the Farmer's Market! With so many things going on, I am always looking for ways to speed the work parts up to make the fun parts last longer.

A lot of my work time in the summer is spent in my kitchen, where someone has to clean, chop and prep vegetables and fruits for the freezer. From July to late September, I make a daily harvest of peppers, and I buy about 30 pounds of fresh food each week for my freezer. It is always my personal mission to not buy overpriced, out of season produce in the cold months. My kids will groan and tell you about the ice cream our freezer lacks these days, to make room for beautiful vacuum sealed bags of mixed veggies!


This post has been sponsored by Arm & Hammer. Thank you for helping keep my veggies clean and fresh!

Preserving food for the future is a lot of work. Some of my earliest summer memories involve 'garden work' with my grandparents, we shelled beans, shucked corn, peeled tomatoes, and made pickles for weeks. I always loved the experience of hard work and the fruits of my labors later.

I don't can at home, but I am the freezer queen. Let me tell you a few tips and tricks to help you master the art of freezing veggies at home while they are in season and ready for the picking!


While most of the veggies I buy locally and grow are organic, I still find it important to give them all a good cleaning. I trust Arm & Hammer Fruit and Vegetable Wash to help me get my veggies ready. This is the first step to preserving great produce. It is so easy to use and is more effective than water alone at removing wax, dirt and residues from pesticides. Simply spray it on, rub the fruit and rinse. It is so easy!


Next, I start chopping! I use large sheet pan to keep my veggies separated for easy access. Some people prefer to blanche first, but for me, I like everything pre-chopped, so I deal with that and get it out of the way. 


After my veggies are chopped, I start blanching some of them. I simply boil the veggies for about 90 seconds, then pull them out of the water and into a cool bowl of ice water to stop the cooking process.

Next, transfer the veggies to a towel and pat them dry.

Then, you are ready to begin sealing. I like to use a vacuum sealer system to remove the air and avoid freezer burn.

Label your bags of fruits and veggies.

Freeze for later.

Arm & Hammer is made with simple ingredients to provide an effective and safe product that keeps your fruits and veggies fresher. It is perfect for the home gardener, a market shopper, or anyone who wants to make their fresh foods cleaner before consumption.

If you have any tips or tricks for freezing fresh foods, I hope you will leave a comment to share!

Summer Sauteed Corn and Squash

Sauteed corn and squash makes for the perfect addition to any summer meal. It is delicious enough to make a meal on its own! Made with fresh and simple ingredients, this dish comes together in a matter of moments and is going to get rave reviews from anyone that samples it!


Summer is here you guys! I have never been so happy to hit the farmers market! After a long winter with access to a sad selection of fresh veggies, to see food grown with care and pride inspired my stomach and my menu planning.


I made the easiest dish for dinner last Sunday. It was a lazy summer day. The kids had been playing outside most of the day and I turned to my farmers market finds to create dinner. This recipe is so easy you guys it makes only 3 ingredients and the prep time is minimal, so you can spend more time making summer memories.


Chefs notes:
Use real butter. Butter is something that should not be sacrificed in any kitchen. I firmly believe that using butter to cook is healthier than turning to some scientifically created food like substance. Butter- just do it guys. 

At the last moment, I tossed roughly chopped fresh parsley into the veggie mix to add a splash of green and a little extra flavor. This is optional


This post contains affiliate links
Ingredients

1 yellow squash
2 ears of corn on the cob
2 tablespoons of real butter
parsley to taste (optional)


Directions

Shuck your ears of corn 
Cut the corn from the cob
Chop the squash into chunks
Heat a skillet at a a medium heat setting
Add butter
Add corn and squash
Add parsley if desired
Sautee for about 20 minutes, stirring frequently. When your squash is tender you can remove from the heat and serve.


I served this along with garlic roasted asparagus for a delicious dinner that was extremely delicious and healthy. It offered a colorful plate packed with summer veggies! This is one of the many ways we love to enjoy summer squash.


 I would love to hear how you enjoy summer squash!


This dinner was so economical. It is one of the many examples of the reality that you can eat wholesome and healthy foods even on the tightest of budgets.  I always hear people claim that it costs too much to eat healthy. Recipes like this dispell that myth. While I didn't add meat to the meal- you could easily do so if you desired.

Summer squash {1/3 of a pound} In stores squash sells for $.99 to $1.59 a pound in my area. I paid 50 cents for the squash at my farmers market.
Corn was on sale for 12 cents an ear. I used 2 ears for a total of 24 cents.
Figuring butter into the equation would be about 15 cents for the amount used in this recipe.
Asparagus was on sale for $1.49 a pound. I used 1/2 a pound with this meal for .75 .

Seriously, this was one of the best dinners I have eaten in a week and I served this to 2 adults for a total of $1.64. We both left dinner incredibly satisfied. This is a completely healthy dinner that is budget friendly for proof that eating healthy is not as expensive as everyone wants you to believe.