Showing posts sorted by relevance for query paper plate. Sort by date Show all posts

Paper Cookies A Preschool Food Craft

My kids are so cute! They always want to help in the kitchen! When I do dishes, my daughter Harper will push a chair into the kitchen and climb up to the sink. She will say "I can do this Mom!" or she will want to help make coffee and push all of the buttons. If there is cooking involved my son dashes in, ready to help! I welcome their company in the kitchen 90% of the time. But, as any mom will tell you, there are times when having small kids in the kitchen is not the best idea.

On those rare times, I feel bad to deny their help, so I came up with a few fun food crafts that the kids can make while I am occupied with a complicated recipe.  The first one we did as you might recall was a pizza craft. The kids had so much fun making pizzas! We have made several of these since the post!

Tonight I was frying chicken, a rare thing that I admit, I am not so great at. I didn't want the kids to get splashed with hot oil so I entertained them with a paper cookie craft. It was a huge hit!


This was incredibly easy for the kids to make, the materials were super simple making preparation a breeze for me, and best of all- this craft does not require anything special. Seriously, you are going to have the supplies in your house!


Materials Needed to Make Paper Cookies

Several Brown Paper Bags or brown or yellow construction paper
Glue
Sprinkles
A Paper Plate

Instructions

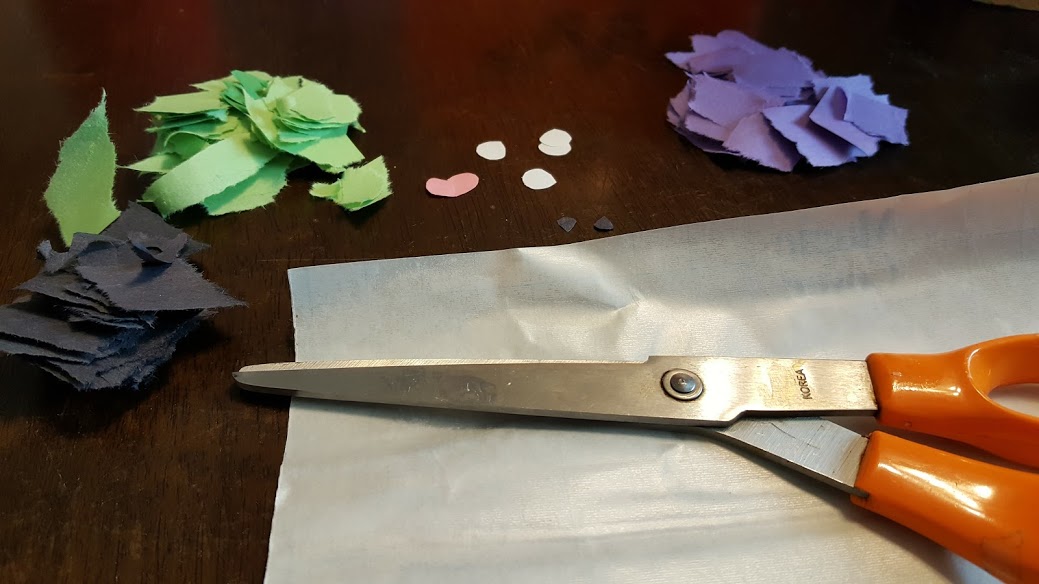
To begin, cut circle shapes in the brown bags or construction paper as your cookie base.
{I cut about 30 circles at a time so that we can do this craft multiple times}.


Place as many circle cookie shapes as you like on the paper plate.
Drizzle glue onto the circle 'cookies'
Decorate with sprinkles
Allow to dry.

This was so fun for the kids! We will be making these again soon I am sure! Do you like to do paper crafts with your kids? I would love to hear about your favorites!

DIY Pumpkin Window Cling

We love to decorate for holidays and Halloween is no exception. This DIY idea makes fun window clings with simple ingredients for a one of a kind look this season!


The kids are excited about Halloween this year! As soon as they saw Halloween decor popping up in stores, they were ready to buy something! Seeing how cute they are, I couldn't deny them their wish. But, I did draw the line at 2 items. We placed a cute ghost on our door in mid-August...

Luckily, the fun of Halloween is still going strong here! The kids and I made some adorable window clings that I can't wait to share with you guys! Today we will go over how we made these cute and easy Pumpkin Window Clings!


Supplies

Transparent Contact Paper
Scissors
Black, Orange and Green Construction Paper


Have the kids tear the orange paper into little strips and bits.


Then cut the pumpkins face out of the black paper. Tear whatever black remains into small bits and strips.

Peel the backing off of your contact paper and lay it sticky side up.

Place the face of the pumpkin on the sticky side of the paper.


 Next outline the shape of your pumpkin in orange.


Then fill the outline in with orange paper.


Next tear one small bit of green paper for a stem and add it to the top of the pumpkin. Begin to fill in the rest of the area with black paper.


Then you can stick this right to your window. The little areas that aren't covered with paper will adhere to the window, but not so much that it makes peeling it off a bother. You can reinforce the edges with tape if you need to or desire.


And there you have a really easy, fun and cheap way to make a window cling! My kids had a lot of fun with this idea and I think yours will too!


You can find all of my Halloween crafts here

Glam Pumpkin Makeover

Paper Plate Witch


Witch Window Cling

It is hard not to get in the spirit of things this Halloween with his hands on witch window cling craft!


This window cling was so much fun to make with the kids. I love that it gives them a chance to use their fine motor skills and practice scissor skills while making something so cute for your windows!

Supplies

Scissors
Clear Transparent Contact Paper
Green, Black, White, Purple Construction Paper
A scrap of pink or red paper


Have the kids tear and cut up the black, green and purple paper into small bits.
Make 2 small circles from a black square of paper.


Cut out small white circles for eyes and a small smile from the red or pink paper.


Begin by placing the small black circles on the contact paper, sticky side up.
Cover those with the white circles for eyes


Next form the nose, mouth and hat of the witch


Begin filling in the face with green bits of paper.


Fill in the remaining areas with purple.

Leave just a few areas uncovered so that the contact paper will stick to your window.


We thought these were really cute. They were fun to make and offered the kids a little challenge as the contact paper is sticky. 

You can find all of my Halloween ideas here.

Paper Plate Witch

Glam Pumpkin Makeover


Basket of Fruit Process Art

Lemon and Limes find a second life after their prime with this easy and fun process art activity! It incorporates an introduction to weaving for small hands with a lot of painting fun. This activity is great for kids of all ages from Toddlers and Preschoolers, to older kids, like Rolf who is 11 now and still had fun with this!


Ok, first, let that sink in. Rolf is 11 now. When I started this blog, he was a baby. Literally, just a baby. And here we are 10 years later. Still sharing, growing and creating. Let's have a big group hug!

Next, isn't this such a cute process art project for kids? I love that the touchy, smelly parts make it super engaging for little hands. If you have been reading for a while now, you know how I feel about sensory play and  projects! (I love them!) Well, I also love to paint with Harper too!  We had a few lemons and limes in the fruit basket that were a little shriveled up and unappetizing so instead of tossing them out, we put them to work in an art project.


 Supplies: 
A lemon and a lime, sliced in half
A paper plate
Glue
Scissors
A brown bag of construction paper
Yellow and green paint

Directions:
Cut the brown paper into thin strips.
Offer your child one strip and encourage the child to glue it to the paper.


As you can see we used 3 vertical strips, then began the under/over process of weaving the horizontal strips.

Keep the weaving simple, you only need 3 vertical and 3 horizontal strips of paper. If your older child is creating this, feel free to encourage a more complicated weave!


Now comes the fun!
Pour a little paint (about a quarter size drop of each color) on a paper plate.


Offer the citrus fruit to the child, allow them to squeeze the juice out and pick at the seeds if they want to. They will want to because it is fun and it smells good! Just have a towel nearby to wipe their hands! When all of the seed picking and fruit squeezing is finished, encourage your child to press the fruit into the paint, and begin filling the woven basket with fruit!


Remind your artist to use all of the fruit and colors!


Allow to dry and display.


This is fun to make in the summer, when we are making loads of lemonade, so maybe save a few lemons after squeezing for an art project? Or pull this out in the winter, when the kids need a break. It is such a sunny little process art project that they are bound to love it!

Hungry Caterpillar Process Art

This easy Hungry Caterpillar Process art project is perfect for preschoolers and elementary aged kids. It gives them a chance to create an adorable picture to go along with story time. I don't know about you, but I love storybook crafts for kids!


This project is perfect for fall. We used fresh apples that were too bruised to eat, and painted these cuties with them. If you have an abundance of apples. maybe you will want to put one to work for this art project.


We have lots of apple crafts on site! 
These cork and button apple trees are a favorite fall craft for kids of all ages.
Corked Stamped Apples are an adorable craft for kids.
Apple Tree Window Clings are a fun budget friendly project.
3D Paper Apples are a good project for using up scrap paper.
Apple Tree Addition makes for a fun way to learn math.


Supplies:
An apple 
Green, red , yellow, black paint.
Paper Plate
A pencil
A knife
Paper


Slice an apple in half
Pour a large dallop of red, green and yellow paint onto a paper plate.
We kind of mixed a little green and yellow together to create a cool effect.
Offer a small drop of black paint.


Offer the child an apple and encourage the child to dip the apple into the paint, and stamp the apple, so that the circles touch one another, going across the page.


Have your child give the caterpillar 4 or 5 segments.
Then encourage the child to dip the other apple half into the red paint and stamp the apple to form the head.


Next, dip the pencil into the black paint and create the eyes and mouth of the caterpillar.
Next, dip the pencil into the yellow paint and finish the eyes.
Now, I know what you are thinking.
Why not use a paintbrush?
Well, we did try that, but it smeared the yellow and black together. We found that the pencil was much easier to work with; and it gave Harper the chance to paint with a non traditional object. We both enjoyed that! You can kind of see in the mouth of the caterpillar that it is a little messy; that was the paint brush. 


Next, grab the stem from the apple and dip it into the green paint.
Give the caterpillar some antennae.
 

 Allow to dry completely. 

Display and enjoy this cute Hungry Caterpillar craft!

Sunflower Stamped Apples

 Kids are going to love this hands on art project that incorporates nature to make a fun print that looks great when displayed! It is easy, needs the most basic supplies and turns out to be so cute!  Make this apple stamping art project after a visit to the orchard, or just as a fun craft to do together.


Photo Credit: Sara Lehman.


Aren't these apples the cutest thing for little hands? All you need is a few colors of paint, a sheet of paper and a dried up sunflower head to make these with your kids. This is great for younger kids.


We visited the farmers market and purchased some sunflowers a few weeks earlier. After they had started to dry out, we plucked the petals off and were left with the heads.

Harp and I thought it would be fun to paint with them, so I grabbed a few bottles of cheap paint and some paper. This is what we came up with.

Supplies:
Paint in red, green and yellow
Paper Plate
Sunflower

Photo Credit: Sara Lehman.

Pour  paint onto a paper plate. You need about a quarter sized drop.

Press your sunflower head into the paint and press it onto the paper.

Repeat as desired.

Photo Credit: Sara Lehman.


Find more fun kids art projects here:
Pineapple Process Art
Christmas Tree Art
Cork and Button Apple Tree Art


Pizza Craft for Kids

My kids love to eat, they love to play with pretend food and they love to craft. Hmmm. I wonder where they get this from? I love to eat, pretend to eat play food and I love to craft. These are my kind of kids!

Every day Roo asks me these 3 questions:
"Mom, are you making lunch?"
"Mom, are you making dinner?"
"Mom, can we make a craft?"
Miss Thang always offers her 2 cents with "Eat Mom?" "Craft Mom?"

A few weeks ago I had a package with the cute little crinkly pieces of paper inside it, like the stuff you fill a gift bag with. I was just about to toss it in the trash when inspiration hit. This would be the perfect base for a craft my kids would want to gobble up!

To start off, I grabbed yellow, white, green and red paper that was left over from another craft we made, I cut simple strips of yellow for cheese. Simple circles for pepperoni, I made little curved green peppers and the hardest shapes was the white mushrooms.

I cut out quite a few of each. I knew the kids were going to LOVE this craft and I want to be able to repeat it again this winter. The extras I placed in baggies and stashed away for later.


I offered the kids some of each topping, including those crinkly little strips of red paper. They each got a paper plate.

To begin we generously applied glue to the plate, then we added our sauce.


Plate with sauce

Next we added cheese.

Cheese Please!

Then we started to add our toppings. This was a ton of fun for everyone, including me.

Green Peppers

The works! See how cute my mushrooms are!


And there you have it! We made fun pizzas from recycled materials. This was really a simple craft that both the almost 2 year old and the 5 year old enjoyed. You will have to stay tuned as this idea has spawned other pretend food crafts!

Sunflower Stamped Pumpkin Patch Art


This adorable pumpkin patch art is great for kids of all ages! Made with simple supplies like paint, paper and a sunflower head, this is a great way to create art using nature!


Harper and I love to paint together. We have been crafting side by side since she was just a tiny toddler, strapped into a high chair for safety. We have painted pineapples, apples, baskets of fruit and even Christmas trees. We usually use corks to create our process art, but we had a bouquet of sunflowers that had seen better days, and well, inspiration hit.

We decided our fridge just had to have a pumpkin patch scene. We are all about creating refrigerator masterpieces 

Supplies:

Orange paint

Green paint

A sunflower head

White paper

A paper plate


Pour orange paint and a small amount of green paint onto a paper plate.


Invite your child to press the sunflower head into the orange paint.

Encourage your child to press the sunflower onto the paper.


Use a stem, petal, or other small item to form the stem of the pumpkin with the green paint.

Allow the paint to dry, then


These were so much fun to make! And I think they turned out really cute! Harper was very proud of her efforts. Preschoolers can handle this project, as well as elementary aged kids like Harper. Your kids might also like to draw little pumpkin faces on these after they have dried.


I hope you get a chance to try this project with your family, it is the perfect project for a fall afternoon!

Find more fall ideas here.