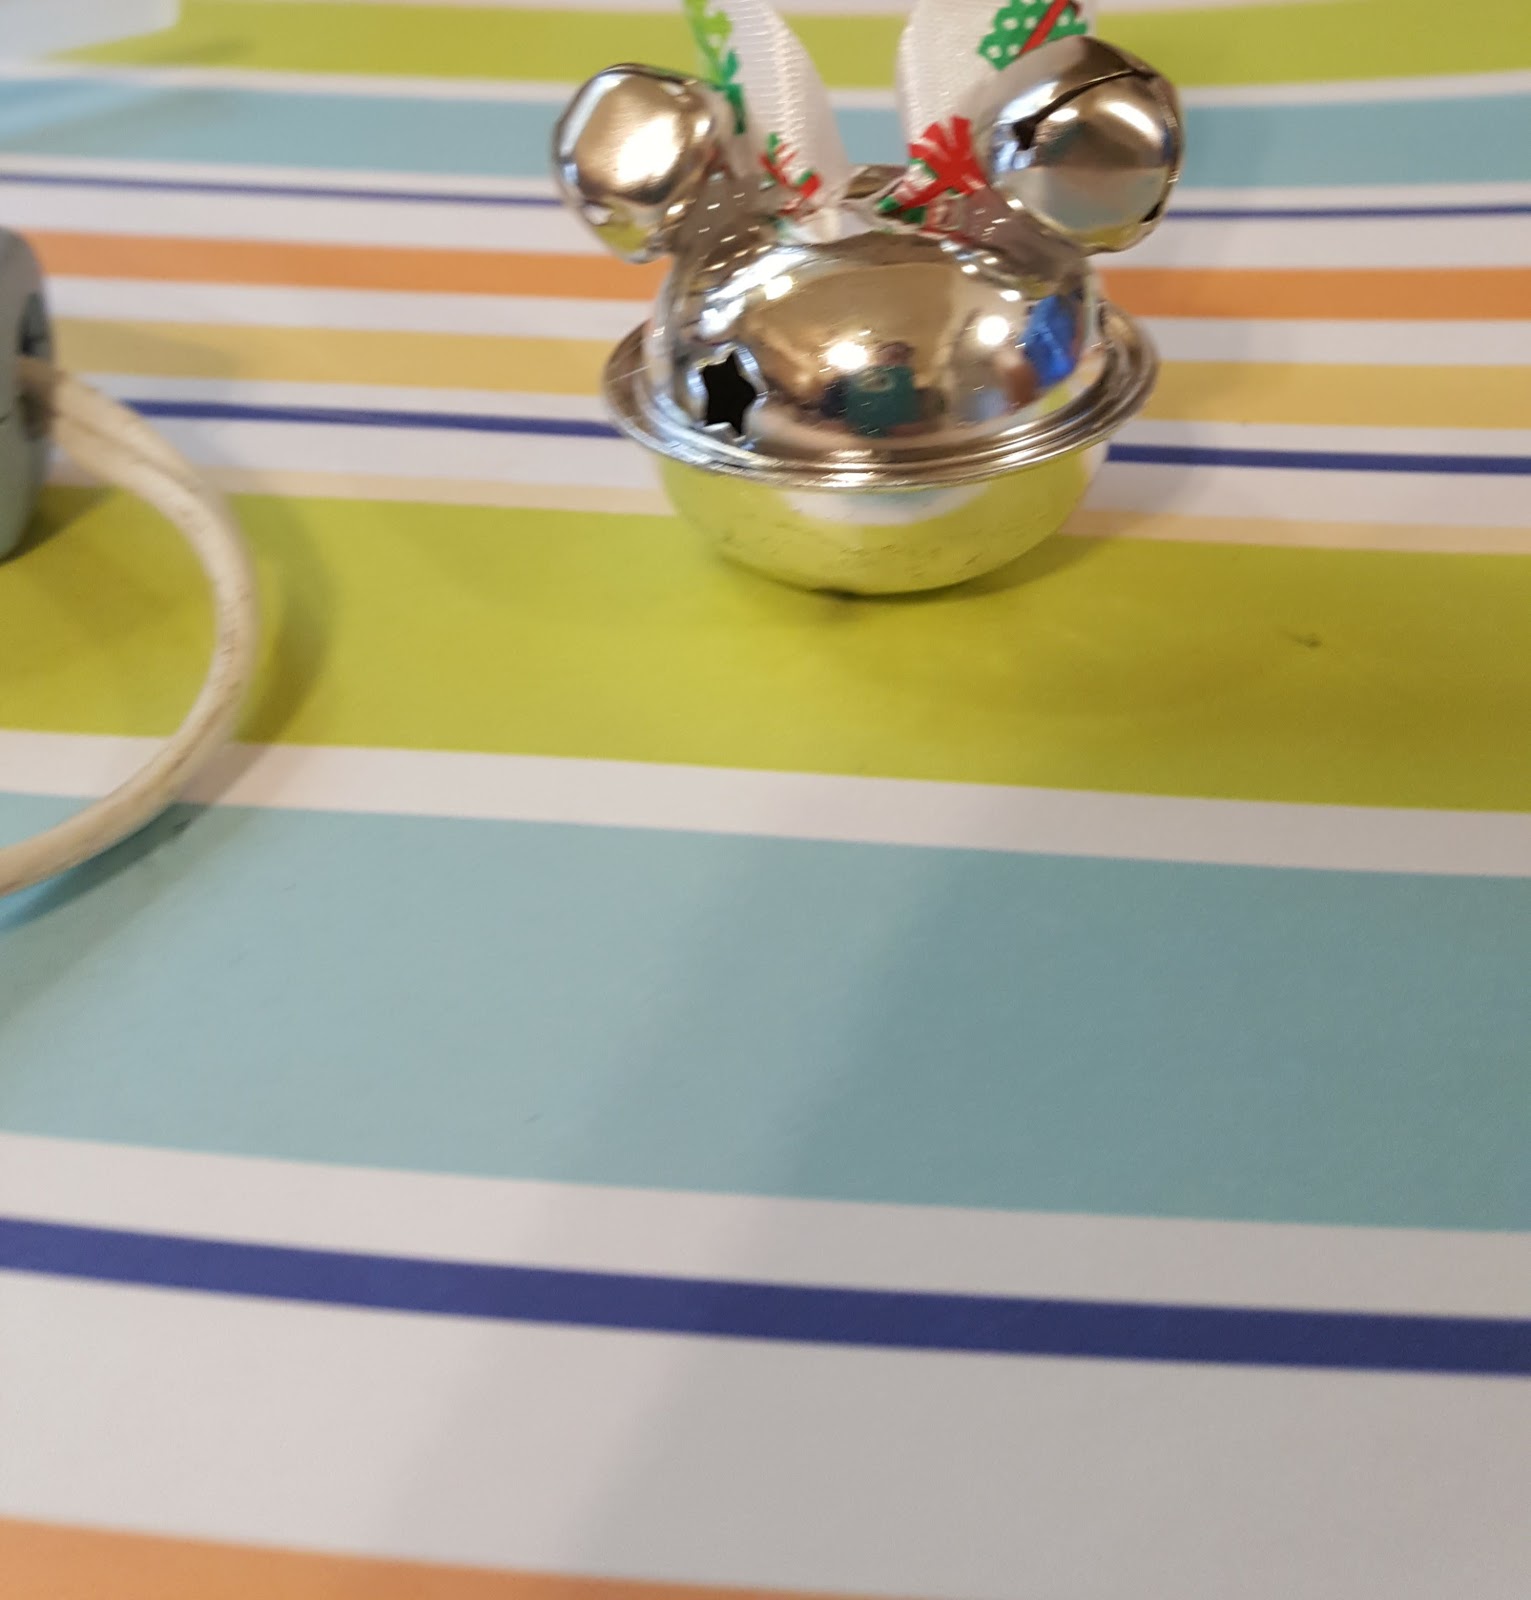
Jingle all the way with these adorable DIY Mickey Mouse jingle Bell Necklaces!

Christmas is close, and this year things are going to be tight for a lot of families. Skipping the gifts just isn't right! We all deserve a surprise this year! So why not make a dozen Mickey Mouse Jingle Bell Necklaces to share with the special people in your life?

You can make about a dozen necklaces for $3 if you shop at Dollar Tree for supplies. These are awesome for classroom gifts or a way to spread a little cheer with a very limited budget.
Supplies:
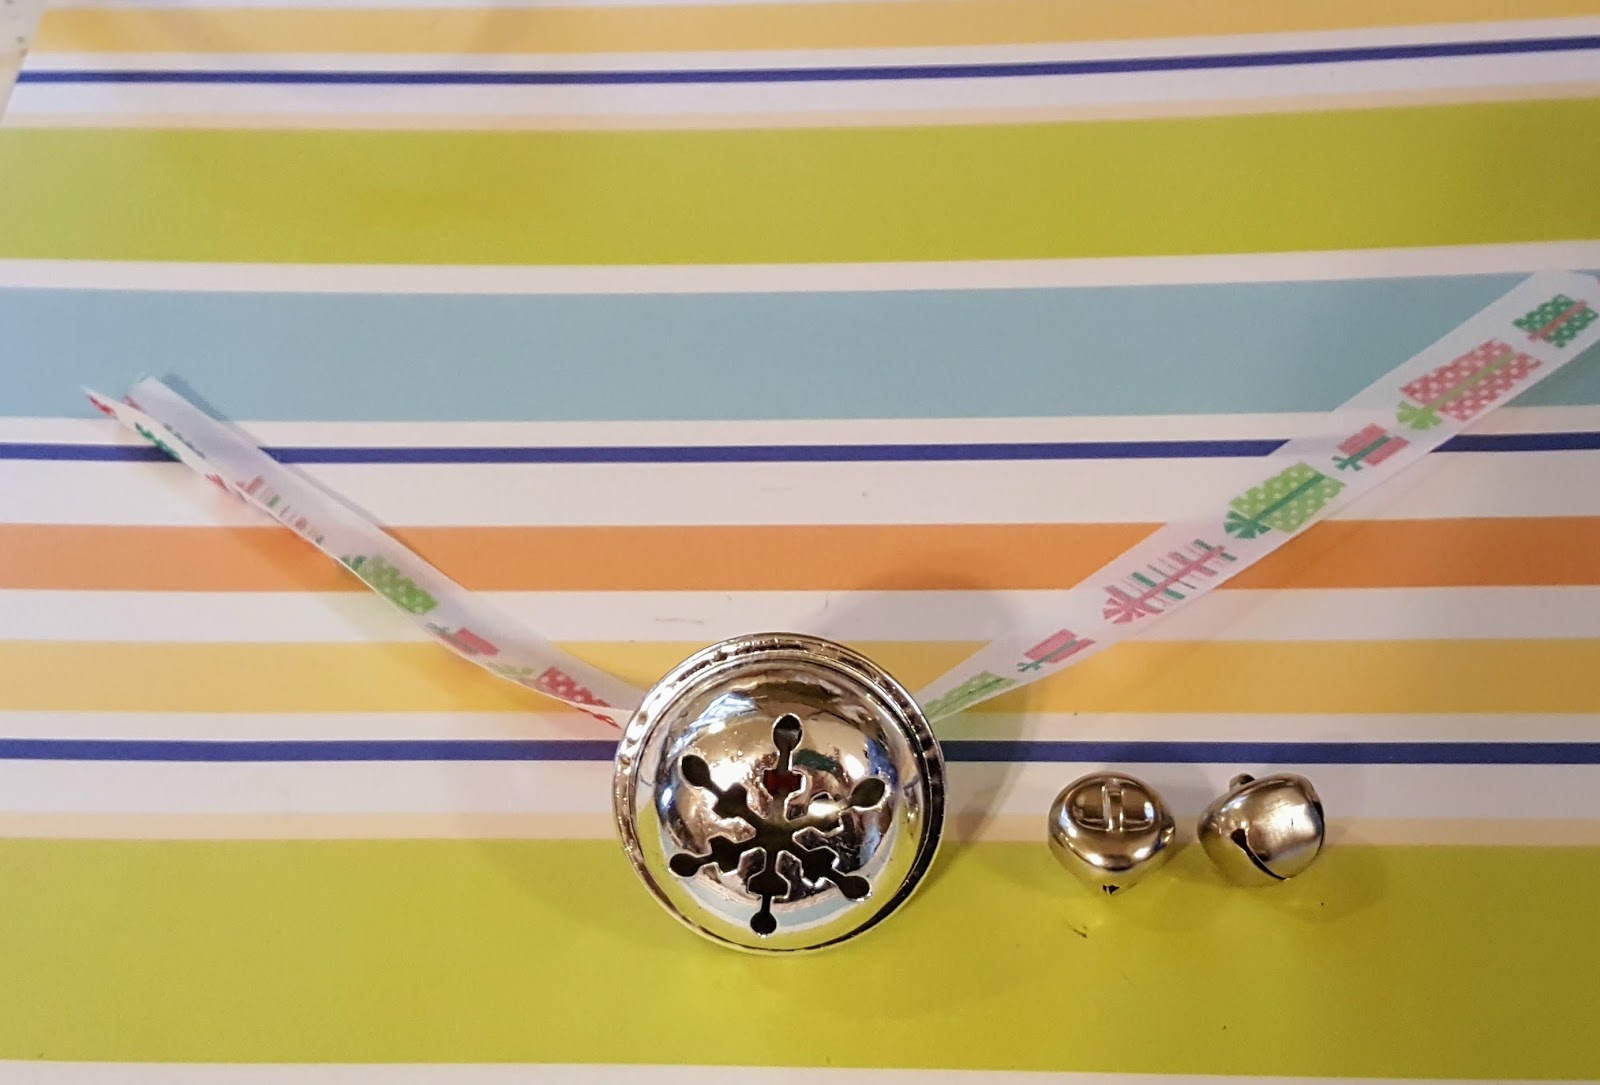
Large Bells
Smaller Bells
Ribbon or bakers twine
Scissors
Hot glue gun

Cut the ribbon to the desired length. (12-15" is ideal)
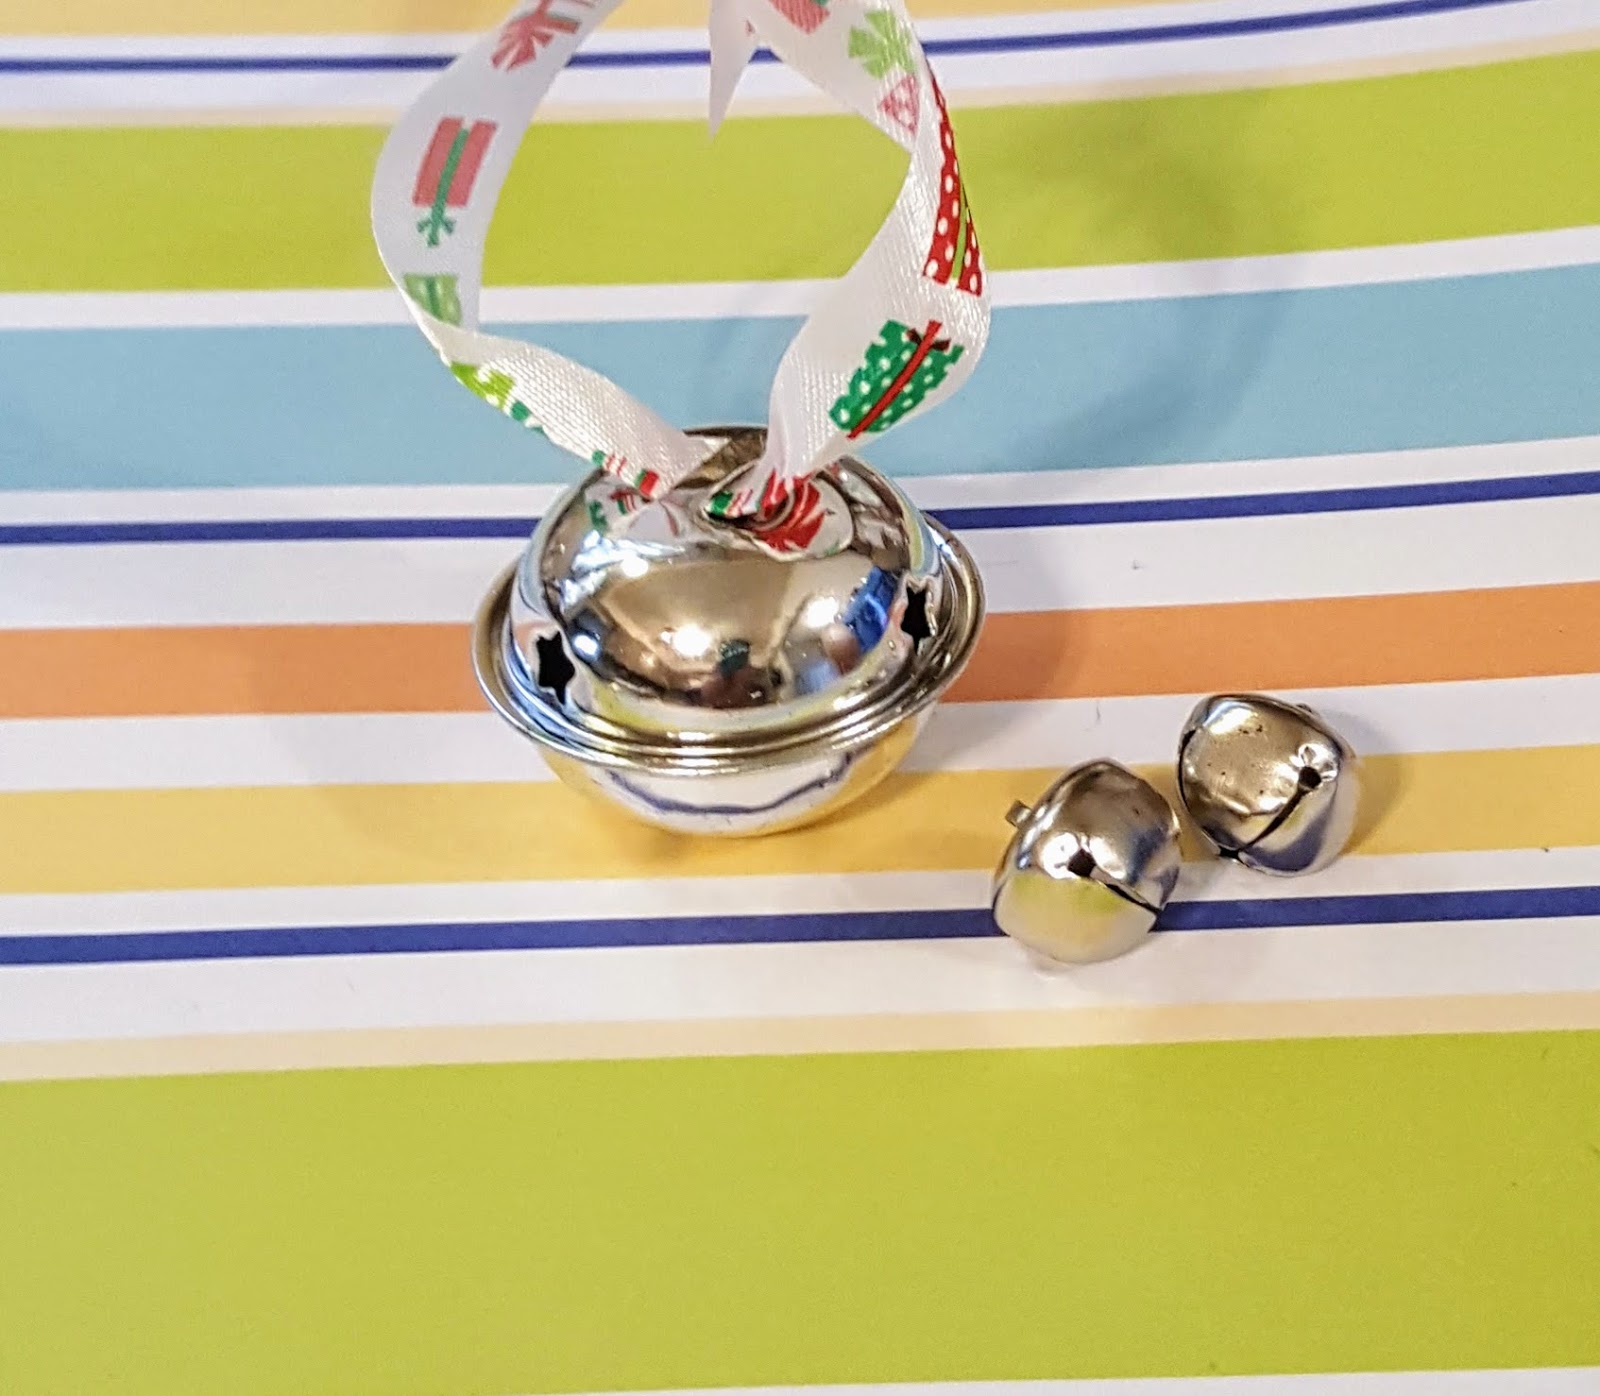
Thread your ribbon or twine thru the top of the large bell.
Place one bell on either side of the ribbon.


Your necklace is ready to wear or share! Jingle all the way with a touch of Disney magic!

If you are looking for more Christmas ideas check out these reader favorites: