Showing posts sorted by relevance for query sensory bag. Sort by date Show all posts

Egypt Themed Sensory Play

Last week I read 2 fun books from our collection with Roo and Harper {Where's My Mummy and 10 Little Mummies} when inspiration hit for a fun play session.

The kids liked the stories, especially Where's My Mummy. We talked about what the mummies are. I reminded Roo about our trips to the Ohio Historical Society where saw a real mummy. We talked about pyramids and how they look like triangles.

Then I captured his attention on the subject of mummies and Egypt for days with a new sensory bin.

For about 6 weeks I held onto the Egyptian Toob from Safari LTD. I knew I wanted to involve these figures in a sensory play session, but I was stumped on what to use on the base. I knew I could use real sand, but I wanted to take it a step further and avoid a sand mess.


It dawned on me to use granulated brown sugar, Roo could touch it, smell it and taste it.


I poured about 3/4 of a bag of Domino Brownulated Light Brown Sugar in a plastic bin.


Next I added assorted Egyptian figures from our Toob.

And a few plastic palm trees.


When it was time to play I gave Rolf a spoon, a fork and a small measuring spoon so that he could dig around in the "sand". He was really interested in digging. Then he smelled the sand and said "yummy!" I told him to taste it, he was hooked... things got a little out of hand from there, he was licking his hand, sticking it in the "sand" and licking it off! Ha! He didn't make it to playing with the Egyptians...


While this sensory play session resulted in a sugared up, sticky little mess of a boy, it was fun. Rolf used his sense of touch, smell and taste... He got to dig in the sugar sand and he says he had fun... MISSION ACCOMPLISHED!

What is Sensory Play?

Sensory play is any activity that engages a child's senses, such as sight, sound, touch, taste, and smell. It is a vital part of early childhood development, as it helps children learn about the world around them and develop important skills.

There are many benefits to sensory play, including:

  • Improved cognitive development: Sensory play helps children develop their problem-solving skills, memory, and attention span.
  • Enhanced language skills: Sensory play helps children learn new vocabulary words and develop their communication skills.
  • Improved fine and gross motor skills: Sensory play helps children develop their coordination and dexterity.
  • Increased social and emotional skills: Sensory play helps children learn to interact with others and express their emotions.
  • Reduced stress and anxiety: Sensory play can be a calming and relaxing activity that can help children cope with stress and anxiety.
There are many different ways to incorporate sensory play into your child's day.

Do your kids enjoy sensory play? I would love to hear about your favorite sensory activities in a comment.

You can find more favorite sensory play ideas here.
Sensory Party in a Bag
Rainbow Disc Sensory Bag


How to Dye Oatmeal without Water for Sensory Play

Dyed oats are perfect for sensory bins! You won't believe how easy it is to dye them without any water!


I have made a ton of sensory bins for my kids over the years. We have explored rice, beans, sand and even straws as fillers. I knew I wanted to try something different, and inspiration was as close as my pantry. I pulled out some oatmeal and got busy experimenting.


First, I tried soaking the oats in dyed water. That was a fail. They clumped together and formed a soggy mess. I couldn't dry them out. 

Next, I thought about how we dyed rice, and decided to try that method on oats. The results were perfect. The oats didn't clump together and they are so soft!


To dye oats you will need:


  • One cup of oats 
  • Food coloring of your choice
  • Hand sanitizer
  • One Ziploc bag


Directions:


  • Pour the oats into the bag.
  • Add 7 to 10 drops of food coloring.
  • Add a generous dollop of hand sanitizer to the bag.
  • Seal the bag and shake until all of the oats are coated.
  • Pour the oats on a paper towel or paper plate to dry.


Dyed oats are perfect for sensory play. Stay tuned for bins that use dyed oats.

You can find all of my sensory content here


Easy Fine Motor Sensory Ball Activity


Preschoolers will love this easy to set up and totally engaging sensory ball activity. It combines fine motor work and sensory play for a boredom buster with benefits. Best of all this activity is super affordable to set up. You can get everything you need at the dollar store.


If you have been reading this blog over the last decade, you might know I am passionate about fine motor and sensory activities. I love creating activities that are fun and benefit development. This is no exception. It is so easy to set up, but it is engaging for kids and helps them build fine motor skills. No fancy equipment required.


All you need to make this fine motor ball is two simple things.
A bumpy ball 
Tiny rubber bands


This is so easy to set up.

Simply stretch the bands over the bumps of the ball
For younger children, use fewer bands
To challenge older children use more bands and make the loops complicated. 


Offer the ball to your child and encourage them to remove the bands. 
Have your child place the bands in a container, storage bag etc as these can be a choking hazard and dangerous to pets. Supervise this activity please!


If you are looking for more sensory and fine motor activities check out these popular posts.

Stars and Stripes Bin

Bring a touch of patriotic flair to your sensory activities with this easy to set up Stars and Stripes Bin.
It is fun to play in and gives little hands a chance to design the flag. Make it for the 4th of July, or anytime for hands on play.


A few weeks ago I ran across a bag of white sand in my craft supplies and I wanted to use it before it spilled all over my craft room. I had visions of our rascally kitten Richard finding it and using it like a mini litter box. 

I kept poking around in my supplies and found a bag of glow in the dark starts. Inspiration was born.
This was an easy bin to assemble and both of my kids enjoyed playing in this bin. 


Supplies:
Popcorn kernels
Hand sanitizer
Blue food color
Red paper
Small glow in the dark stars
Paint brush
Plastic bin with lid
Scissors
Zipper seal storage bag.


Directions:

To make blue dyed popcorn:
Place about a 1/2 a cup of unpopped popcorn kernels, 2 generous drops of hand sanitizer and several drops of blue food coloring in a zipper seal food storage bag. 
Shake well.
You can allow the kernels to dry in the bag overnight, or place them on a paper towel to dry for several hours.


To assemble the bin:
Cut a sheet of red paper to fit inside of the bin you plan to use.
Pour white craft sand over the red paper.

In the upper left section, pour the blue dyed popcorn kernels.


Add a paint brush and an assortment of stars.


Invite your child to brush sand away to create the stripes.


Encourage your child to add the stars to the popcorn kernels.


When not in use, replace the lid on the bin for easy storage for future play!

Find more sensory bin ideas here.
Reader favorites include:


Pot of Gold Sensory Bin

Saint Patrick's Day is right around the corner and I have the perfect sensory bin to share with you for the occasion. This Pot of Gold Bin is easy to set up, is loads of fun to play with, and will get kids excited for the holiday!

St. Patrick's Day Sensory Bin. This easy activity is perfect for kids who want to find the gold at the end of the rainbow!

Sensory bins are so much fun for kids. They combine fine motor work, the engagement of the senses, and imagination into one awesome invitation to play. This Pot of Gold St. Patrick's Day Bin was so easy to set up, and I got everything I needed at the dollar store. This sensory bin is easy to set up, and the kids will want to play with it many times. 


Supplies:

  1. A plastic storage bin with a lid.
  2. St. Patrick's Day Foam Scatter
  3. 4 Leaf Clover Confetti
  4. Buttons in assorted colors
  5. Small black cauldrons from the party favor section of Dollar Tree


Instructions:
  1. Dump the confetti, foam scatter and buttons into the storage bin.
  2. Add a few of the cauldrons to the bin.
  3. Offer your child tweezers, spoons, or any other tool you like for scooping.
  4. Allow your child to fill the buckets with a rainbow of colors (beads) and the gold foam coins.


I encouraged my daughter to tell me what colors she would find in a rainbow and place one bead from each color in the bucket.

We also used this as a counting exercise; how many gold coins could she find? How many big clovers? And so on.


Harper also had fun just digging in the scatter and confetti. She brought a few little action figures into the mix and had a fun small world session later. 

I like to make these bins in shoe box sized plastic containers so we can snap a lid on it and revisit the activity later. The kids always want to play with the bin again!

If you like this idea you can find all of my sensory bins and bags here.
Reader favorites include:
Sensory Party in a Bag
Birthday Cake Sensory Bin
Grab some FREE St. Patick's Day Coloring Pages here
Check out these End of the Rainbow Snacks
Check out these easy 3d Shamrocks


Button Sorting Sensory Bag

Toddlers need sorting skills for a variety of reasons. Sorting helps them learn about the world around them, develop their fine motor skills, and improve their problem-solving skills.


Learning about the world around them

When toddlers sort objects, they are learning about the different characteristics of those objects. They are learning about colors, shapes, sizes, and textures. They are also learning about the relationships between objects. For example, they may learn that all of the blue objects go together, or that all of the small objects fit in the small container.

Developing fine motor skills

Sorting requires toddlers to use their fine motor skills. They need to be able to pick up small objects, hold them in their hands, and move them around. This helps to strengthen their muscles and improve their coordination.

Improving problem-solving skills

Sorting also helps toddlers to develop their problem-solving skills. When they are faced with a problem, such as how to sort a group of objects, they need to use their logic and reasoning skills to come up with a solution. This helps them to learn how to think critically and solve problems on their own.

If you would like to make a DIY sorting activity for your little learners, you might love this easy buttons sorting bag. You might have everything you need at home to make this easy and engaging activity.


Supplies:
A zipper seal baggie
Clear hair gel
Buttons
Markers


First, figure out what colors of buttons you have to work with. You will want to use coordinating markers to make this work.


Start by drawing a large circle with one color of marker.


Then repeat using all of your marker colors.


When you have used all of the colors of markers, add about 2 tablespoons of hair gel into the baggie. You don't need a lot; just a little to make the activity extra fun! Little hands will love the way the buttons glide thru the hair gel. Spread the gel out with your hands.


Add the buttons to the bag.


Seal the bag. You can secure the seal with duct tape if you like.


Encourage your toddler to sort the buttons by color, and maneuver the buttons into the circle.


This activity is so simple but so awesome for hands on learning because it combines sorting skills with fine motor work.

Fine motor skills are the small, precise movements of the hands and fingers. They are important for a variety of tasks, such as eating, writing, and playing musical instruments. Fine motor skills also play a role in cognitive development, as they require children to use their brains to coordinate their movements.

Here are some of the reasons why kids need fine motor skills:

  • To perform everyday tasks: Fine motor skills are essential for performing everyday tasks, such as eating, dressing, and using the bathroom. Children who have difficulty with fine motor skills may struggle with these tasks, which can lead to frustration and delays in development.
  • To learn: Fine motor skills are also important for learning. Children who have good fine motor skills are better able to hold a pencil, write neatly, and turn pages in a book. This can help them to learn more effectively in school.
  • To participate in activities: Fine motor skills are also important for participating in activities, such as playing sports, playing musical instruments, and doing arts and crafts. Children who have good fine motor skills are better able to participate in these activities, which can help them to develop their social skills and have fun.

There are many things that parents can do to help their children develop fine motor skills. Here are a few tips:

  • Provide opportunities for practice: One of the best ways to help children develop fine motor skills is to provide them with opportunities to practice. This could include giving them toys that require them to use their hands, such as blocks, puzzles, or play-dough.
  • Encourage exploration: Children learn best by exploring. Encourage your child to explore their environment and use their hands to interact with objects. This could include letting them help you cook, garden, or clean.
  • Be patient: It takes time for children to develop fine motor skills. Don't get discouraged if your child doesn't master a skill right away. Just keep providing them with opportunities to practice and they will eventually get there.

Fine motor skills are an important part of child development. By providing children with opportunities to practice and develop these skills, you can help them to succeed in school and in life.


Find more fine motor ideas here

Sushi Sensory Bin

A few weeks ago while shopping at my Kroger I saw these adorable erasers- sushi style- in the clearance section. At 69 cents they were a steal. I couldn't pass them up! My husband said "What are you going to do with them?".

What am I going to do with them? Make a sensory bin of course! A Sushi themed sensory bin sounded like fun to me!

I picked up a bag of long grain white rice, one pound was on sale for $1.09. I used this as my base.


My son was intrigued. He couldn't wait to get his hands in the bin of rice!

Next we added our Sushi Erasers.


Again, Eager Hands were grasping to get involved. Not that I can blame him!

Finally, we finished the bin off with a pair of chopsticks.


And there you have our under $2 sensory bin! It was easy to make and fun for Roo to play with.

I liked that we could enjoy the feeling of rice when we touched the bin, the rice was fun for roo to dig around in. He likes the way it sounds when he picks up a handful and drops it in the bin. The chopsticks are great for his fine motor skill development.

When he grew tired of picking up the erasers with the chopsticks he fed rice to an assortment of dinosaurs. Then he decided to toss handfuls of rice into his barnyard toy for the other animals to eat... and yes, it got messy. But, I went with it! After all this was my big idea of fun and dried rice is pretty easy to sweep up.

Do you engage in sensory play with your kids? I would love to hear about your favorite sensory bins.


Time Out Jar

I first made these calm down jars in 2014. My kids were so small that we used plastic, just in case they were dropped or thrown during a tantrum back then. While the children have grown so much since then, I have made these with them a few times. I have updated the post and included a few new photos for you.


Photo Credit: Sara Lehman.

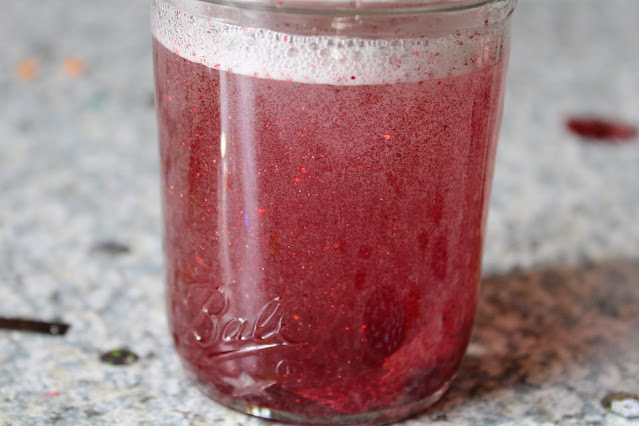
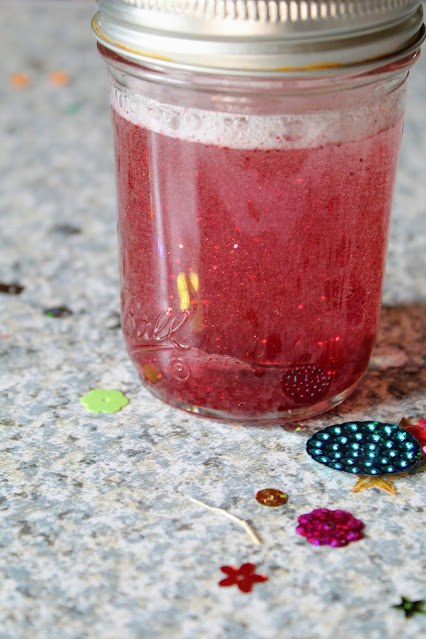
If you need an idea that brings a little more zen and fewer tantrums, let me introduce you to the time out jar. You can call these whatever you like; a meditation jar, a calm down jar, or a time in jar. The idea remains the same, this jar can help your kids take a minute to collect themselves after a meltdown, or offer them a quiet minute for themselves anytime they want it. Plus, the results are pretty and relaxing to watch.


Photo Credit: Sara Lehman.

Make these with a plastic container, like a treehut body scrub container, if you have little kids.
If your kids are older, and would be more likely to use this as a meditation tool, feel free to use a mason jar, or even better, recycle a used food jar, like a pasta sauce container.

Photo Credit: Sara Lehman.


This is an easy craft, that all ages can help with. It is cool enough to get tweens interest, and you can use your favorite colors and whatever glitter you like. We have even added chunky confetti to time out jars.


Photo Credit: Sara Lehman.

Supplies:

1 to 2 tablespoons of glitter glue

Chunky Confetti

Glitter 

A mason jar and lid

1 ¾ water

A craft stick


Photo Credit: Sara Lehman.

Pour the warm water in the container with the glitter glue.

Photo Credit: Sara Lehman.

Add a drop or two of food coloring to the glue and water.

Photo Credit: Sara Lehman.

I lined the lid of the container with glue and firmly sealed the jar.

Photo Credit: Sara Lehman.

And here you have a TIME OUT JAR.


Photo Credit: Sara Lehman


You can find all of my sensory ideas here.
Egypt Sensory Play
Feeding Sharks Sensory Bag


Rainbow Sorting Sensory Bin

 This rainbow sorting bin is so much fun for little ones. It has a variety of textures, shapes and colors for sorting on a rainy day, or anytime! This is perfect for kids who are learning colors, or just need some busy work!


My daughter loves rainbows, and she loves busy work, so this rainbow sorting bin was the perfect rainy day activity for her. We had dyed oats in our craft supplies, and with that, an idea was born to make this activity. Dying oats is so easy, and they are awesome to play with. 


I grabbed a 3 pack of mini pots at the dollar store  and painted them with Kwik Stix but you could use any type of small container, like a baby food jar, a food storage container or whatever for this bin. you just need something that your toddler or preschooler can place the beads in.


Supplies:
Small containers
A plastic storage bin with a lid
Clothespins
Small spoons
Foam beads
Buttons or larger beads


After dying your oatmeal start layering it into the storage bin.


Place the pots or containers for sorting into the bin.
Add beads to the bin, or buttons. I like to offer a variety of textures in the beads. This bin has foam, wooden and standard crafting beads in it.


Add a few small spoons, clothespins and other items for sorting, pinching and measuring. Tongs and slotted spoons are great additions!


I added a clear plastic ornament to the bin too because I wanted to challenge Harper to place the items in a smaller opening.


Offer your child the bin. Ask your child to identify colors as they are picking them up. Encourage your child to sort the colors. This bin is fun to play in, and it is visually appealing too. The variety of textures is engaging. The use of clothespins and or tongs uses the small muscles of the hand. 
This bin has so many developmental benefits and it is a lot of fun too!


Harper loved this bin. She is a big fan of rainbows and busy work, so this rainbow sorting bin engaged her for a while on a rainy afternoon. When she was finished we snapped the lid on the storage bin and stashed it away for another day.


You can find more sensory play ideas here