Apple Tree Window Cling

Fall days are the perfect time to find inspiration from nature and create fun crafts with the kids. This easy DIY window decal comes together within a few moments and adds a colorful touch to your windows. The kids will love displaying their artwork for the world to see!


This is such a simple project you guys! For $2 you can make a dozen or more window decals to add a festive fall touch to your windows! Best of all, this imaginative craft is perfect for the kids!

To make an apple tree window cling you will need:
Transparent contact paper, cut to the size you wish to work with. We used a 6'x4" section.
Tissue Paper Squares in dark green and yellow
One strip of brown construction paper
Scissors


First peel the backing off of the contact paper and lay it sticky side up. Add a strip of brown paper for the tree trunk.


Cut several circles from your yellow tissue paper, place around the tree trunk.


Next lay your squares of green tissue paper over the yellow dots, forming the leaves of the tree. 


Finally, find a window that gets a lot of sun and smooth the sticky side to the window. It will peel off without mess or residue whenever you are ready to take it down.


I love this craft for kids because it introduces them to a sticky texture to work with, and manipulating the paper into the right placements is great for fine motor skill development.


You might also enjoy this Fall Tree Silhouette Placemat Craft for kids.


17 Must Read Thanksgiving Books for the Kids

This post contains affiliate links, but the list was inspired by the reading material I have for my children this month.

Thanksgiving is near and everyone is excited for the time with family, the parades and of course the food! This year, why not build on that excitement while offering your kids a chance to read, learn and be entertained without screentime?

I have compiled a great book list for my kids, Roo and Harp and I think your kids will love these titles too. You can order them via the links below or perhaps look for them at your local library.


Pete the Cat's Thanksgiving

Reading Railroad : Giving Thanks

Little Critter Just a Special Thanksgiving

A Charlie Brown Thanksgiving

Thanksgiving Helper

Bright Baby Thanksgiving

I Know an Old Lady Who Swallowed a Pie

Ladybug Gives Thanks

What is Thanksgiving?

The Berenstain Bears Give Thanks

T is for Turkey: A True Thanksgiving Story

Happy Thanksgiving Curious George

Fancy Nancy: Our Thanksgiving Banquet 

Arthur's Thanksgiving

 Five Silly Turkeys

Turkey Trouble

10 Fat Turkeys

Have your kids read any of these books? If you have a favorite I would love to hear about it so we can look for it!


20 Chicken Recipes You won't Want to Miss

I don't know if I ever mentioned to you guys that I stopped eating beef and pork? I mean, it is not that I don't love those two meats, but I am kinda going thru this picky eater stage and I am only consuming chicken and fish these days.

So, chicken or seafood every day takes some skill. I have to prepare it in different ways or I will dread dinner time! I turned to my fellow bloggers and started discovering some amazingly delicious recipes for dinner that I know you won't want to miss.

Here are 20 Chicken Dinners that you will want to try. From chili to wraps, tacos to fajitas, there is a chicken recipe for everyone in this collection!


Cheesy Chicken Taquitos
Peanut Butter Chicken
Dr. Pepper Smoked Chicken
Easy Chicken Marsala
Red Chicken Chili

Hot Chicken Salad Braid
Buffalo Chicken Avocado Ranch Wraps
Chicken with Bleu Cheese and Grapes
20 Minute Skillet Chicken and Spinach Parmesan
Chicken & Cheese Stuffed Shells

Roasted Chicken Fajitas
Chicken and Dumplings
Chicken Spaghetti Casserole
Creamy Pesto Chicken Pasta
Chicken and Sausage Gumbo

Baked Chicken Fajitas
EasyTex Mex Chicken
Chicken Bacon Pizza
Garlic Chicken Pesto with Tomato Cream Sauce
Chicken and Cornbread Casserole

We love Cheesy Chicken Taquitos! This is one of my husbands favorite recipes! I can't wait to make my own Chicken Bacon Pizza and skip carry out pizza! Which of these recipes do you want to try first? Do you have a go to chicken recipe? I would love to hear about it!


Monster Hand-print Puppet

These hand print puppets are adorable and they will be a monstrous hit with your kids! They take the most basic of supplies and come together in a flash for a lot of fun for everyone!

We love to make puppets you guys. Harper and I can craft up a handful of puppets and she will spend the rest of the day, wrapped up in a world of her own dramatic creation! 

We decided that now was the perfect time to make a few easy peasy hand print monster puppets! These were fun because they ready to play with in a matter of moments and they were so cute!

Supplies
construction paper
pencil
scissors
squiggly eyes
craft stick
glue
marker


Trace a hand on construction paper.

Cut it out.


Glue on as many eyes as your child desires. We used 3.

Draw polka dots, hearts or whatever you like to give your monster a fun look.


Glue the craft stick on the back, leaving enough room for small hands to hold on to the stick.

There you have a fun handprint monster for Halloween dramatic play!

You might also like this hand print fish puppet idea.


Paper Plate Crowns

Paper Plate Crowns are super easy to make and incredibly fun for kids! You need only a few items to make these and your kids are going to adore them!


Harper is into all things princesses these days! The gowns, the shoes, the crowns! A few weeks ago, I made these fun paper plate crowns on Quirky Momma, and I knew I wanted to recreate the craft with Harper! You guys, these are so easy to make. You are going to want to pin this for rainy day reference!

All you need is a paper plate, a pair of scissors and some markers or crayons.

Begin by gently folding your plate in half.

 
Cut it thru the center, extending to right before the plate becomes textured on the side.


Make another cut in the opposite direction, Repeating until you have made 4 cuts. It is kinda like cutting a pie.


Next, fold the cuts so they stand up. Repeat until all sections are standing up.


Color the crown, in whatever colors you like, I added hearts for Harper.


Now you have a crown, fit for a princess! 

You might also enjoy this Tree Silhouette Placemat Craft


Paper Plate Witch Craft

This paper plate craft is perfect for toddlers and school aged children. This one requires simple supplies you likely already have and comes together in a flash!

We have been crafting up a lot of Halloween fun! The kids are really excited about spooky fun and awesome costumes, so I have been indulging their interest and excitement with easy crafts! 


To make this fun witch craft all you will need is:

A paper plate
Green Paint or Markers
2 fun googly eyes
Glue
Black Construction Paper
Orange Construction Paper
Scissors


Color or Paint the Paper Plate Green


Cut a triangle from the black paper, then cut a strip slightly longer than the triangle, glue these onto the paper plate like a witch's hat.


Tear a few strips of orange paper for hair. Tearing instead of cutting will give kids a chance to use fine motor skills plus make the paper curl slightly, which is just fun! Glue the hair onto the witch. 

Next, add eyes and draw on a nose and a mouth. We gave our witch a cute smile.


There you have a cute, friendly and fun Paper Plate Witch craft! This is great for little ones because it is creative, it gives them the opportunity to use their scissor skills and work their fine motor skills too. Additionally, it offers your home a touch of personalized Halloween decor!

You might also like this cute Angry Bird's Pig Craft.

12 Apple Inspired Dinners

It is time to head to the orchard and harvest plenty of
beautiful apples! I will,of course, make apple crisps, pies, and even applesauce, but this year, my mind is going to dinner inspiration instead of just desserts!

I found 12 awesome apple inspired dinners that I will certainly be making after my trips to the orchard! From slaws to salads and so many other dishes that there has to be something on this list for everyone!

Why not add an apple to dinner? You know what they say about keeping the doctor away and all!


Which of these recipes will you try first? The apple chicken salad sounds perfect for a picnic dinner amidst the crunchy leaves. If you have a recipe that puts apples in your dinner I would love to hear about it!

Grilled Chicken: 10 Delicious Ways

Fall might be here, but in my mind, that makes it the ideal time of year to fire up the grill! There is something special about gathering outdoors on a crisp evening and chowing down on some grilled chicken that I can't resist!

If you feel the same way about fall grilling you won't want to miss these 10 recipes! Of course, you could always bookmark or pin this recipe for future reference when the weather better suits you for grilling!


Which of these grilled chicken recipes do you think you will make first? I think the Grilled Honey Mustard Chicken sounds pretty fantastic! If you have a grilled chicken recipe that you often go to when you need an awesome dinner, I would love to hear about it!

Jalapeno Popper Spread

Creamy and spreadable, this Jalapeno Popper Spread recipe comes together easily, adds the perfect touch of heat to the cool creaminess of the cheese and best of all... it has bacon in it!


You guys, there are some things in this life that are made for one reason only, to enjoy. On my list of things one is meant to enjoy, no arguments you will find cream cheese, jalapeno peppers, and bacon, as well as the good stuff like puppy breath, the softness of tissues and a luxury pillows.


If there are things meant to enjoy in life, is it wrong to want to enjoy them at the same time? Is it crazy to snuggle a puppy chilling on a luxury pillow with a soft tissue at your disposal? Nah... not crazy, unless you mean crazy awesome. So, why not take a few favorite foods and combine them into one awesome spread to serve at your next party?


This is so easy and yummy that you might want to make a double batch if you are tailgating. It will go fast!
You can serve it with a nice bread, any kind of crackers, or if you thin it down a little, you could use this as a dip!

Ingredients
2 Jalapeno Peppers
6 ounces of softened cream cheese
4 ounces of shredded cheddar cheese
4 ounces of real bacon bits

Remove the seeds from your peppers and chop them.


Add to the cream cheese.
Add shredded cheese.


Add bacon.
Mix well, with a fork until well blended.


Serve with crackers or on bread. This also makes a delicious addition to just about any sandwich you might make!


Shiny Happy Pumpkin Craft

I know it is early into the month of September. I get it, it is still summer technically, but you guys... I can't resist making some awesome pumpkin crafts with my kids!

Today, we were ready to jump into the fall theme of things, so we surveyed our craft supplies and made these Shiny Happy Pumpkins! My almost 3 year old loved these large sequins and thought they were beautiful! I have to admit, this is the shiniest fall craft we have ever made, they do look happy too!!


To make a shiny happy pumpkin you will need:
A Paper Plate
White School Glue
Black Construction Paper
Scissors
Large Sequins in Brown, Burgundy and Orange


Apply glue to the paper plate, be generous!


Start filling in the plate with the large sequins. This is a great fine motor activity for kids of all ages! The sequins stick together and working them apart is great for little fingers!


As you fill in your plate, cut eyes and a mouth for your shiny happy pumpkin. With glue apply the facial features to the sequined plate.


And there you have a Shiny Happy Pumpkin!


Easy Angry Bird's Pig Paper Craft

My little boy is in school all day now. This has been an odd adjustment, let me tell you. Considering we spent basically every moment together until school started this year has been nothing short of horrible for me. I sobbed like someone told me we would never see each other again, he belongs to school now....

On the first full day of school, I was feeling pretty terrible. I missed Rolf. I felt like I let his childhood slip past me and I wasted so much time being irritated or upset, or distracted by irrelevant things and those days were gone. Melodramatic? Yes. But, that is how I felt!

So, as I was consumed with missing Rolf that day, Harper and I decided to make something for Rolf to make him smile and pass the time while she waited on her playmate and I waited on my cutie pie.

Rolf is really into Angry Birds, so I knew that this was going to make him smile and Harper had fun playing with her Piggy too!


To make a Paper Pig from Angry Birds you will need:

Scissors
Glue
Green Construction Paper
White Construction Paper
Back Construction Paper


Instructions:
Cut one large circle, One smaller oval, 2 Triangles, One tail from the green construction paper.

Cut 2 small circles, 3 larger circles from the black construction paper.

Cut 2 circles from the white construction paper.

Glue the 2 white circles onto the largest green circle in the place of eyes.

Glue the green oval to the middle of the green circle for the snout.

Glue the 2 larger circles of black onto the snout for nostrils.

Glue the last black circle on for a mouth.

Glue the 2 smallest black circles onto the eyes for pupils.

Add the 2 green triangles for ears.

Add the squiggly tail at the bottom!


And there you have an easy peasy Angry Bird's Pig Paper Craft!


Chinese Chicken 10 Yummy Ways

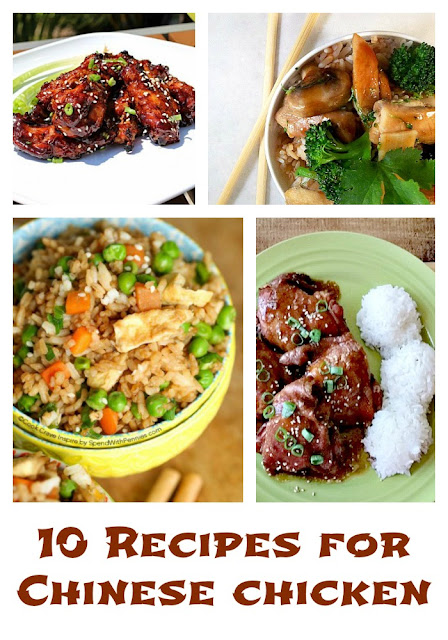
I can't resist Chinese take-out! I mean, who can? It is so easy to place an order and swing by to pick it up after a long day when you don't really feel like cooking. The thing is, Chinese take out can add up pretty quickly! Luckily for my family, I found 10 scrumptious recipes for Chinese Chicken at home, so we can have that take-out taste at a fraction of the cost and with minimal efforts!

Chinese Chicken


Orange Chicken Tofu Bowl
Lighter General Tao's Chicken
Peanut Butter Chicken
Teriyaki Chicken
Sweet and Spicy Asian BBQ Wings
Shoyu Chicken
Spicy Chicken Teriyaki Bowls
Chicken Fried Rice
Sesame Ginger Chicken
Copycat PF Changs Lettuce Wraps

Which of these recipes do you want to try first? Peanut Butter Chicken is a go to dinner at my house on long days when something amazing is needed for dinner. I can't wait to try the Shoyu Chicken recipe, maybe this week!

You won't want to miss this collection of Lo Mein Recipes.

Find more chicken recipes here: 
20 Chicken Recipes You Won't Want to Miss
Cracker Crumb Chicken Nuggets

Tree Silhouette Place-Mat Craft

Once school starts, I am ready for fall. Bring on the warm days and cool nights, the changing of leaves and all things pumpkin!  If my family isn't home together enjoying summer break, let's move on to the next best thing- FALL!

Mr. Sweet Silly Sara had to return to work to get the school library set up and ready for the students on Monday. Rolf has another week before he is officially in school. We are trying to make the most of these lazy end of summer days together.

Yesterday morning, the kids and I were restless. It was cool outside and the grass was very wet with dew, so we decided to savor the time and let the sunshine do its thing to warm the day up and dry the grass before we headed out to play.

To make the waiting more enjoyable we decided to get crafty and make this great tree silhouette placemat. This was so easy to make and my son did a great job on his! I knew I had to share this with you guys!


To make a placemat with your kids, you will need to gather a few basic supplies and then let your creativity flow.


Supplies needed:

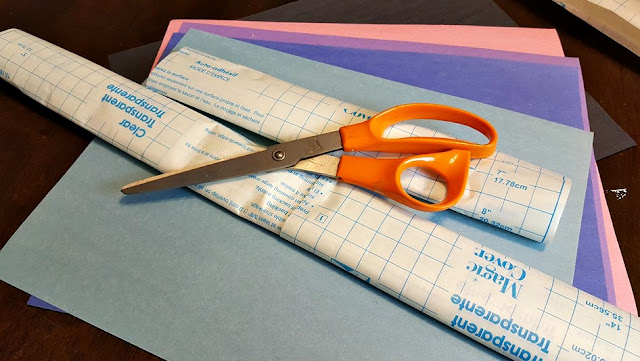
2 pieces of transparent contact paper, cut to 5" wide and 8" long sections.
Assorted construction paper in the colors of your choice. We used black, pink, purple and blue.

Instructions:
Begin by having the kids tear up the construction paper into small squares and strips.


Keep the colors separated for easy application of colors.
Next, you will want to carefully peel the back off of one section of contact paper.
Lay it sticky side up.
With a few strips of black paper, make the outline of the tree.


Next, begin applying more strips of paper around the tree. We made our tree placemat to look like the sun was setting, with the colors we often see in the evening sky.


Continue to stick your strips of construction paper to the sticky side of the contact paper.


After you have filled in all of the blank space on the contact paper, peel the backing off of the other section of contact paper. Only expose a small strip! This will make it so much easier to line up.


After you have lined up the beginning of contact paper section #2 to the first section, begin peeling the backing away while smoothing the first second section onto the first. {Does that make sense?!}

Then you have an easy to wipe off and very handy placemat for your little ones!


My son loved that he MADE this place mat. It was so much more important to him than the ones we have that came from a store! I loved how it turned out! It is such a lovely work of art!

This project is great because it is affordable to make. You could make 6 or 7 of these at least for a mere $2 if you buy your supplies at Dollar Tree.

It is also a great way to get your kids using fine motor skills. They will develop the small muscles of the hand with the action of tearing paper. This later plays into handwriting skills among other things.

Asides from that huge benefit, making place mats with your kids offers them the chance to express their creativity and make something they can use and admire and feel proud of!

You might also enjoy this Lemonade Craft idea!


Best Way To Cut Watermelon

You guys, I have the best way to cut a watermelon and I can't wait to share it with you. The days of making slices to form a wedge are long gone. This method reduces waste and really makes your melon easier to eat and share!
First, select your melon and place it on a large tray.


Cut it in half. Set half aside and flip the half you are going to work with red side down, rind up.


Slice the watermelon as you might if you were serving slices... long cuts that cover the watermelon, about an inch wide.


Then make cuts the length of the melon, crossing over the wide cuts you made a moment ago.


As you can see, instead of a big, hard to eat wedge of watermelon, you now have this neat little stick!


My best tip is to serve as is on the tray! It holds together nicely and makes it easy peasy for sharing!


This is a kid friendly way to serve melon too! Everyone that had a stick of watermelon was impressed with the serving method. It wasn't as messy to eat, there is so much less waste this way and it is fun to put knife skills to work sometimes!!

How do you serve watermelon? Wedges, cubes, sticks, balls?