Mushroom Hunting with Sweet Silly Sara

I have an interest that you might not know about; I am especially fond of mushrooms! Photographing wild mushrooms is one of my hobbies that I rarely talk about. It is one of those things that I do for the sheer pleasure it brings me to find a mushroom growing somewhere and to capture it, as it is at that moment in time. I have toyed with the idea of turning my collection of photos into a book, but in the meantime, I am going to share a few with you.  I hope you enjoy this glimpse into my life and one of my interests.


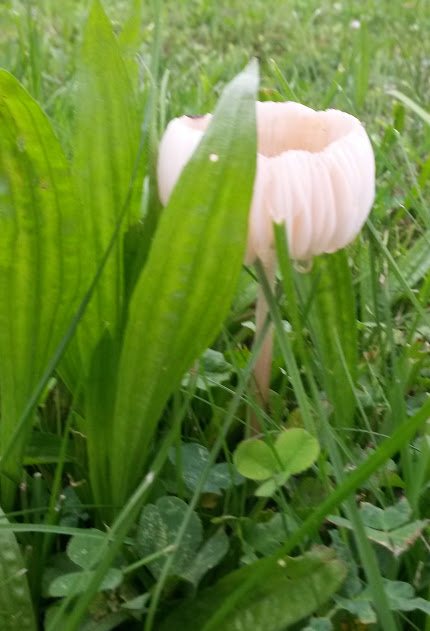
I spotted this beauty on a walk in the woods with my son.


This specimen was discovered growing in a yard on a walk downtown. 


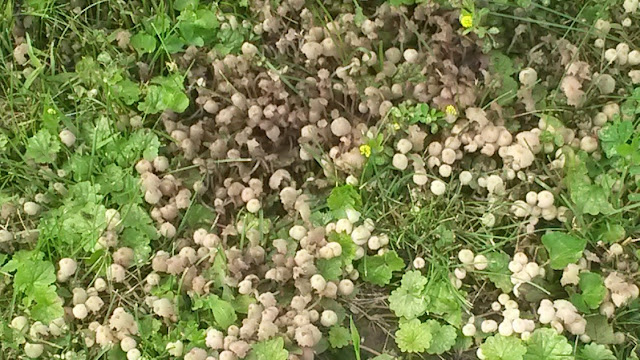
Jackpot!! Look at all of these babies!


These ones were  discovered on a walk in my neighborhood.


Not the best photo, but for some reason I am drawn to it.


On a fall walk one morning, I took a side street I had never walked. I walked upon hundreds of these beauties. I loved the way the mushrooms resembled buttercups. This was a fantastic reward for exploring!


A few days later I returned for more photos, I found the mushrooms were in a state of decay, but they were still an impressive sight. 


I ran across these guys in a random field.

I do not, at this time, attempt to identify the mushrooms. I simply enjoy their beauty and appreciate the mystery of the fungus. 

My interest in mushrooms began about 12 years ago. My then boyfriend, now husband and I took a walk around a lake after an especially rainy couple of days. We saw a large mushroom with lovely purple hues to it. I snapped my first mushroom photo at that moment and have been intrigued by them since. 

I often joke with people that according to my photo collection all I ever do is eat, visit parks with my kids and take photos of mushrooms. There are that many mushroom pics on my phone!

Thanks for stopping by for a glimpse into my life!

Lemonade Craft for Preschoolers

This craft is perfect for a play time pause on a hot summer day. Your preschooler will have a lot of fun creating a craft to go with a glass of lemonade!

Summer is here! The kids are enjoying the chance to play at every park known to man, soak up the sun and splash in the pool! My husband and I are trying to savor these sweet and relaxed moments while they last. We know all too well that the hustle and bustle will begin soon enough as the kids head off to school and he resumes his post as the local school librarian.


Last week I squeezed lemons for our first fresh pitcher of lemonade of the summer. My kids were quite impressed with this. I love the magic of the early years! My toddler daughter thought it was "magic!" My kindergartner thought I was kidding when I told him the lemons would turn into his favorite drink.

After the fruit was squeezed and the lemonade was chilling in the fridge, I decided now was the perfect time to pull out a craft to go with a cold drink. I quickly gathered supplies and had this ready to assemble in under 5 minutes.

Supplies needed:
2 pieces of construction paper in the shape of a glass
1/2 a sheet of white copy paper, cut into cubes
2 strips of paper cut to look like a straw
One cupcake liner, yellow, cut in half
A glue stick

When I called the kids for their snack and lemonade, I had laid out the supplies needed at their place of seating. I asked them to take a long look at their lemonade glasses and notice how the drink looked in the glass.

Next I asked the kids to glue ice cubes on their glasses.
They both thought 3 ice cubes were the ideal amount.
Then I had the kids glue on the half cupcake liner for their lemon.
Novel. Lemons are food, so this had both of my mini foodies intrigued.
Finally, I instructed them to include their straw shaped paper.


This was such an easy craft for the kids. It kept them entertained for long enough to cool off for a moment before rushing back out to play and it gave them a chance to try freshly squeezed lemonade in a calm and relaxed setting. With growing a growing boy, it seems like he gulps and dashes without ever really tasting anything... {wink}. The kids also concentrated on what their beverage looked like so they could create their craft for thinking skills in early learners.

It was cute to see the kids interpretation of what a glass of lemonade looks like too.

You might also enjoy this Paper Cookie Craft.


5 Factors to Consider When Choosing a Professional Moving Company


There is nothing as challenging as relocating to another house or office. It is quite stressful and frustrating gathering up all your stuff and moving to a new household. If not planned well, the move could result in a disaster. To save yourself from such hectic situations, you need to hire a good and affordableprofessional moving company to get the job done. Here are five things that will guide you to choose the right relocation company.


Check whether the company is licensed

Every professional moving company should be registered and fully certified to operate. A company that is certified should have a valid license showing they have the basic requirements to engage in the specific business. Involving unregistered companies to carry out the service is unlawful; the law may find it difficult and challenging to protect your rights when seeking justice in case of violation of the agreement.

Insurance

Make sure you check whether the company is insured. This is especially important if you are doing a long-distance move. This is because all your items will be covered against any damage or loss. Inquire what the insurance policy covers so that you can take up any additional indemnity to ensure that you are fully covered during the relocation process.

Check the technical capacity to render the services

As you plan to move, do not be in a rush and just pick any moving company in South Florida. Make sure you check their technical capacity to get the job done. The mover should be well equipped to move your valuable items. A professional moving company should be able to facilitate transportation of different types of items, be they fragile, delicate or heavy. The right mover should be able to understand different customer needs and exceed them for future engagement.

Look at the company’s service history

With the internet, you will get any information you want with just the press of a button. You can know more about moving companies and read lots of customer feedback regarding their services. You can gather as much information as you want to enable you to make the right decision. Dig deeper; contact people or businesses that were previously moved by the company you are considering. With the right information, you will be in better position to make the perfect move without regrets.

Get moving estimates

It is advisable to get several estimates from different moving companies and do a comparison. Every figure should be scrutinized and you should ask questions where necessary. You can go ahead and inquire about what would happen in case they cause any damages. Negotiate for better rates, especially if the one on paper seems high. These estimates are never final; adjustments can be made by engaging these companies.

A good mover should be able to offer alternative options to their customers in case they are undecided on how they want their situation handled. Good companies will give customers a perfect guide when offering relocation services. Next time you plan to move to a new household or office, consider using the above tips to get yourself a professional moving company and move without regrets.

Makeup for Busy Moms

This conversation has been sponsored, via product or payment but all opinions, chit chat and ideas are my own.


As a busy mom, sometimes I feel like I have to sacrifice sometimes. You know the joke, 'It's the house or me. We both can't look good at the same time.' That rings entirely too true in my life some days. As an example, last week when I attempted to style my hair my sweet little 2 year old climbed atop a counter and found a bottle of honey in a cabinet... I might have looked halfway human after 5 minutes with my curling wand, but my house was an entirely different and sticky situation.


When it comes to my makeup routine, time is always of the essence. With active little movers and shakers in the house and limited patience, I need products that make my skin look amazing without requiring a detailed regimen. I am kind of a wham, bam, thank you ma'am kind of woman. Not that I wouldn't love to devote 30 minutes to getting ready for the day, but life moves fast.

Mineral Hygienics is my go to makeup these days. Not only is it a matter of steps for a polished look, but geez you guys. Have you ever tried this stuff? It is incredible. Let me tell you why.


I have fair skin. I burn fairly easy for a few weeks in the spring and early summer, but then I am fortunate to develop a nice tan. However, it doesn't seem that I tan evenly. My high cheekbones generally catch all of the rays. My skin tone looks a little blotchy and uneven at times.

With 2 shades of Mineral Hygienics, I can even out my skin tone. I love that these are natural products and even better- for my high cheekbones- this makeup offers natural, chemical-free protection from the sun and those damaging rays!

After adding my foundation tones in the appropriate places, I follow up with a cool mineral enhancer, which adds a pop of pretty color to my cheeks. A quick brush with silk translucent and my face is silky, even looking and picture perfect.

Even on the busiest of days, this is a few moments I can spare for myself. As a mother, I feel it is important to look and feel confident. While sometimes it is nearly impossible to get yourself dressed and get your makeup on, it really makes a difference in how we feel as mothers. When I am dressed in a nice outfit and I get a little dolled up, my attitude is positively impacted. I feel like I can face the world.

If you are a busy woman, this is one makeup brand I insist you try. After receiving my starter kit, I tossed all of my other foundations. I finally found the perfect one for my skin.

Want to give this makeup a try? Why not apply coupon code SILLYSARA to your order?


Berry Vanilla Parfaits {Easy Patriotic Parfaits}

This easy recipe requires no baking and is a perfect sweet treat with berries, sponge cake and ice cream. So easy to assemble anyone can make this scrumptious dessert that combines 5 simple ingredients.


Unless you spend time in my company on holidays, you wouldn't know this secret fact me. On a holiday, I take a nap! I feel drained after all of the preparations usually and my husband is home on every holiday known to mankind, {hooray!} so there is an able bodied adult to keep our little ones happy.

On Memorial Day, I really wanted to have a nap. I shooed the family out the door for a round of frisbee golf and the house was quiet. As I looked around, I realized it was now or never. I attacked the closets, the massive amount of blankets and the aftermath of a what feels like a constant toy tornado with a vengeance. I folded laundry, sorted out items we no longer need for donation and tidied up my office/studio.

As I smiled and surveyed my impromptu cleaning spree I realized I had not made dessert, and my family had let me know several times they wanted cake. Luckily I had 3 slices of sponge cake left over from a recipe I made a few days prior and a few other simple ingredients on hand.


Ingredients
1 pint of strawberries, cleaned, destemmed sliced
1 pint of blackberries, cleaned
1/4 cup of white sugar
Vanilla Bean ice cream
3 x 2" thick slices of sponge cake, cut into 1" cubes
1/4 cup of water


Directions
Add your strawberry slices and blackberries together in a bowl
Add 1/4 cup of sugar and 1/4 cup of water. Gently stir.
Layer 3 or 4 cake cubes into a pretty glass or parfait bowl
Add 2 small scoops of ice cream {I used a cookie dough scoop for the perfect size}
Spoon berries and a little of the sugar water/ juice mixture over the cake cubes and ice cream
Add 2 more cake cubes to the glass
Serve immediately as the cake will get saturated with the liquid for a delicious flavor infusion
Repeat until the ingredients are depleted.

This recipe will serve 6.


This was the perfect easy patriotic parfait to make for Memorial Day. I will definitely be serving this to guests on the 4th of July and Labor Day as well! Actually, strike that, this is going to be one of those easy recipes for the hot summer months that I add into my rotation without a doubt!

What is your favorite no bake dessert recipe to serve in the summer months?

You might also enjoy this Fruity Waffle Recipe made with Gerber Baby Food.

Apple, Strawberry, Banana Baby Food Waffles #CookingwithGerber

This is a sponsored conversation, however, the chit chat, opinions, and recipes are all my own!

Moms, baby cereal is a part of life during the early years of a child's life. We have all mixed it with fruit, spooned it into mouths and cleaned it out of hair! But, did you know that even after your child is past the baby cereal stage, there is a good reason to keep it in the pantry! Gerber brand cereal also makes for an awesome baking substitution and there are so many ways to use it to add a little something special to your recipes!

There are 4 varieties of Gerber baby Cereal available at Wal-Mart stores; Oatmeal Cereal, Oatmeal & Banana Cereal, Lil' Bits Strawberry and Banana and MultiGrain. which are great for different stages of feeding baby and introducing textures. 


I have been around the block of picky eating a few times now, my daughter will eat anything and everything, my son, however, is incredibly picky. His famous line is "That makes me weird..." when he is offered almost any kind of food. He will eat waffles, pancakes, chicken and potatoes... you can imagine how I worry about his nutritional needs! At the age of 6 he is growing and developing. He is active and plays sports, the mom in me needs to know he is getting some essential nutrients in his selective eating phase.

Last week I whipped up a fantastic and easy recipe with Gerber Oatmeal and Banana Baby Cereal and Gerber baby food {apple strawberry banana stage 2}. This was so easy to make and my son had NO CLUE I slipped some added goodness into one of his favorite foods.


If you are looking for a healthy recipe with added nutrients that is an awesome and hearty breakfast in its own, you are going to love my recipe for Apple, Strawberry, Banana Baby Food Waffles!


Ingredients
2 cups of all-purpose baking mix
1 cup of Gerber Oatmeal and Banana Baby Cereal
1 container of Gerber Apple strawberry Banana 2nd foods
2 1/2 to 2 2/3 cup of milk
1 banana sliced finely
1 egg

Directions
Add baking mix, Gerber baby cereal, egg and banana together, lightly stir to smash the banana.
Add the apple, strawberry, banana baby food to the mixture, stir lightly
Begin to gradually combine the milk and the waffle mix. When you reach the desired consistency, stir the batter well to smash up any larger chunks of banana.
Add to your waffle iron and cook until done.
Serve warm with syrup or sliced fruit.

My son really loved these fruity waffles. The fruit flavor was not overpowering which is awesome for parents of picky eaters! If your child likes fruit, you could reduce the milk by 6 ounces and add an additional container of baby fruit food.

How do you use Gerber Baby Food? Have you ever added it to a recipe? I would love to hear about your experiences with Gerber Cereal.

You guys, I want to inspire you to create a great recipe with Gerber Cereal!! Would a $50 prepaid credit card help inspire you to pick up a package of Gerber Cereal at Walmart and make a yummy recipe? If so, enter for your chance to win! This giveaway is not endorsed by facebook or any 3rd party applications or other social media channels! The sponsor will deliver the prize to the winner, who must be 18+ and live in the USA.


Adding Dreaminess With My Wonderful Walls

We moved 53 weeks ago. That is one year plus one week of time. In a way, it seems like it was not that long ago but then again... it feels like we have been here forever. Funny how that works out. The house is an old charmer for sure. It has its own quirks, conveniences, and irritations. Mostly, the place feels like home. Then we get to the master bedroom...

You guys, this is horrible to admit on some level, but the master bedroom was completely ignored. Like, people may use this room... but I can't be certain as it is like... empty! Like I mentioned above, the house has quirks and conveniences, but it also has one massive inconvenience. The stairs twist in 2 spots, this makes taking basically anything up the stairs impossible. On moving day, we realized that getting our mattress up the stairs and twisted to go around the corners was quite a feat. Nothing else was going to go up there... my bedroom furniture was destined to sit in the shed.

Life moves fast... so fast. Finally, one cold winter day I walked in that room and said "Are we college kids, forced to sleep on the floor?! Why have we never dealt with this bedroom situation!?"

The project began, some artwork was brought in, a small dresser was purchased. A bed in a box type of contraption was purchased and brought in. It was starting to look like an actual bedroom. But, it really lacked something.

This is where My Wonderful Walls comes into my story.

I didn't want to do anything permanent to the room, as I am trying to convince my family that my daughter should trade rooms with my husband and I. But, I really wanted to add something to the room while we are using it. My Wonderful Walls happens to offer an impressive selection of decals for your walls that are perfect for what I wanted to do.

The hardest part about adding to my wall decor with this company was this... How do you decide when there are so many cute, fun and gorgeous options?! Really! I finally made use of my best gal pal and ran my favorites by her. We both seemed to have fun with the selection process.

In the end, I decided on a constellation scene, Scorpio and the Blue Ridge. It was absolutely perfect for adding a dreamy touch to a bedroom! The decal arrived quickly and securely shipped in a sturdy tube {this is so important as I have ordered a decal from another site in the past that arrived folded and unusable as it never flattened out properly...} I unrolled it, oohed and ahhed and hopped on to the next moment in this busy life.

This is what it looked like on the site.


A few moments later, my husband asked me to have a look. I couldn't believe he already had it up! It looks fantastic in our bedroom and would look great in a living room, maybe behind a sofa as well! My son suggested putting one on a ceiling too!

Mr. Sweet Silly Sara informed me that the decal was incredibly easy to apply to the wall and that it was practically effortless because of the shape and size of the decal.  {We got the large size.}

This is what it looks like on a wall in my home.


Overall, I couldn't have asked for a better experience with this company. They make great products to bring  new life to any space. Many years ago we featured a canvas print over here and it is still looking fabulous on the wall of my sons room! I know that this decal will be a part of the atmosphere of our bedroom for many years to come. It is so peaceful and pretty I can't imagine anyone ever wanting to take it down. However, should you change your mind about a decal from My wonderful Walls, rest assured these can be removed without damaging the wall, and with little effort.

If you want to add some awesome to your walls, you will not want to miss this giveaway! My Wonderful Walls has graciously offered to give one incredibly lucky reader a $100 gift certificate to the site! This giveaway is not endorsed or affiliated with facebook or any social media site or application. The prize is to be delivered from the sponsor. The giveaway is open to US residents, 18 and older.


a Rafflecopter giveaway

Zesty Pickle Dip

Samples were provided to inspire this recipe.

This Zesty Pickle Dip recipe combines cream cheese goodness and a kick of mouthwatering pickle flavor into one easy to make and even easier to eat dip! Serving alongside John Wm. Macy's Sesame Gruyere Cheese Crisp is the perfect choice for this addictive dip!


My family is busy as the school year comes to a close. My husband is wrapping up the year and busier than ever as students return their books and devices. My son has games, practices, lessons and parties to attend. My daughter and I are trying to get ready for having the guys home with us for a few months, taking in the sunshine and spending extra time at the park. In the afternoon before the rush to a game or practice begins, we all need a snack to hold us over until dinner time!

Last week I surveyed my refrigerator and pulled out 2 simple ingredients to make one unforgettable dip. If you like creamy dips or pickles you have to try this. There is so delicious no one will believe it took you less than one minutes time to prepare!

I served Zesty Pickle Dip with John Wm Macy's Sesame Gruyere Cheese Crisps for an incredible flavor. It took the yum of the dip to a new level of bliss with the perfect crispy crunch! It was devoured in an instant. I honestly had to grab a small dish and run away to snap a few shots. My bunch liked this dip that much!


print recipe

Zesty Pickle Dip
A creamy dip with lots of pickle flavor!
Ingredients
  • 6 ounce package cream cheese, softened
  • 2 tablespoons zesty pickle relish
Instructions
Combine softened cream cheese and pickle relish.
With a fork, mix the 2 ingredients together for about 30 seconds or until well blended.Serve with crackers, chips or bread.
Details
Prep time: Cook time: Total time:


This Guide Will Help You To make The Most of Your Time In Costa Rica

If you’re traveling to Costa Rica in the near future, you’re going to want to make sure you make the most of your time there. This post aims to give you a few useful tips so that you can have one of the most unique and amazing experiences imaginable. Enjoy!


Start Being More Positive
If you have an upcoming trip to Costa Rica, one of the best things you’ll do is start being more positive right away. Why? Well aside from the fact you have an incredible experience coming up, Costa Rica is one of the happiest places in the world. Some even consider it to be the happiest! The people are super friendly and will smile at you, so be prepared to smile back. The happiness is usually infectious.


Consider Volunteering
Costa Rica is one of the most incredible places to volunteer. Not only will you become close to members of the community, you’ll be able to make a real difference. You just can’t beat that feeling! Volunteer in Costa Rica if you want to have a go at tree planting, help endangered red monkeys, or teach English. If you want more, there’s too much to name here. You can even head over and then decide once you’ve arrived.


Book A Beach Or Tree House
If you have the cash and want to enjoy a day or two pf pure luxury, book a tree or beach house. You will overlook the jungle, or some other spot of gorgeous scenery. It’s not something you forget in a hurry! You can enjoy a luxurious space, and plenty of privacy too. That is apart from the visitors you’ll get from time to time. Monkeys turning up unannounced!


6873800332_b3dc92e7f7_z.jpg


Use Public Transport
Make sure you use public transport here. It is much more affordable and run fairly regularly, so you can get to where you want to go quickly. It’s better to have an experienced local taking you where you want to go. Plus, the last thing you want to do is drive when you’re supposed to be enjoying yourself!


Shop At Local Markets
Check out the local markets for unique finds and fresh food. Cook with your fresh local produce at home if you do rent somewhere nice and private.


Make Sure You Don’t Miss The National Parks
There are 32 national parks in total. Here, you can enjoy wildlife, sloths bats, butterflies and more. There are even falcons, tropical land crabs, and racoons.


Spend Some Time Relaxing on The Beach
There are a number of incredible beaches in Costa Rica, and many things you can do on them. You could catch a tan, play frisbee, ride a horse, read a book, watch the sunset, or take a surf lesson at one of the amazing surf schools. Maybe you could pick up a new skill while you’re here.


Don’t Stress
Don’t stress here. Don’t try to cram too much in. Simply go with the flow and enjoy yourself. Costa Rica is all about staying happy and relaxed!

Brown Sugar Cream Cheese Dip


There is something about Brown Sugar that has completely stolen my heart over the past few months. It adds so much depth to recipes. When it is added to cream cheese? Watch out! Yummy stuff right!?

Roo is a busy boy in the spring. He has multiple sports which keep us running to soccer and t ball several nights a week for a few weeks as the end of soccer overlaps with the beginning of t ball. I always try to have a snack ready when Roo gets home to hold him over until we make it back home for dinner. A few weeks ago, I tossed some soft pretzel bites in the oven when an idea hit me. This idea turned out to be the yummiest thing to happen in terms of dipping for a long time!


print recipe

Brown Sugar Cream Cheese Dip
A sweet, creamy dip that is perfect for soft pretzels, cookies and crackers!
Ingredients
  • 6 ounces Cream Cheese
  • 2 ounces Water
  • 2 tablespoons Brown Sugar
Instructions
Add 2 ounces of water and 6 ounces of cream cheese to a small sauce pan, heat until thoroughly heated and well blended.
Pour into a serving dish and top with brown sugar.Serve with cookies, crackers, soft pretzels, or bread.
Details
Prep time: Cook time: Total time:
It is every bit as yummy as it looks! It is so easy to make and will be perfect for serving at parties! I think this would be great with bread too!

What is your favorite dip? Tell me all about it in a comment.
You might also enjoy this Easy Cheesy Chicken Taco recipe.

A Pretty Pair of Panties Delivered to Your Door With Panty by Post

Thanks to my friends at Panty by Post for providing me with a sample to inspire this post.

Ladies, I know I am not the only one that sometimes puts my own needs last. Between working, managing our homes, the busy season of raising kids and being a good partner... seriously. Sometimes, the efforts I put into everything leave me drained. I might look halfway presentable at any given moment but under that untucked mom shirt and a skirt or leggings... my poor husband. It is almost always some good old mom panties, you know, the kind you buy in a 5 pack at the grocery store. Not at all glamorous. 

Do you end up rocking those kind of panties too? It seems like once a week I think, Sara, girl buy some panties. Buy something that is pretty, something that has been missing from your wardrobe since you became a mom... but like I mentioned earlier, life moves fast and that to do list gets longer and longer. Making a trip to the mall for something I desire? Please. I will always desire time at home more than time at the mall. 

I found a service that is a ton of fun and is helping me stock my panty drawer with so not my normal mom style panties!

Panty by Post is a 3, 6 or 12 month subscription service that delivers a great pair of panties to your door each month. With feminine styles and several levels of subscription to meet your panty style wishes, this is something you really want to try! It is a nice way to try new styles, to get something awesome delivered to you and to avoid a trip to the mall!

This is a great idea for a gift for a special lady or a fantastic treat for yourself. Because we are friends, you can tell Panty by Post I sent you when you subscribe and use this code IMNEW15 at checkout to save $15 on your subscription!


I got a really great bordeaux thong from the Signature Line. It is really comfortable, feminine and stylish. It is kinda crazy, but girls, when I started rocking some not my normal mom undies, I felt incredible! My confidence level seemed to improve.

Overall, Panty By Post rocks. This is a cool service that I think you will like as much as I did!

Making Sandwiches with Harper {Kids Craft}

A few days ago, Little Miss Harper wanted to help me make lunch. I love her eagerness to help and her interest in learning. But, on this particular day, I wanted to keep her busy and out of the kitchen, as I was in the middle of a project.

I asked her if she wanted to make paper sandwiches while I made lunch, it sounded appealing to her! I had a collection of paper sandwich fixings ready for an occasion like this. I found a yellow glue stick to imitate mustard. Harper was all set to make sandwiches!

To prepare for this activity I had previously cut the following shapes from construction paper

bread shapes  white paper
red circles for tomatoes
squiggly green leaves for lettuce
yellow squares for cheese
brown circles for meat

You will need a glue stick. Red or Yellow is fun with this paper food craft, like ketchup and mustard!


As you can see, this activity is completely basic. Construction paper and glue. I offered Harper ample supplies for building sandwiches. To keep her busy and having a lot of fun!


She began by adding mustard to the bread and adding tomatoes.


Next up was cheese! 


Harper was completely into this craft. She loved making sandwiches. She added layer upon layer, happily crafting while I made lunch!


My kids both love a good paper food craft! If I find myself with a few extra moments and a pack of construction paper I make little craft bags for occasions like this day.  They are always a huge hit with my kids. They have enjoyed making paper cookies, paper pizzas and paper jam sandwiches. These are the best kind of kid food crafts in my opinion because they are virtually mess free and they are really a lot of fun!

Fun With the Kids: The Rennaissance Teddy Bear concert Series

My family is always looking for something fun to do with the kids! Lucky for us, we live in Ohio! There are so many things to do in this state! From parks and museums; to the Lake {We have some major #LakeErieLove in this family!}; to the events that are ideal for families!

Next weekend on April 3rd we will be heading to the Renaissance in historic downtown Mansfield to see a really adorable performance with Roo and Harper! They are so excited about the Teddy Bear Concert: The Emperors New Clothes. Let me tell you a little more about this performance and why you are going to want to head into Mansfield for the event!


This show is a part of the Mechanics Bank Education Series. It is the perfect way to introduce your kids to theater and live performances. This performance will feature a woodwind trio playing popular and classical selections along with an interactive puppet retelling of the Emperor's New Clothes with actors Maddie Beer and Colton Penwell. My kids are incredibly excited! 

The show begins at 2:30 pm on Sunday, April 3rd. Of course, doors open an hour before the start of the show. If you are worried about price, don't be! This show is incredibly affordable! Tickets start at $10. 

Have you ever taken your kids to a play? How did it go? We have taken Rolf to a few when he was a toddler. He did really well with sitting and watching! Harper has not been to the theater yet, but I anticipate that she is going to love the Teddy Bear Concert! 


Goodnight Kiss Cocktail Recipe

This post contains affiliate links, if you click a link, I could get a peanut! 

Gin is my favorite spirit to drink! I love the flavor that is reminiscent of a Christmas Tree; I love the warm and fuzzy feeling it always gives me! I love to mix it and create new cocktails. Every weekend I mix up something a little different from the weekend before and it dawned on me... why am I not sharing these awesome recipes with you guys?!

This weekend, I made something so fantastic that it earned a name within moments of consuming it! If you like a sour drink, you are going to love the Goodnight Kiss. This drink combines Sparkling Pink Lemonade , concentrated sweetened Lime Juice and gin to bring a delicious drink that will make you pucker up, just like you are ready for a Goodnight Kiss!


Ingredients:
2 shots of extra dry gin
1 ounce of sweetened lime juice concentrate
4 ounces of sparkling pink lemonade
2 orange slices
1 maraschino cherry
1/4 teaspoon of sugar
Ice

Directions:
Place ice to your liking in a glass.
Place the orange slices and maraschino cherry on the ice
Add sweetened lime juice
Add sugar
Give the drink a gentle stir
Add Sparkling Pink Lemonade
Add the gin

This drink is great. It is kind of like those sour then sweet candies for kids. The first few sips, your lips pucker from the lime juice. After a few sips, it becomes sweeter. {Likely from the gin taking hold!} It is a lot of fun to drink!


Do yourself a favor. Resist the urge to eat the fruit right away. Let it soak in some of the gin! After a few moments, eat the fruit for a delicious fruity booze treat! I usually wait until the drink is drunk to nibble the fruit, always saying "This is the way to enjoy gin..."

You might also enjoy this Boozy Slushie recipe!

What is your favorite way to drink gin?

How To Remove Cat Urine From Carpet

There is nothing quite like the smell of cat pee on your carpet to really put a damper on the day. While we don't want to admit it, life with pets leads to a few messes here and there. Cat pee can be such a hard odor to get rid of, especially on carpet! It also seems that once your cat has an accident on the carpet, that spot is going to become a frequent place for future accidents if not treated.

My cat has had several accidents over the years. I have tried several methods to remove the odors and the germs! From specialty products sold in pet stores to natural remedies. I have had a variety of results as you can imagine. It seems that the products that work the best require the most work. Then one day, I had an idea and I tried it... Luckily it worked! I can't wait to share this easy DIY solution to pet odors that not only kills bacteria and germs but also has a pleasant smell!

Best of all- this is a DIY solution for pet odors like cat pee that will only cost you $2 to create. You may already have all of the supplies on hand for a frugal and fast fix to pet accidents!

The first step to take when your pet has an accident is to clean up as much of the urine as possible with paper towels. Blot it up as soon as possible until your paper towel is dry after blotting! This will make the job so much easier.

If you have a newspaper around lay it on top of the area where the accident occurred. The newspaper will absorb some of the odor.


Affiliate links are used!


Next, you need an empty spray bottle and mouthwash.

Pour mouthwash into your clean and empty spray bottle.


Simply spray this over the area that the accident occurred. Spray the area down until it is damp.


And there you have it. A simple DIY Cat Urine Remover that is super easy to make and use. The mouthwash will kill bacteria and leave a pleasant smell. As you can see I used mint, because that is what my local Dollar Tree had in stock.

How do you deal with the mess and smell when an accident happens? 


Snickerdoodle Cake

Today I am sharing one of my favorite recipes with you. Usually, you bake a cake for a special occasion, but in the case of this recipe, the cake becomes the occasion! The recipe was inspired by a classic cookie that just about everyone loves and this cake is just as fantastic. Best of all, this Snickerdoodle Cake is easy to prepare from scratch!


This cake is gorgeous after baking and I always hesitate to cut it into slices for just about a nanosecond! But it smells divine and it has so much flavor that there is no way to not devour it! This picture does not do it justice, really! But, guys, this is the best I have for you as the cake was devoured in a flash! My husband could be heard groaning in delight. My children could not rest at the thought of this cake!

This post contains affiliate links.

Ingredients for Snickerdoodle Cake
2 cups of white sugar
2 1/2 cups of all purpose flour
2 teaspoons of baking powder
1/2 teaspoon of salt
2 teaspoons of cinnamon
1/2 cup of butter flavored shortening {I used Crisco}
2 eggs
1 cup of milk
1 teaspoon of pure vanilla extract

Cake Topping Ingredients
2 tablespoons of white sugar
2 teaspoons of ground cinnamon


Directions
Preheat oven to 375 degrees

Spray a cake pan (13x9 or a bundt pan) with cooking spray

In a medium sized bowl mix the flour, salt, cinammon and baking powder together, set aside

Cream together shortening and sugar until fluffy

Add eggs one at a time, mixing well

Add 1/3 of flour mixture and 1/3 a cup of milk, mixing well and repeating until all ingredients are combined

Pour cake batter into prepared pan

Combine the Cake Topping Ingredients and sprinkle over the batter 

Place in the preheated oven to bake for 35-40 minutes or until baked. 

This cake is incredible with or without frosting! I top it with my Cinnamon Buttercream Frosting. It is a huge hit with everyone that tastes it. The cake is kind of heavy, there is a simple and scrumptious flavor to it, and everyone will ask for your recipe!

What is your favorite kind of cake? I would love to hear about it in a comment!

You might also like this rice pudding recipe


Blueberry Chia Breakfast Bowl

We all know Breakfast is a meal not to be missed, but come on guys! I cannot get excited about eating a bowl of cold cereal from a box for breakfast... now at snack time some cereal is my go-to, but for breakfast? Give me something healthy, delicious and it has to have some visual appeal too!

This Blueberry Chia Breakfast Bowl is the way to go for a start to your day that is almost too pretty to eat and that is so delicious you just might hop out of bed at the thought of it!


Ingredients

  • 2 cups fresh or frozen blueberries
  • 2/3 cup low fat milk
  • 2 tablespoons maple syrup
  • 1 banana, peeled
  • 1/3 cup quick-cooking oatmeal
  • 1/4 cup chia seeds

Instructions

  1. In a blender or food processor combine blueberries, milk, maple syrup and banana; blend until smooth.
  2. Divide mixture among two serving bowls.  Stir in oatmeal and chia seeds.
  3. Refrigerate for 30 minutes to thicken.
Serve with your favorite yogurt and sprinkle with more blueberries
Number of servings (yield): 2

Have you ever had a breakfast bowl like this Blueberry Chia Breakfast Bowl? This one is nothing short of incredible. I love that it is packed full of fruit and oats and that it can even be made the night before for a super easy start to the day!

Thanks to my friends over at the Blueberry Council for inspiring this post!

Upcycle Coffee Can Project

I have a big serious love of contact paper! You guys! This stuff is amazing! I have to stop myself when I get on a kick to buy contact paper because I want it ALL! I see different colors and prints and I think about all of the possibilities of projects I could work on.

You might remember that I made a DIY Blanket Box for under my daughter's crib a few months ago. That got me on a contact paper craft craze! Nothing was safe from my stash of contact paper! I created a few decorative containers that can be used for so many things!

I used mine to store markers in, as well as a really cute and simple way to organize kitchen things like wooden spoons and glass straws.

Materials needed to Upcycle a Coffee Can into a decorative storage container:
Contact Paper in your choice of prints.
Scissors
A clean coffee can or two
A utility knife


This project was so easy to do!

First, clean the interior of the coffee can to be sure there are not coffee grounds there!

Next make a measurement on how long and wide to cut your paper based on the size of the can. This is what I love about contact paper... it is so easy to measure, cut and work with!

Peel a small strip of the backing off of the contact paper and place it on your coffee can. Slowly, peel the paper back while smooting the adhesive paper to the surface.


As you cover the can, you are likely to have a little excess around the rims. No biggie, this is so easily remedied! You can use your utility knife to trim around the rims really easily! Just be careful, as those things are crazy sharp!

Everyone that sees my upcycled coffee can says "Where did you get them?" They are really cute, they used to match my kitchen perfectly before our move, and they have been surprisingly easy to keep clean {use a baby wipe}!

This upcycle project really didn't cost me anything to complete as I had materials on hand already, but I would say a thrifty shopper could find contact paper at Dollar Tree and make 4 of these {estimate} for $1.


Do you ever reuse a coffee can? I would love to hear how!