DIY Mermaid Stress Balls

Vegan Summer Side Dishes
Summer is near, and I have gathered some of my favorite vegan side dishes to share with you. These are easy, healthy and are made with loads of fresh summer veggies. I know you are going to love a few of these tasty side options, if you are eating vegan or not!
I am not completely vegan, or vegetarian. I just rarely eat meat these days. I like it! But, the rising costs of groceries keeps me from buying it often. Adam and I are totally fine with meatless meals, Harper never eats meat unless it is in a taco. Rolf is our resident carnivore. So, these side dishes are perfect for our family.
- Vegan Waldorf Salad by Happy Kitchen
Lentil Quinoa Salad by Green Bowl 2 Soul
Mexican Pinwheels by Sprinkles and Sprouts
Baba Ganosh by The Lazy Slow Cooker
Vegan Pasta Salad by Nourish Plate
Four Bean Salad by Aussie Home Cook
Avocado Bean Dip by Sungrown Kitchen
Summer Rolls by Drive Me Hungry
Vegan Jalapeno Poppers by Food Sharing Vegan
Sweet Potato Salad by Plant Based on a Budget
Jackfruit Tuna Salad by LB Health and Lifestyle
Black Chickpeas by Tips and Recipes
Fire Roasted Corn Salsa by The Helpful GF
Vegan Pasta Salad by Strength and Sunshine
Dive into Fun with a Kid-Made Fish Tank!
Calling all creative captains! Are you ready to set sail for an ocean of imagination? Today, we're building a cute little fish tank, and the best part is, there are no limits to what your little ones can create!
This exciting craft is perfect for a rainy day or a dose of undersea whimsy. It's easy to customize and allows kids to explore their artistic talents while learning about the fascinating world of fish.
This project is perfect for a rainy day. It uses simple supplies and is so much fun to add your own touches. Kids will love making their own little friend, and taking it everywhere!
Supplies:
Small jar with lid (I used the button jars from Dollar Tree)
Several buttons
A 6” section of string
Glue
Tape
Scissors
Googly eyes
Paint samples
Directions:
Fold a paint sample in half
Cut the paint sample in the shape of a fish so that you have 2 fish.
Place glue on the backs of the fish.
Place the string so that it is in the center of the fish when they are placed on top of each other.
Glue on the eyes.
Tape the string to the inside of the lid of the jar.
Place a few buttons inside the jar.
- Get down to their level: Sit on the floor with your child and participate in the activity. Show them your own excitement and creativity!
- Focus on the process, not the product: The joy of crafting comes from creating together, not achieving perfection.
- Let them take the lead: Encourage their creativity and allow them to make choices. Their unique ideas are what makes their crafts special!
Setting the Stage for Success:
- Prepare your workspace: Cover the table with newspaper or a tablecloth for easy cleanup. Have all materials within reach to avoid frustration.
- Embrace the mess: Crafting can get messy, and that's perfectly okay! Lay down a tarp outdoors for messy activities or use a large plastic bin for easy containment.
- Safety first: Be mindful of your child's age and choose age-appropriate materials. Adult supervision is always recommended for younger children, especially with scissors or glue.
Best Boba Recipes
My 9 year old, Harper, has developed an obsession with boba. She bats her big blue eyes at me and says "Mommy, let's go out for a tea..." almost everyday. It is so funny that I have this little bestie who thinks I am rich. To keep her happy and getting her boba fix at least once a week, we have been making some fun recipes at home. If you are wanting to save some cash and still have a treat, like us, you are going to love this list of the best boba recipes to make at home.
Before we get into this, can you believe Harper is 9 and a half already? It seems like just a few months ago that so many of my friends were chipping in to write posts for my blog so I could bask in the wonder of our new baby Harper. Now here she is, a full blown tween with a boba tea habit.
.png) |
| Photo Credit: Sara Lehman and various artists. |
Jasmine Milk Tea Boba by Greedy Girl Gourmet
Lychee Milk Tea Boba by My Vegan Minimalism
Hokkaido Milk Tea by Aubrey’s Kitchen
Vegan Boba Cake by Rainbow Nourishments
Homemade Black Boba Pearls by Delightful Plate
Fruity Bubble Tea by Kids Activities Blog
 |
| The Devil Wears Salad. |
Watermelon Fruit Salad with Brown Sugar Boba by The Devil Wears Salad
Strawberry Milk Tea by Moon and Spoon and Yum
Brown Sugar Boba Ice Cream Bars by The Oregon Dietitian
 |
| Photo Credit: White Kitchen Red Wine. |
Strawberry Milk Tea by White Kitchen Red Wine
Taro Bubble Tea by The Oregon Dietitian
Chocolate Milk Bubble Tea by The Littlest Crumb
 |
| Photo Credit: Entirely Elizabeth. |
Earl Grey Milk Tea by Entirely Elizabeth
Iced Boba Coffee by Recipes from a Pantry
Vegan Bubble Tea by Plant Based on a Budget
With so many tasty bubble tea recipes, the hardest part of getting your boba fix will be deciding which of these recipes to make first. Happy sipping!
You can find some of my favorite drink recipes here
Sour Apple Margaritas
Hillbilly Cider
Bomb Pop Cocktails
Blueberry Lime Vodka Sorbet
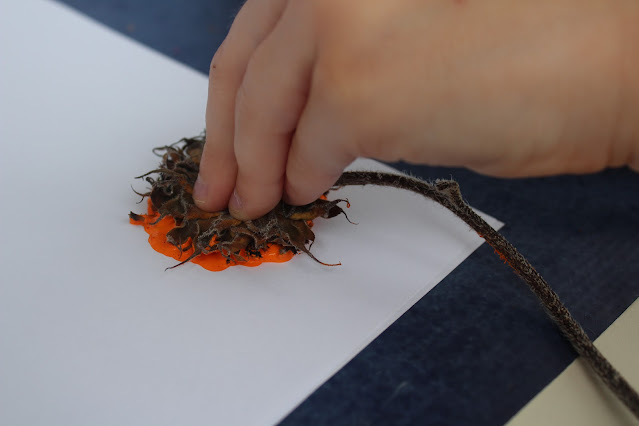
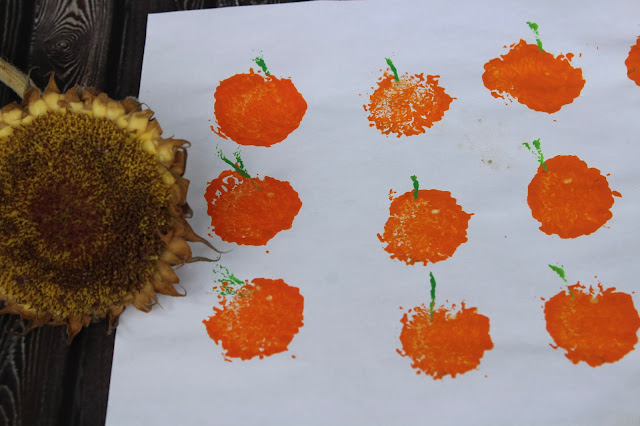
Sunflower Stamped Pumpkin Patch Art
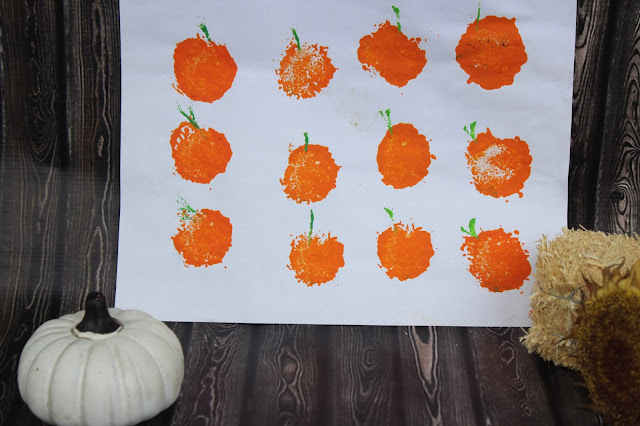
This adorable pumpkin patch art is great for kids of all ages! Made with simple supplies like paint, paper and a sunflower head, this is a great way to create art using nature!
Supplies:
Orange paint
Green paint
A sunflower head
White paper
A paper plate
Pour orange paint and a small amount of green paint onto a paper plate.
Encourage your child to press the sunflower onto the paper.
Allow the paint to dry, then
I hope you get a chance to try this project with your family, it is the perfect project for a fall afternoon!
Find more fall ideas here.
Lego Stamped Pumpkin Art
Harper and I love to paint with, well, anything but a paint brush! Last week she came home from school and asked me if I wanted to make something with paint, and how could I resist the invitation? This lego pumpkin idea was just the thing. It pairs cute and creepy together just right.
This is such an easy activity, and it is fun for kids of all ages! Even Rolf, who is 12 now, was curious about this and told us it was a "cool idea" before dashing back to his busy preteen activities.
Directions:
Pour a small amount of orange, black and green paint onto a paper plate.
Offer your child legos in assorted sizes and paper.
Encourage your child to dip a lego into the orange paint and make the shape of a pumpkin.
When you have filled in the shape of the pumpkin, dip a lego into the black paint and make a face.
You can find all of my Halloween crafts here
Painting projects here:
Reader favorites include:
Hungry Caterpillar Process Art
Pineapple Process Art
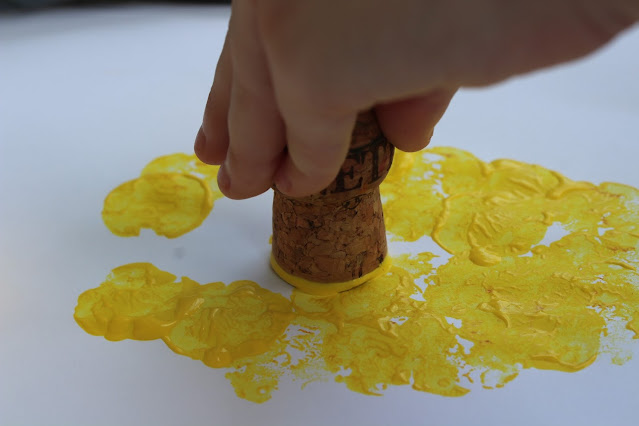
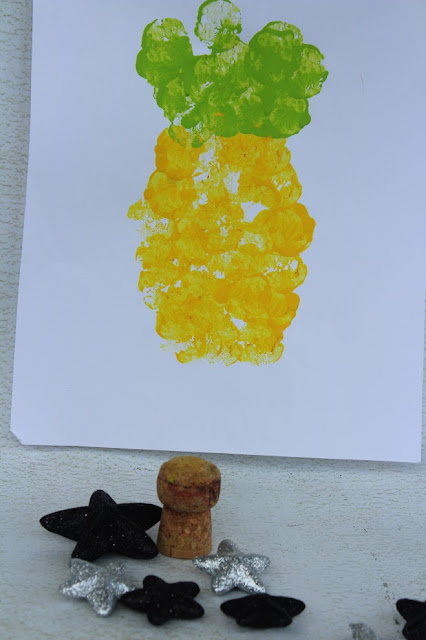
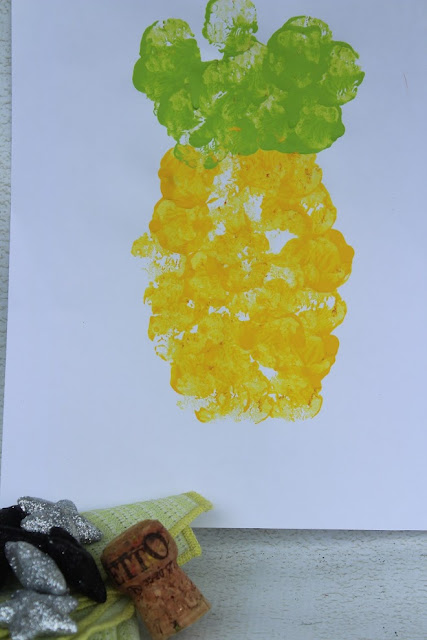
This pineapple painting project is perfect for little ones. It takes only a moment of set up and it creates such a cute art project! Kids are going to be so proud of their efforts and want to display this project on the fridge door gallery!
Supplies:
Paper Plate
Yellow and Green Paint
A Cork
Copy Paper
Pour a quarter size drop of several shades of yellow and a shade of green onto a paper plate.
You can find more process art ideas here
If you want to learn more about why process art is important for kids this is a great resource from Messy Little Monster


%20(2).png)




.jpg)


.jpg)


