Showing posts sorted by relevance for query paper plate. Sort by date Show all posts

Lego Stamped Pumpkin Art

 Harper and I love to paint with, well, anything but a paint brush! Last week she came home from school and asked me if I wanted to make something with paint, and how could I resist the invitation? This lego pumpkin idea was just the thing. It pairs cute and creepy together just right.


This is such an easy activity, and it is fun for kids of all ages! Even Rolf, who is 12 now, was curious about this and told us it was a "cool idea" before dashing back to his busy preteen activities. 


Supplies:
Orange Paint
Black Paint
Green Paint
Legos
Paper Plate
Paper


Directions:

Pour a small amount of orange, black and green paint onto a paper plate.

Offer your child legos in assorted sizes and paper.

Encourage your child to dip a lego into the orange paint and make the shape of a pumpkin.


Now, fill that shape in with more lego stamps.


When you have filled in the shape of the pumpkin, dip a lego into the black paint and make a face.


Next, give your pumpkin a stem with the green paint.
Allow to dry and display.


These were a really fun, kid led Halloween craft. I know your kids will love making pumpkin art this way.


You can find all of my Halloween crafts here

Painting projects here:

Reader favorites include:

Pumpkin Window Clings

Ghost Play Dough Ornaments

Fantastic Flower Crafts for Spring


Bloom Where You're Planted: Unleash Your Creativity with Flower Crafts!

Flowers bring color, joy, and a touch of nature's beauty into our lives. But their magic extends far beyond the vase! Today, we're celebrating the art of flower crafts, a vibrant world where creativity blossoms alongside blooming details.

Whether you're a seasoned crafter or just starting your artistic journey, flower crafts offer something for everyone. From simple projects perfect for little hands to intricate designs that challenge experienced makers, the possibilities are endless.


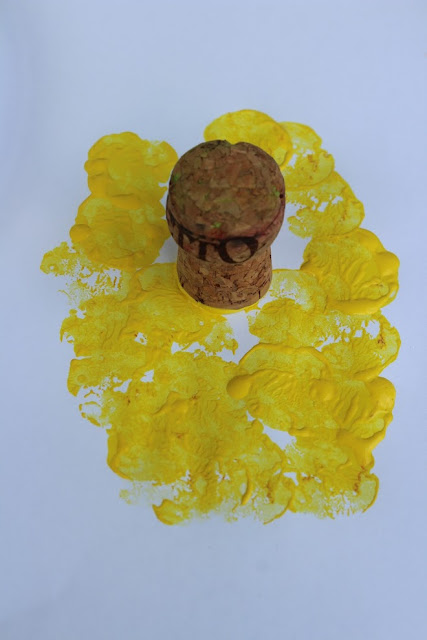
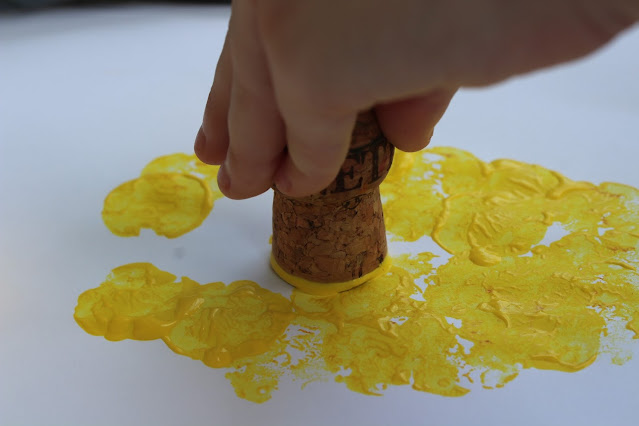
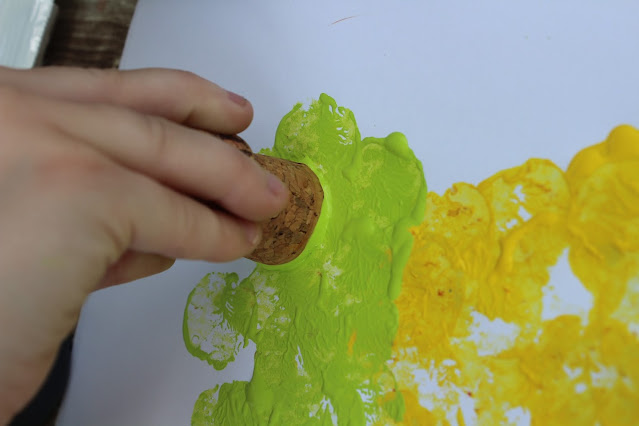
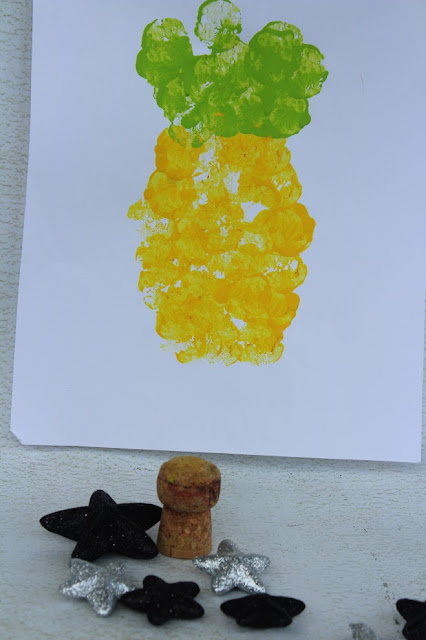
We love crafting flowers. Here are a few of my favorite projects from over the years.

3d Tulips

Ten Cute Tulip Projects

Play Doh Cactus

Sock Roses


Here are just a few reasons to embrace the world of flower crafts:

  • Unleash your inner artist: Flower crafts are a beautiful canvas for expressing your creativity. Experiment with different colors, textures, and materials to bring your unique vision to life.
  • Embrace mindfulness: Crafting can be a wonderful way to unwind and de-stress. The repetitive motions and focus required in many flower crafts can be a form of meditation, allowing you to find peace and tranquility in the creative process.
  • Spread the joy of handmade: Handmade gifts hold a special place in our hearts. Whether you're crafting a vibrant bouquet for a loved one or decorating your home with blooming creations, flower crafts are a thoughtful and heartfelt way to share your creativity with others.
  • Upcycle and repurpose: Give new life to everyday objects! From using leftover fabric scraps to crafting with recycled materials like cardboard tubes, flower crafts encourage resourcefulness and sustainability practices.
  • Bond with loved ones: Crafting is a wonderful activity to share with friends and family. Get together for a crafting session, teach younger generations the joys of handmade creations, and create lasting memories together.

So, gather your supplies, let your imagination bloom, and dive into the world of flower crafts! With a little creativity and these timeless projects, you can bring a touch of floral flair to your life and the lives of those around you.

Ready to get started? Explore these links, from some of my favorite bloggers for a vast array of flower craft tutorials, or simply grab your favorite crafting materials and let your creativity bloom!


 Paper Roses by Crafting Jeannie

Flower Garden Sensory Bin by Sweet Silly Sara

Tissue Paper and Twig Flowers by Barley and Birch

Paper Plate Sunflowers by The Printables Fairy


Felt Roses by Two Kids and a Coupon

Button Flower Pins by Artsy Fartsy Mama

Fingerprint Flower Pots by Crafts by Amanda

Pressed Wildflower Bookmarks by An Off Grid Life

Water Bottle Flowers by Kid Friendly Things to Do

Paper and Seed Sunflowers by Easy Crafts for Kids


3d Pop Up Flower Cards by Mommy Made That

Paper Sunflowers by The Inspiration Edit 

Handprint Flowers by Little Ladoo

Flower Handprint Card by Simple Everyday Mom 

Pressed Flower Suncatchers by In the Playroom

Cupcake Liner Flowers by A Little Pinch of Perfect

Tissue Paper Flowers by Mom Wife Busy Life 

Egg Carton Flowers by The Boondocks

Mini Flower Wreath by Sustain My Craft Habit


Fun and Creative Kids Activity: Stamping Bunches of Grapes Process Art

 Looking for a fun and creative kids activity that is both educational and festive? Look no further than stamping bunches of grapes with pencil erasers and wine corks! This activity is perfect for kids of all ages, and it can be enjoyed indoors or outdoors.


We love to paint with all kinds of things! From wine corks, to dried flower heads, and everything in between. This easy painting project is perfect for kids of all ages. Little ones will love working on a few bunches or grapes, while tweens and teens can create more elaborate works of art.

What is Process Art for Kids

Process art for kids is a type of art where the focus is on the process of creating the art, rather than the finished product. This type of art is often open-ended and allows kids to be creative and expressive. There are many different types of process art that kids can do, such as:

  • Painting
  • Drawing
  • Collage
  • Sculpture
  • Performance art
  • Installation art

Process art is a great way for kids to explore their creativity and to learn about different art materials and techniques. It can also help them to develop their fine motor skills and their problem-solving skills.

Here are some tips for doing process art with kids:

  • Provide a variety of art materials and let kids explore them.
  • Don't be afraid to get messy!
  • Encourage kids to be creative and expressive.
  • Don't judge their art.
  • Celebrate their creativity.

Process art can be a lot of fun for kids. It's a great way for them to express themselves and to learn about art. So get creative and let your kids explore the world of process art!


Supplies:

  • Purple Paint
  • Green Paint
  • A paper plate
  • A pencil eraser
  • A wine cork
  • White paper


Begin by stamping one purple dot, then on the next row, stamp two. Repeat thru 4 to 5 rows of grapes.


Repeat until your paper has plenty of purple bunches of grapes. 


Now grab your wine cork and dip into the green paint.


Fill the blank space in between grapes with green dots for leaves. When you are finished your paper should look like this.


So pretty! Let this dry and display it somewhere in the house. You could stick it on the fridge, but this turns out so cute you might want to frame it.


This is a perfect spring or summer craft for kids of all ages. It is easy, and needs no special supplies. I know you will have fun with this process art project.


Find more fun kids craft ideas here:

Pineapple process art

Cork and Button Apple Trees


Here are some process art for kids ideas:

  • Painting with natural materials: Gather some natural materials, such as leaves, flowers, twigs, and grass. Dip the materials in paint and then stamp them onto paper.
  • Collage: Collect a variety of materials, such as magazines, newspapers, fabric, and yarn. Cut out shapes from the materials and then glue them onto paper to create a collage.
  • Sculpting with playdough: Playdough is a great material for sculpting. Kids can use their imaginations to create anything they want, such as animals, people, or objects.
  • Performance art: Performance art is a type of art that is performed in front of an audience. Kids can create their own performance art pieces, such as dances, songs, or plays.
  • Installation art: Installation art is a type of art that is installed in a specific space. Kids can create their own installation art pieces, such as sculptures, paintings, or photographs.

These are just a few ideas for process art for kids. There are many other possibilities, so get creative and let your kids explore their imaginations!

Pineapple Process Art

 This pineapple painting project is perfect for little ones. It takes only a moment of set up and it creates such a cute art project! Kids are going to be so proud of their efforts and want to display this project on the fridge door gallery!


Harper and I love to get creative together. We are always crafting, painting or baking something. 
You might remember we made this adorable apple process art with a cork.  Well, we ran across the cork again and decided that it was so fun to paint with it, that we would give it another go. We came up with this cute pineapple art. We love it because it can work for a summer day project, or pull this out around the new year to bring good luck to your space.


Supplies:

Paper Plate

Yellow and Green Paint

A Cork

Copy Paper


Pour a quarter size drop of several shades of yellow and a shade of green onto a paper plate.


Offer your child the cork and encourage the child to stamp a pineapple shape with the yellow paints.


When the pineapple is shaped encourage the child to form the stem of the pineapple with green paint.


                                                             Allow the art to dry then display.


This is a fun project for summertime, but I also love to make these with the kids in anticipation of new year since the pineapple symbolizes a warm welcome, celebration and hospitality.


You can find more process art ideas here

Basket of fruit process art

Cork and button tree art

If you want to learn more about why process art is important for kids this is a great resource from Messy Little Monster

DIY Pallet Halloween Tree

 I have developed a serious affection for pallet projects. I love how many ways you can re-purpose them! I came up with this easy DIY Pallet Halloween Tree using materials I had a home. 


This is such an easy last minute DIY project to add a little creepy decor to your or yard. You can use the things you have around the house to come up with something creep-tastic! I am already planning ahead to next year and how I will make this cuter with clearance Halloween goodies!


Supplies used:

A few pallet boards

A hand saw and or a circular saw

E6000 glue

Halloween ribbon

Halloween trinkets

Black paint


Directions:

Saw down your pallet boards so that you can form a tree shape. I used a 1", 3",  6",  8",  10" boards and a 18" board for the back.

Paint your boards black, allow to dry.

Glue your short boards to the longest board, black side out.

Place something heavy or use a vice to secure the boards to the wood and allow to cure and dry.

Now, you can start decorating!

I glued Halloween ribbon to the tree and then placed the "ornaments". I used bugs, spiders and creepy eyes as decorations.

Allow to dry again and place it in the yard or in the house.


You can find all of my Halloween crafts here.

Reader favorites include:

Paper Plate Witches

Paper Plate Spiders


10+ Crafts for Chinese New Year

Chinese New Year is coming up on January 25th, and these fun crafts are perfect for creating with the kids to celebrate in style!


We love Chinese New Year because it happens in the winter, and it gives us something to celebrate and learn about at a pretty dull time of the year for us. My husband is down because I will naturally make something awesome for dinner like egg rolls or peanut butter chicken over fried rice.


This list has something for everyone; literally! From the cute and easy paper fortune cookie to a stunning mason jar lantern; there is something for every skill level in this collection! I can't wait to hear which is your favorite craft!


Mason Jar Lanterns by Mod Podge Rocks
Chinese New Year Tangrams by My Craftily Ever After
Paper Plate Chinese Lanterns by In the Playroom
Rooster Craft by Crafts n Coffee
Egg Carton Dragons by Happiness is Homemade
Homemade Chinese Gong by Kid World Citizen
Chinese Take Out Box Craft by Create Craft Love
Chinese New Year Shakers by In the Playroom
Chinese Dragon Puppets by Crafts n Coffee
Paper Fortune Cookies by Mad in Crafts

If you have a fun idea for Chinese New Year, I hope you will leave a comment to share it!


You might also like this paper fortune cookie craft.


Strawberry Ghosts

Trying to eat a little healthier this fall? You are in luck! With this simple recipe you can make a serving of candy coated fruit to satisfy your cravings.


I am always trying to make fruits and veggies more appealing to my kids. This recipe is a sure way to get kids excited about strawberries, while giving them a little of the candy they desire.

Supplies:
Strawberries
White candy melts
Candy eyes
Parchment or wax paper


Directions:
Wash the berries and dry them on a paper towel.
It is very important that you remove all the exterior moisture before you dip into the chocolate.
If there is still water/moisture on the berries when you dip into the chocolate; it will clump up fast.


When the berries are dry melt the white chocolate/almond bark according to the directions on the packaging.
Dip the berries into the melted chocolate, working fast.
Place the berries on the wax paper.
Before the chocolate has a chance to harden, drop 2 candy eyes on each berry.


When all of the berries have eyes, you can place them in the fridge to help the chocolate harden.
You can enjoy these within 15 minutes or so.


These are perfect for sharing at a Halloween party! What a sweet little spooky ghost!


I bet you can't eat just one!


These are delicious, easy to make, and while they do have a candy coating, they are so much healthier than some of the options Halloween is best known for!


Make a batch and stop by to share a little BOO! with a friend or neighbor!
Or maybe just eat them all by yourself! 


 You can find all of my Halloween ideas here

Reader favorites include:

11 Apple Crafts to Make with the Kids

I can't help but get excited about the end of summer, because it means that fall is near! Trips to the orchard with the family; lots of action in the kitchen, the temps are finally cool enough for baking! And of course, the crafting with the kids! How could I not get excited for fall!? 

This year I have 11 apple craft to make with the kids to share with you that I know you will have fun making with your little ones!

 Apple Crafts to Make with the Kids


Toilet Paper Roll Apple Stamp
Paper Plate Apple Craft
Caramel Apple Fall Craft
Apple Suncatchers
Take a Bite Out of Fall Craft
Apple Playdough
Button Apple Trees
Fruit Loop Fall Tree
Apple Tree Craft
Toilet Roll Apples
Stuffed Paper Apples


I love all of these ideas! I am hoping to make them all with the kids! We are planning to make these Apple Tree Window Clings again this year but we might make it a crafting marathon with these great ideas!

You can find my Halloween posts here

You might also like this easy homemade play dough recipe

13 Ghostly Crafts to Make for Halloween

Halloween is near and we are crafting up all things spooktacular! I found 13 awesome ghost crafts that the kids and I can't wait to make! These are too fun! To say the least, they are a step up from our efforts so far this season of a simple ghost decoration.


Ping Pong Ball Ghost Lights by Unoriginal Mom

Lollipop Ghosts by Mom Dot

Toilet Paper Ghosts by Ginger Snap Crafts

Plastic Bottle Ghosts by In the Playroom

Halloween Footprint Craft by Where the Smiles Have Been

Ghosts Under Glass by Yesterday on Tuesday

Tin Can Ghosts with FREE Printable by Ginger Snap Crafts

Ghost Mobile Kids Craft by Sugar Bee Crafts

Halloween Ghost Windsock by Real Coake

Giant Hanging Ghost by A Girl and a Glue Gun

Pillowcase Ghost Dress by Sugar Bee Crafts

Spooky Cheesecloth Ghosts by Yesterday on Tuesday

Gourd Ghosts by House of Hawthornes

Which of these ideas will you try first?


Which of these 13 ghostly crafts to leave you aghast do you think your family would have the most fun with? I love the ghostly gourds! I have an obsession with gourds and love the idea of creating something more than a centerpiece with them.

If you are in the mood for more Halloween crafts check these ideas out!


If you make any of these fun ideas make sure you hop over and share a pic with me on facebook!


You might also like

 Paper Plate Witch Project.
Glam Pumpkin Makeover
Handprint Monster Puppets


Flying High In the Sky

This easy to set up sensory bin is perfect for little hands. It is fun to sort thru and play in, and it has a really fun feature for night time play; this Flying High in The Sky Sensory Bin Glows in the DARK!


We have been making sensory bins for about 8 years now.Even though Rolf is a tween and is generally too cool for my projects, even he wanted to get his hands into this one. I used things we had in our craft supplies, but for your convenience I added affiliate links to help you find some of these items that you may not have.


Supplies:
A Storage Bin with a lid
Neon Blue Food Color
A zipper seal baggie
White Rice, Uncooked (2 cups)
Tongs
Glow in the Dark Stars
Cotton Balls


To dye the rice
Place 2 cups of white rice into a zipper seal baggie.
Add 2 tablespoons of non toxic glow in the dark paint (I used art deco brand) and 10 drops of neon blue food color to the baggie.


Seal and shake well.
Pour the rice on a paper towel, paper plate, or something like an old cookie sheet and allow to dry for about 4 hours. You may need to stir halfway through the drying time.

To assemble the bin:
Cut several sections of rainbow ribbon in various lengths from 1 to 3 inches.
Gently "fluff" several cotton balls to resemble clouds.
Pour the dry, dyed rice into the storage bin.


Bury several sections of rainbow ribbon in the rice bin.
Place the remaining rainbow ribbon on the top of the bin.
Bury several plastic glow in the dark stars in the rice bin.
Sprinkle the remaining stars on top of the bin. 
Add fluffy cotton clouds to the bin.
Add the planes and helicopters from the tube of Toobs 


Add a pair of tongs to the bin and invite your child to explore.
The tongs add a challenge to the bin, which is excellent for practicing fine motor skills.


I like to make sensory bins in a container with a lid,so we can snap the lid on it when play time is over and revisit the activity later.  For bins like this that are fun to play with anytime, that comes in handy because my kids want to dig around in this one all the time!


Here is the bin after dark. We LOVE glow in the dark activities


Some of our favorite glow in the dark activities include:
Find more sensory ideas here: