How To Tell The Family About Your Elopement Without Causing A World War


Pexels Image: CC0 License

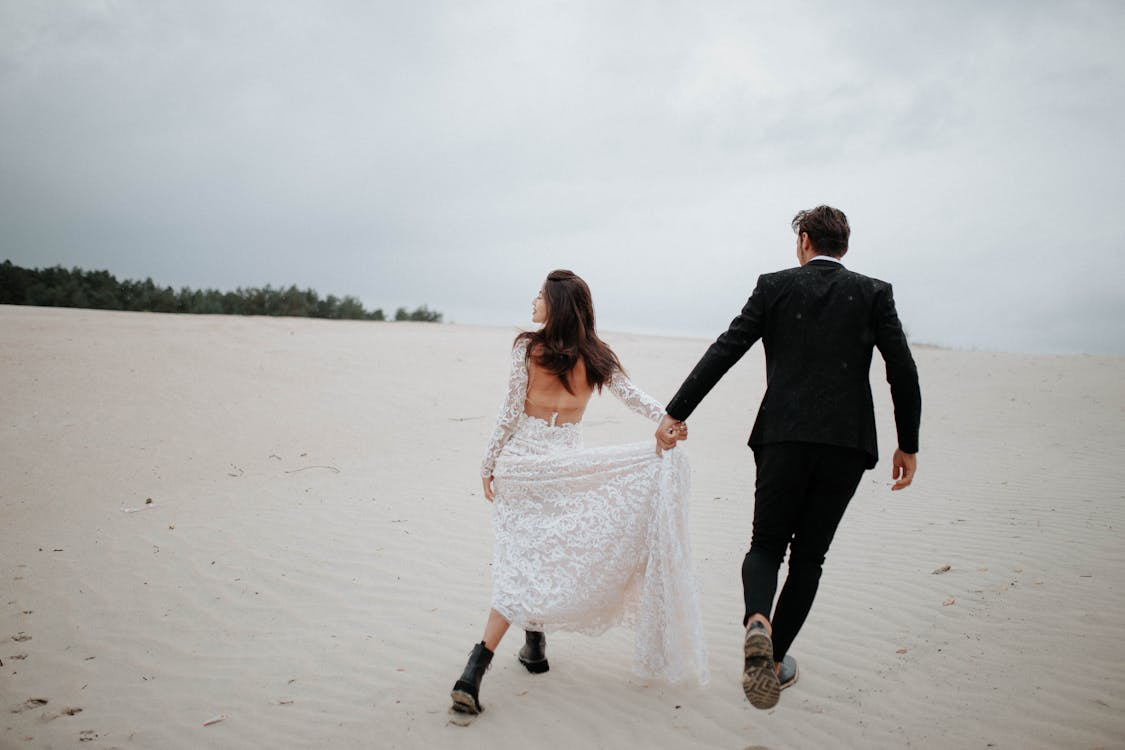
We’ve said it before, and we’ll say it again – elopement is making a comeback. And it’s hardly surprising considering that elopement offers benefits including affordability, sustainability, and unfounded levels of wedding day ease. But, you know who probably won’t be so keen to jump on the elopement bandwagon? Your family. 

While time has moved on from famed elopement scandals like Lydia Bennet and George Wickham, family members may still feel disappointed to miss out on a big wedding day. This is especially true for mothers and grandparents who rarely understand the elopement appeal. 

Naturally, you may feel nervous about informing these people of your decision. Family fallings out have happened over less! But, we’re here with some top tips on how to spread the news of your elopement without starting the next world war (within your family, at least)!

# 1 - Think About Timings

Timing is everything when it comes to bomb defusion, and the same thing can be said for when you choose to reveal your elopement.

Sharing your news before your elopement happens can be useful because it can stop family members from feeling blindsided or lied to (albeit by omission). This may be a useful tactic if you’re worried that certain family members will react badly, as it shows that you’re still sparing them some thought. Alternatively, some couples prefer to wait and share the news until afterwards, which can be useful if you’re worried about family interference.

Pexels Image: CC0 License

# 2 - Find New Ways to Include Your Family

Whether it’s your express intention or not, elopement inevitably excludes people who may have imagined your wedding almost as much as you have. While eloping is completely your decision, those people also have a right to feel hurt or robbed of a big life experience. 

You can ease that loss a little by simply finding new ways to include your family. A pre- or post-elopement party is the best example of this, as it still gives everyone a chance to celebrate your married life. Equally, you could bring close family members like your mum along to help you choose what to wear so that they can share in your excitement. 

# 3 - Be Willing to Share Some Details

Pexels Image: CC0 License

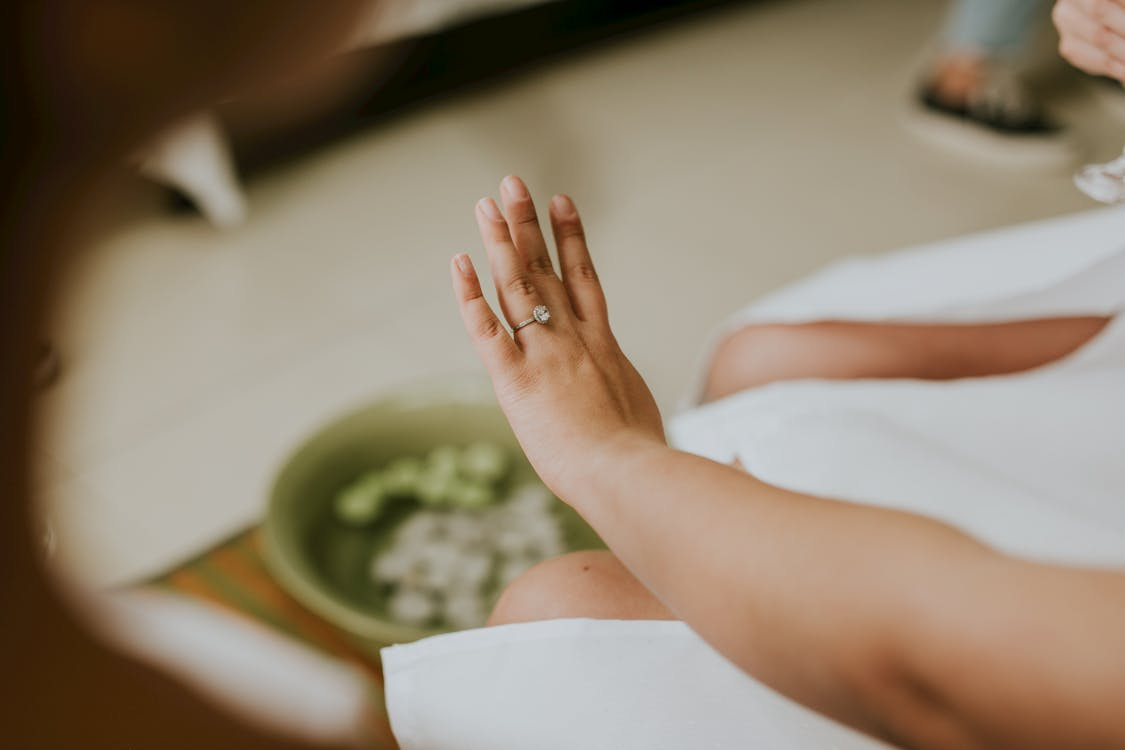
Elopement should be intimate, but keeping everything between your partner and you will leave a lot of family members out in the cold. Hence, you should also be willing to share some details of the big day. 

This doesn’t mean you need to recount the whole experience, but it might be worth letting family members admire key wedding pictures. Equally, people will love to look at your wedding ring, especially if it’s an elegant diamond option like this ADA Diamonds lab grown fine jewelry. And, of course, if you do feel happy to share a few small details, that can help to make family members feel far more a part of things. 

Elopement is your choice, but that doesn’t mean you can completely overlook how you share your big news with your family!


3 Questions To Ask Yourself Before Starting The Homeschool Process


Photo by Antoni Shkraba Studio: https://www.pexels.com/photo/boy-smiling-while-thinking-5306419/


It can feel rewarding to homeschool, or at least to begin flirting with the idea. After all, if you have the time to dedicate, spending most of the week with your child (or children) can feel like reason enough. Moreover, there are unquestionable benefits to homeschooling over conventional schooling. For example, you only have one or two children to focus on, whereas even the best teacher might have twenty or more.


Moreover, some curriculums, like this secular homeschool curriculum, give you a great deal of wriggle room on the topics you could cover and the learning measures you take. That’s not to mention other benefits, like how taking a “field trip” for education more often than not is entirely valid. A trip the local museum isn’t a huge affair with parental donations and volunteering, risk assessments and heavy planning or booking. You just go with your child, learn, and have a fun time. As long as it’s structured, there’s a huge amount to love here.


However, as with any huge life choice, there are questions to answer. These are for you to answer of course, but we can certainly help you prompt them. In the post below, we intend to do that:

How Much Time Can You Dedicate?

Homeschooling can easily become a full-time role, and we’d recommend it becomes your main focus. As such, it’s worth thinking about what that might look like across a typical week. You won’t need every hour mapped out or rigidly planned, but there does need to be enough consistency for your child to keep learning and progressing. 

That might involve mornings of focused study, afternoons of practical tasks, reading, project work, or occasional meetups. The important part is knowing if you can carve out those regular chunks of time and energy, even around other responsibilities. Always prioritize regular, engaged effort that suits your routine.

Do You Know The Curriculum, Courses & Testing Requirements?

Different regions can have different expectations, so it helps to know what’s legally required and what’s flexible. Some places could ask for structured progress reports, or another state may need exam entries or formal assessments, while some leave things quite open.

There’s usually room to personalise the learning approach you do take, especially with secular curricula, but it’s still helpful to have a framework in mind. It doesn’t need to be formalised from day one, but having a rough idea of what's needed, what your child enjoys, and how you can track progress makes everything feel more manageable in the long run.

Are There Any Homeschooling Communities In Your Area?

Homeschooling doesn’t always need to be a solo effort you focus on alone, as many areas have small groups of parents who organise meetups, outings, or shared lessons now and then. It could just be a few people who chat online and arrange things as they go. It can help to ask around locally or check social media to see what’s out there. 


This kind of casual connection makes the whole thing feel more natural, with your child gaining the ability to meet other kids in their age group. Not every week has to be planned with others, but having a few familiar faces around can give the whole experience more of a connection, and that addresses the main insular downside of homeschooling.


With this advice, we hope you can start the homeschool process with care.


Stretch Your Grocery Budget: Buy, Prep, and Freeze Farmers Market Veggies

 Shopping at the farmers market can be one of the smartest ways to feed your family healthy, fresh food without spending a fortune. I regularly stock up on affordable, locally grown, organic produce and use simple freezing methods to make it last. With prices like 3 cucumbers for $1, squash and onions for 50¢ each, $1 baskets of potatoes and green beans, and $3 for a dozen ears of corn, it’s easy to stretch your budget and keep your freezer full.


Keep in mind, I shop the grassroots farmers markets! None of the trendy, upscale ones held in a big city. I travel one town over to get these prices from the same farmer, year after year, and I visit roadside stands, trying to support the farmers in my area who have good prices on good crops.

What to Buy and When

Buying in-season produce at its peak means better flavor, higher nutritional value, and lower prices. Here’s what I usually grab when it’s available:

  • Cucumbers (3 for $1): Best eaten fresh or pickled.

  • Yellow squash & zucchini (50¢ each): Ideal for freezing after slicing or shredding.

  • Onions (50¢ each): Can be chopped and frozen raw.

  • Potatoes ($1/basket): Blanch before freezing or store in a cool, dark place.

  • Corn on the cob ($3/dozen): Shuck, blanch, and freeze off the cob.

  • Green beans ($1/basket): Wash, trim, blanch, and freeze.

  • Broccoli crowns ($1/bag): Blanch before freezing.

  • Cabbage ($1/head): Chop and blanch or freeze shredded for soups and stir-fries.

How to Prep & Freeze Your Veggies

Freezing is simple and doesn’t require fancy equipment—just zip-top freezer bags or containers, a pot of boiling water, and a bowl of ice water.

1. Wash & Chop

Start by washing all your produce thoroughly. Cut into the size and shape you’ll use in meals (e.g., slices, chunks, shredded).

2. Blanch (Most Veggies)

Blanching preserves flavor, color, and texture. To do this:

  • Boil water and add your veggies for 2–4 minutes (each vegetable varies).

  • Immediately transfer to ice water to stop cooking.

  • Drain well before freezing.

(Note: Onions and peppers don’t need blanching—just chop and freeze.)

3. Bag & Label

Pack veggies into freezer-safe bags, removing as much air as possible. Label with the date and contents. Most vegetables last 8–12 months in the freezer.

Sample Prep Ideas

  • Zucchini & Squash: Slice and freeze for quick stir-fries or casseroles. Or shred and freeze in 1-cup portions for baking.

  • Corn: Boil for 4 minutes, cool, cut off the cob, and freeze.

  • Green Beans: Blanch 3 minutes, cool, and freeze in meal-size portions.

  • Cabbage: Great for soups—chop, blanch for 1.5 minutes, cool, and freeze.

  • Broccoli: Blanch florets for 3 minutes and freeze in single layers.

Why It’s Worth It

Buying in bulk during peak season saves you serious money. It also lets you serve your family nutrient-dense, homemade meals all year long—even when prices rise at the store. With a little weekend prep, you’ll have fresh-from-the-farm flavor ready in your freezer.

Final Tip

Keep a freezer inventory list on your fridge so you know what you have on hand. It helps you meal plan and avoid waste.

The Best Macaron Recipes

 Elegant, colorful, and irresistibly delicious, macarons are the crown jewel of French patisserie. These delicate sandwich cookies—crisp on the outside, chewy in the center, and filled with everything from buttercream to ganache—have captured hearts (and taste buds) around the world. But behind their beautiful shells lies a baking process that demands precision, patience, and a little pastry magic.


The origins of the macaron date back to 8th-century Italy, but it was the French—especially the Parisian bakery Ladurée—who refined the version we know and love today. Over the centuries, these once-simple almond meringue cookies have evolved into the vibrant, flavor-packed treats perfect for holidays, tea parties, or just a luxurious afternoon pick-me-up.

If you’ve ever tried baking macarons and ended up with cracked tops, hollow shells, or lopsided cookies, you’re not alone. Don’t let that intimidate you! In this post, I’ve gathered some of my favorite macaron recipes—along with essential tips for macaron success—so you can achieve bakery-worthy results right at home.

Top Tips for Baking Perfect Macarons

1. Weigh Your Ingredients

Use a kitchen scale to measure your almond flour, powdered sugar, and egg whites. Macarons are sensitive to even small deviations, so accuracy is key.

2. Use Aged Egg Whites

Let your egg whites sit in the fridge for 1–3 days before using them. This reduces moisture and helps achieve stiff, stable peaks when whipping.

3. Sift Your Dry Ingredients

Sift almond flour and powdered sugar at least once, ideally twice. This ensures a smooth shell and avoids lumps in your batter.

4. Master the Macaronage

Macaronage is the technique of folding the meringue into the dry ingredients. Fold gently until the batter flows off the spatula like lava—thick but able to settle into itself within 10–15 seconds.

5. Use a Template

Pipe your macarons onto a silicone baking mat or parchment paper with a printed template underneath to ensure even sizes.

6. Rest Before Baking

Once piped, let your macarons sit at room temperature for 30–60 minutes (or until the tops are dry to the touch). This creates the essential “feet” when baking.

7. Control Oven Temperature

Every oven is different. Start testing at 300°F (150°C), but use an oven thermometer to verify accuracy. Rotate the pan halfway through baking for even heat.

8. Don’t Skip the Tap

After piping, tap the tray on the counter a few times to release air bubbles. Use a toothpick to pop any visible ones to avoid cracked tops.

9. Cool Completely Before Removing

Macaron shells are delicate! Let them cool fully on the tray before removing or they might stick or break.

10. Mature the Macarons

After filling, refrigerate your macarons for 24–48 hours. This aging process allows the flavors to meld and the texture to improve—chewy, soft, and perfect.

On to the recipes!

S’mores Macarons by Broken Oven Baking

Raspberry Jam Filled Macarons  by All We Eat

Blueberry Macarons by Salt and Spoon

Tie Dye Macarons by Homebody Eats


Valentine’s Day Macarons by This Mama Loves

Almond Joy Macarons by Ruffles and Rain Boots

Vegan Macarons by Baked by Chlo

Almond Flour Macarons by Spatula Desserts


Donut Macarons by Meals by Molly

Salted Caramel Macarons by Britney Breaks Bread

Champagne Macarons by Barley and Sage

Keto Macarons by Wholesome Yum

Cookie Butter Macarons by Barley and Sage

Pistachio Macarons by House of Nash Eats

Strawberry Macarons by State of Dinner

Mastering macarons may take a few tries, but once you get the hang of it, it’s incredibly rewarding. Remember: measure by weight, age your egg whites if needed, and always let your piped macarons rest before baking to form that signature skin. A little care and attention go a long way toward perfect shells.

Whether you prefer classic flavors like vanilla and raspberry or something more adventurous like matcha or salted caramel, these recipes offer something for every palate. Happy baking—and don’t forget to share your macaron creations with someone who deserves a sweet treat!

Let me know in the comments which flavor you're trying first or if you’ve discovered your own perfect macaron technique. Bon appétit!

Maple Brown Sugar Cookies

Copycat Crumbl Golden Graham Cookies

Chocolate Covered Cherry Cookies

Brown Sugar Sugar Cookies

Cake Mix Peanut Butter Chocolate Cookies

Cream Cheese Sugar Cookie Bars

Mint Chocolate Chip S'mores

Find more favorite cookie recipes here:


Five Reasons to Go Back to School

 Whether you're considering a career change or you're aiming for a promotion, going back to school can be a transformative step to take. Maybe you're just craving personal growth and you're looking for a way to recover some of the fun that you once had when you were actually at college once. 


If you've got children, it may be stopping you and making you hesitant to wonder if school is even an option for you because of the financial commitment required. But there are financial support advantages for you, like an RESP grant for your education, and that can serve as a powerful reminder of the value of lifelong learning. But adults can benefit greatly from returning back to the classroom, and here are 5 reasons to go back to school, no matter how old you are.


Image source: Pexels

  1. The chance to advance. One of the most common reasons that an adult returns to school is to boost their career prospects. Whether it's completing a degree that you started years ago or you want to earn a new certification, additional qualifications help to set you apart in the competitive job market we have today. Many industries are evolving rapidly, and staying up to date with current knowledge and skills can help you to remain relevant and increase your earning potential along the way.

  2. You want a change. Maybe your current job no longer excites you, or the industry you're in is facing long term decline. Going back to school gives you the opportunity to pivot, and a structured education can provide the foundation that you need to break into that new field. You also gain access to internships, networking opportunities, and mentoring that can ease your transition.

  3. Improving your earnings. There is a very strong correlation between education level and income level. Individuals with college or university degrees on average tend to earn more over their lifetimes than those with only a high school diploma. Even the short term programs or specialist certifications out there can lead to higher paying jobs. While going back to school is a huge investment in your future, the long term financial benefits can often outweigh those costs.

  4. It feels good. Education is not just about making more money, it's also about personal development because via learning new concepts and being challenged academically, you'll be able to achieve new goals. Many adults find that going back to school can boost their confidence, sharpen their critical thinking and reignite a passion for learning.

  5. You can set an example. It's really good for your family to see you achieve. If you're a parent, returning to school can send a huge message to your kids about the importance of education, perseverance and self improvement. Children will often look up to their parents as role models and seeing you dedicate time and effort to better yourself academically can inspire them to take education seriously.


Going back to school is a huge step, but there's nothing stopping you from saying yes and going for it.